Rate this article :
5/5 | 2 opinion
This article was useful to you ?
Yes
No
Vous avez noté 0 étoile(s)
Sommaire
Procédure
Nginx, which we've been hearing a lot about recently, is a web server just like Apache. It is a great success with connoisseurs and is currently supported by a very active community. It is well maintained and, if properly managed, offers many advantages over Apache in terms of performance.
Before you can migrate your site, make sure you have the following information:
To save the web files of your Wordpress site on the ISPCONFIG Apache VPS, you need to connect to your site using FTP. So to start with, you should make sure you have an ftp account that will allow you to back up your site.
If you need to change the FTP account settings for your site within the ISPCONFIG Apache VPS, follow the procedure below:
Log on to ISPCONFIG --> Sites --> FTP user --> FTP user name

You can also create a new ftp account under ISPCONFIG to perform the backup.
Once you have the ftp connection settings for your site, you can use your ftp client software to connect to the site inside the server. For example, with filezilla, you would need to open the application, and specify the connection parameters which are :
After that, you can click on the quick connect button and the connection to your site will be made. Information about the connection will be displayed on the Filezilla interface.
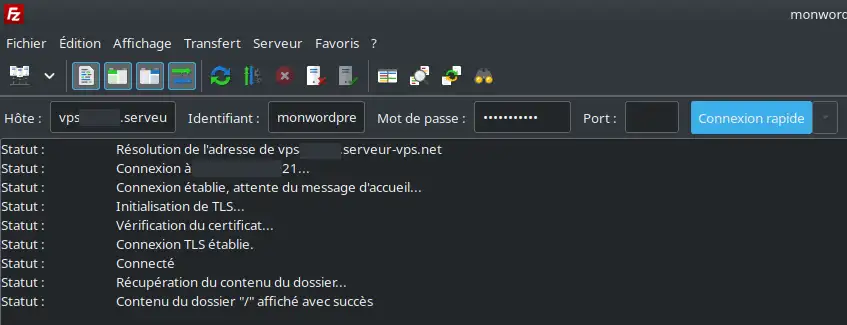
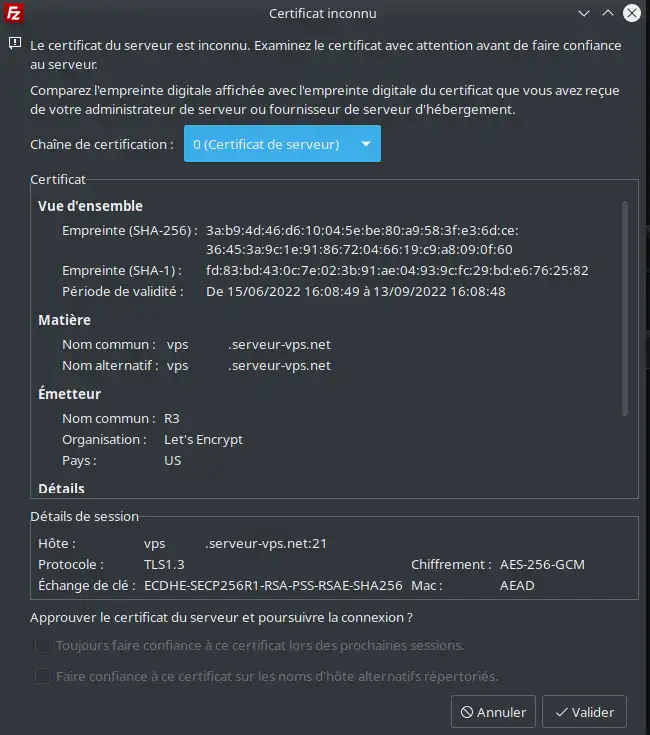
You will be greeted by a certificate validation window that you should confirm.
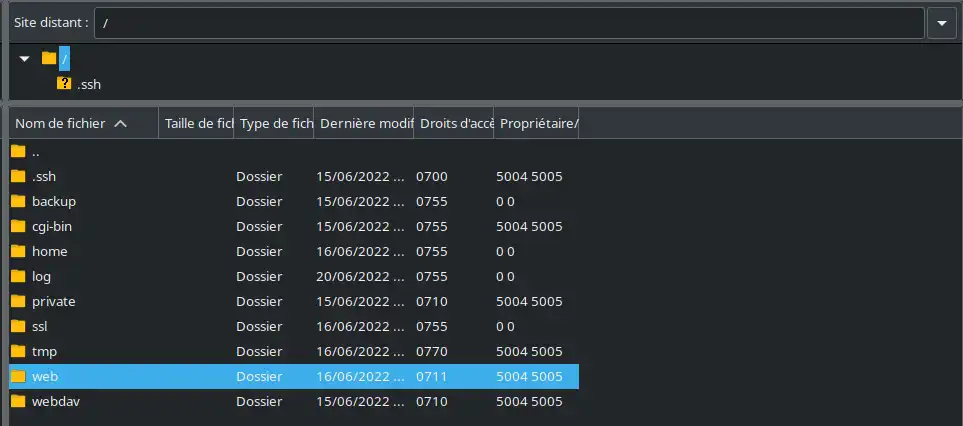
Once the connection has been made, you will find the list of directories linked to your site in the interface dedicated to the file in the remote site (on the right). Your site's web files are located in the web directory. Double-click on the directory to enter it.
You will then see a list of your web files on the remote site.
Then, in your local directory (on the left), navigate to a folder where you want to store your backup. Create a new folder if necessary.
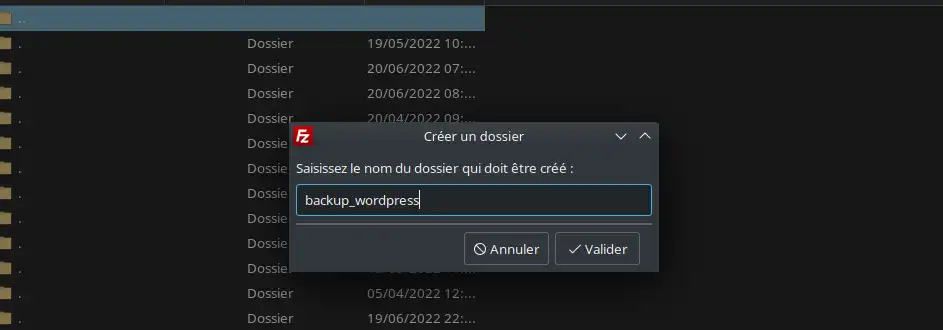
Once your site backup folder has been created, you then need to select all the web files on the remote site.
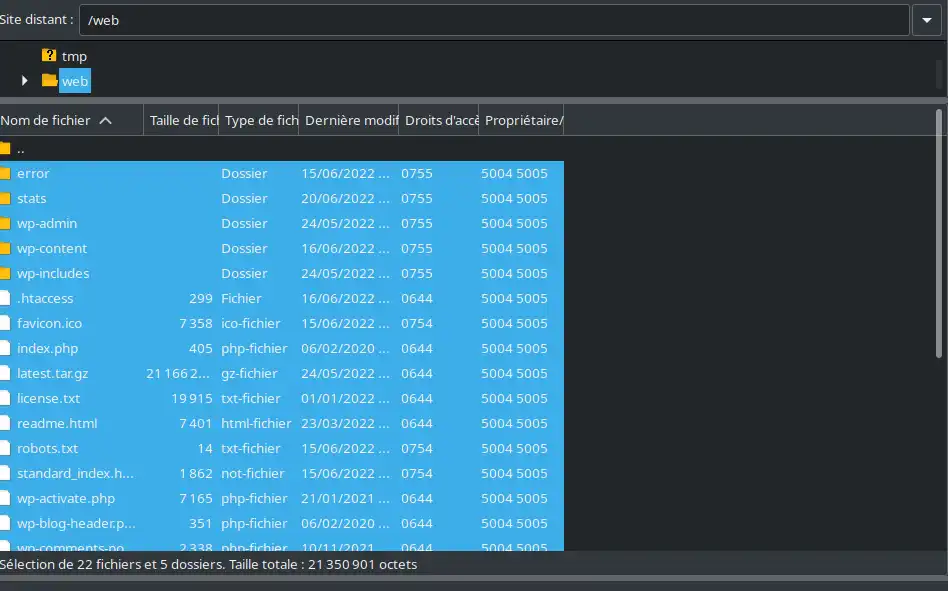
Finally, right-click on the selected files and click "download" to download them to your computer in the open local directory.

Wait until the download is complete and you will have a backup of your site's web files.
To export your site's database, you need to connect to your VPS's phpmyadmin interface, following the procedures described in this article"How do I connect to the PHPMyAdmin utility from ISP Config?
You will probably need to know the name of your site's database, the database user name and the password before you can access it.
Then, once you are on the phpmyadmin interface, you need to :

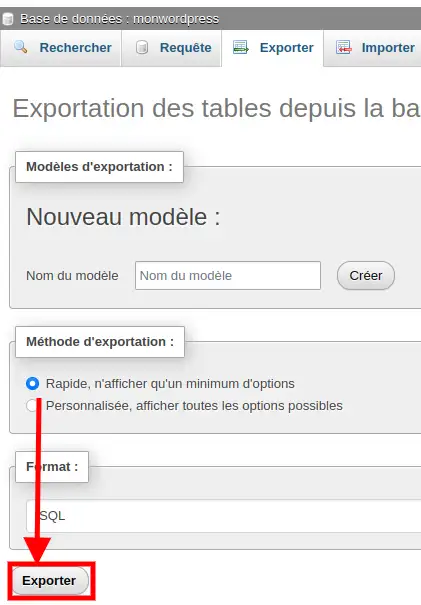
To recreate the site and its database in the ISPCONFIG Nginx VPS, you now need to connect to the ISPCONFIG interface of this VPS.
Connecting to ISPCONFIG with the Nginx VPS is similar to any VPS with ISPCONFIG. You can follow the instructions in the article"How do I access ISPConfig on my dedicated VPS server?" to connect.
You will be greeted by theISPCONFIG authentication interface if you are not yet authenticated. Authenticate with the admin user and you will arrive at the home page.
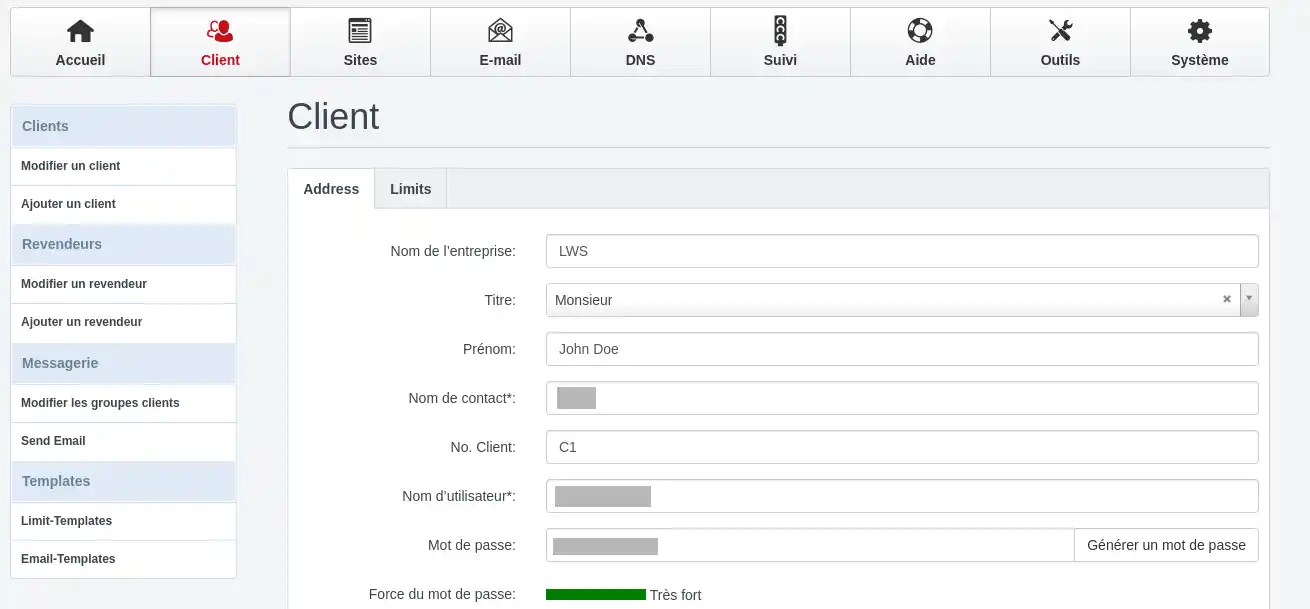
Once you have logged on to ISPCONFIG, you can add a new customer via the customer menu. Type in the information and save so that the customer can be created.
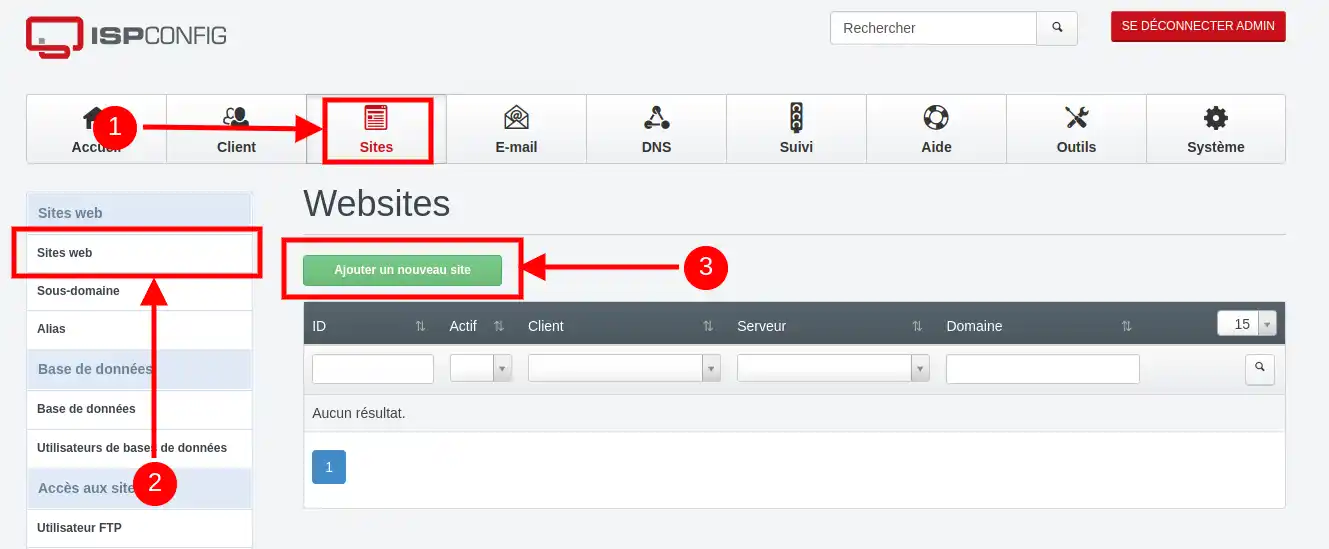
After that, to recreate your site, you need to go to the "Sites" menu on the top menu, and then click on the green "Add a new site" button.
Enter your site parameters very carefully:
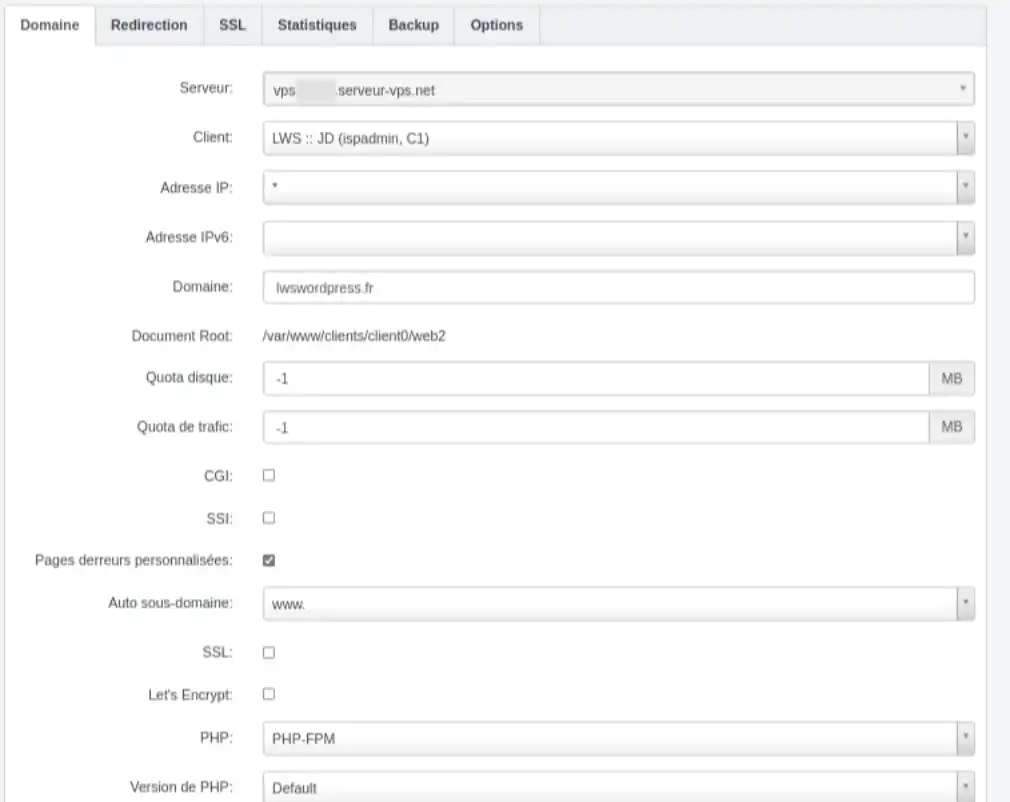
Once you have registered, the site will be created after a few minutes, and you will see a red light at the top, indicating the number of tasksISPCONFIG is running to apply the changes.
The next step after creating the site is to create the database for your site.
Recreate your site's database by following the procedure mentioned in this article"How do I create a database in ISPConfig?"
Properly reproduce the information in your site's database:
To enable you to upload the web files you have just saved via FTP, you will need to create an ftp user in your ISPCONFIG Nginx VPS server. Follow the instructions in this article"How do I create an FTP account in ISPConfig?" to create an ftp account for your site.
Once your ftp account is created, you can connect to the site in the other VPS, using your preferred ftp client software.
When you are connected :
.webp)
The database for your site can also be imported using the phpmyadmin utility on the ISPCONFIG Nginx VPS. As with exporting, you need to connect to phpmyadmin on the Nginx VPS.
On the Nginx VPS, you will need to access the phpmyadmin url with a browser. The url used to access it is in the form :
"https://vpsxxxxx.serveur-vps.net:8081/phpmyadmin orhttps://vpsxxxxx.lws-hosting.com:8081/phpmyadmin"(xxxxx being the vps number; vpsxxxxx.serveur-vps.net or vpsxxxxx.lws-hosting.com being the "hostname" or name of the VPS server)
This means that the port used for phpmyadmin is different from the port used for ISPCONFIG(8081 instead of 8080).
Once on the first authentication, type :
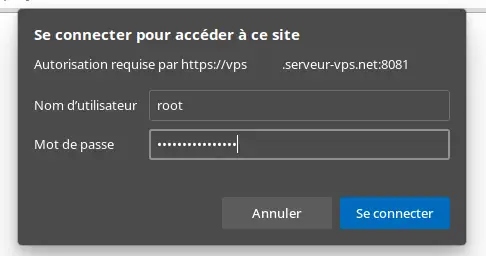
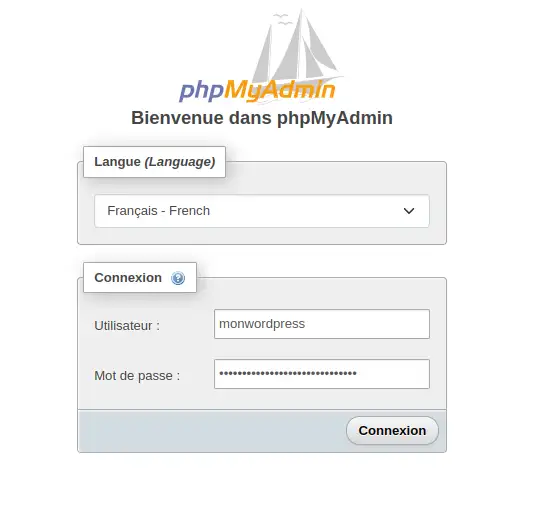
This will take you to thephpmyadmin authentication page where you need to enter the access details of the database user you have created for the site.
Then, to import the database: select the database --> click on "Import" --> click on "Choose a file" .
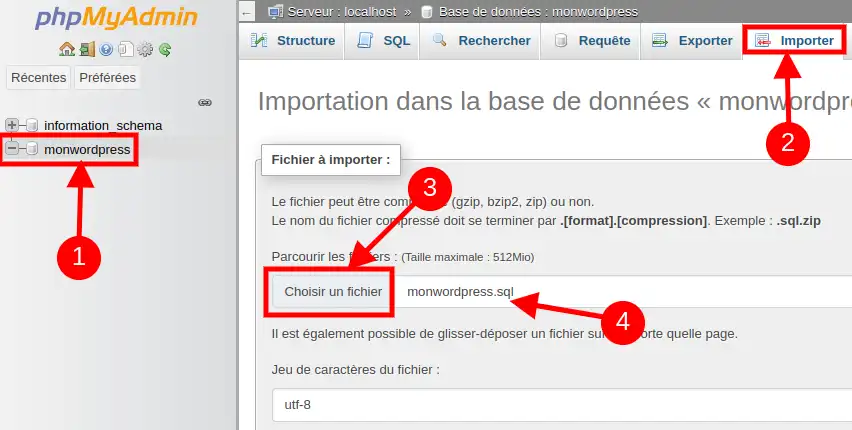
Choose the sql file of the exported database in your local directories, navigate down and click the "import" button to launch the import.

The import time will depend on the performance of your internet connection and the size of your database.
On a configuration with Nginx, you should make adjustments to your site settings so that the basic redirects defined on Wordpress comply with the Nginx syntax.
To define redirects, you will need to add options in the site parameters on ISPCONFIG, following the procedure below:
location / { try_files $uri $uri/ /index.php?$args; }

Once you have carried out all these procedures, all that remains is to point your domain to the ISPCONFIG Nginx VPS.
The last part, DNS pointing, will depend on your DNS configuration. To point your DNS, you need to know where your domain's DNS zone is managed.
1. you can directly update the domain'stype A record in the ISPCONFIG Apache VPS
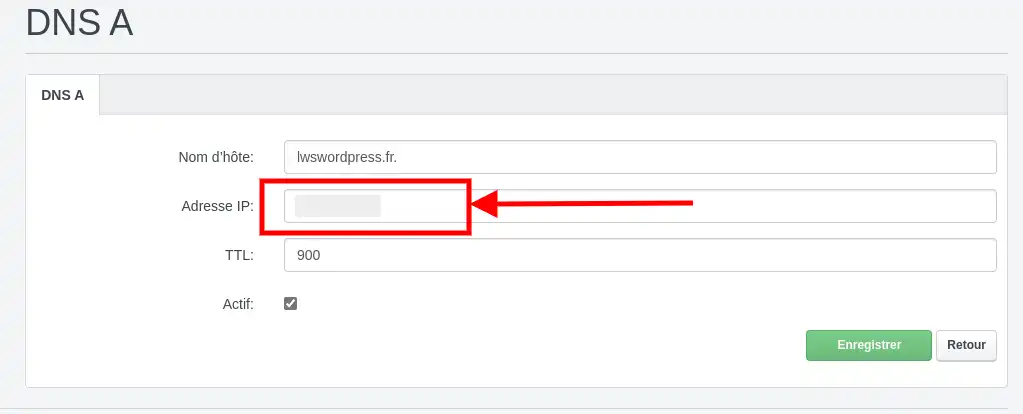
2. or recreate the DNS zone on the Nginx VPS and update the primary and secondary DNS servers following the instructions in this article "How do I create a DNS server in ISPConfig on a dedicated VPS server?".
Once the settings have been applied, all you need to do is wait for DNS to propagate and your site will be migrated to the new server.
After that, you can create a Let's Encrypt certificate on the site that has just been migrated by accessing the ISPCONFIG interface of the Nginx VPS, checking the "Let's Encrypt " option via the site parameter, and finally saving.
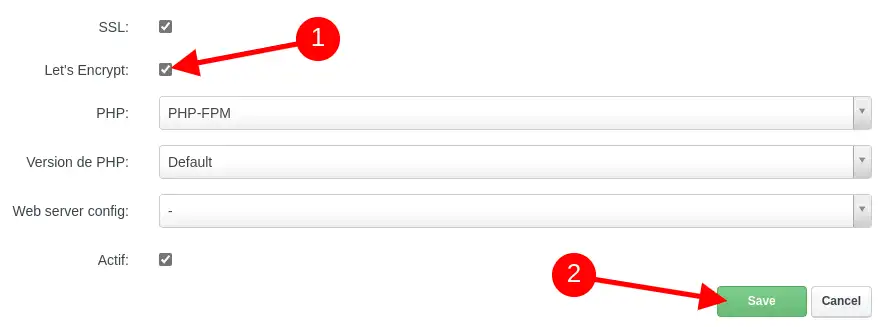
The Let's Encrypt certificate will be installed after a few minutes.
You are now ready to migrate your Wordpress site from an ISPCONFIG VPS with Apache to an ISPCONFIG VPS with Nginx. Don't hesitate to"trigger outsourcing" if you want to take advantage of our team's expertise to carry out the migration for you.
Rate this article :
5/5 | 2 opinion
This article was useful to you ?
Yes
No
2mn reading
How do I add a website to an ISP Config VPS dedicated server?
1mn reading
How do I create a sub-domain on a dedicated VPS server?
1mn reading
ISPconfig - How do I link my domain name to my VPS server?
1mn reading
It's easy to configure my domains on my VPS