Rate this article :
5/5 | 1 opinion
This article was useful to you ?
Yes
No
Vous avez noté 0 étoile(s)
Sommaire
Procédure
The Domain Name System (DNS) is a service that translates a domain name into various types of information associated with it, in particular the IP address of the machine bearing that name.
In this article, we'll look at how to create a primary DNS server on your VPS.
There are 4 steps to follow:
The zone is created using a wizard. Once you are connected to the ISPConfig control panel, go to the " DNS " tab (1), the " Zones " menu (2) in the " DNS " section and select " Add new DNS Zone with Wizard " (3).

Fill in the form as follows (don't forget to replace the domain name andIP address):

Then click on " Create the DNS record ". Your DNS zone is now available on your VPS server:

You now need to authorise the transfer of your DNS zone to the secondary DNS server " dns2.lws-hosting.com ". To do this, click on your DNS zone " monsite.com " and then on the " Zone settings " tab (1). Add the IP address " 185.98.131.49 " in the field " Authorise zone transfers to
these IPs " and " Notify also " (2):

Once you have created the DNS zone for your domain name on your VPS server and authorised the transfer of this DNS zone to the IP address of the secondary DNS server provided by LWS, you now need to add the DNS zone on " dns2.lws-hosting.com ".
To do this, go to the administration area of your VPS server and click on " Secondary DNS ".
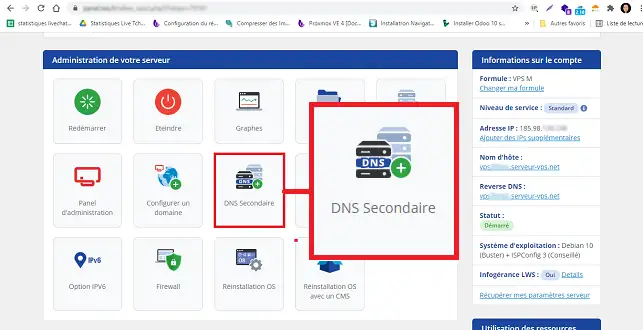
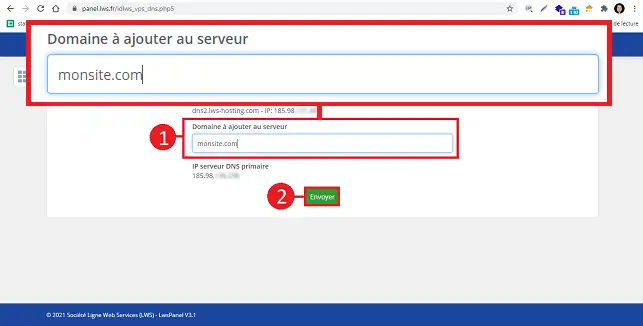
Add the domain name you want to link to the secondary DNS and click"Submit" to save your request.
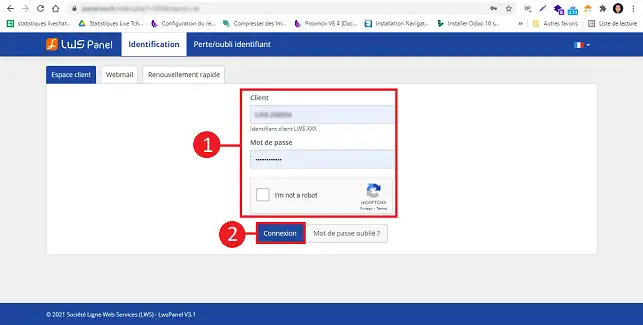
The last step is to change the configuration of your domain name. You need to indicate to it the new DNS servers that we have just configured. To do this, log in to your customer area.
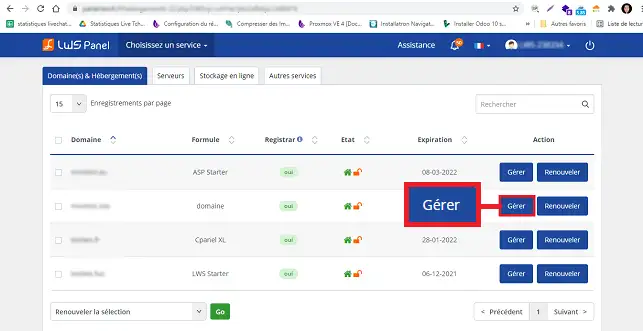
Click on"Manage" behind the domain name you want to configure.
Click on the " DNS Servers " button in the " Domain Management " section to edit the DNS servers associated with your domain name.
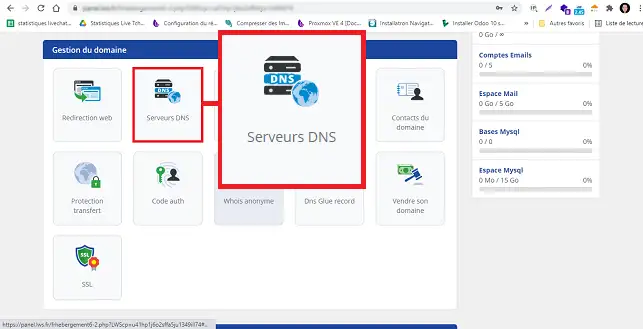
Tick the " Other servers " box and enter the following details:

Once the changes have been validated, you will receive an email within 1/2 hour telling you whether the modification has been taken into account or not. If it has been rejected, check that you haven't made any mistakes by rereading the previous steps.
Within 24 hours, DNS propagation has had time to take place and you can test your new DNS server. The easiest way to do this is to go to the Whatsmydns website and enter your domain name.
Rate this article :
5/5 | 1 opinion
This article was useful to you ?
Yes
No
3mn reading
How do I access ISPConfig on my dedicated VPS server?
0mn reading
How do I change the ISPConfig 3 panel password?
1mn reading
How can I secure access to my ISPconfig panel using an .htaccess file?
1mn reading
How do I change the php.ini file on my VPS server?