Rate this article :
5/5 | 1 opinion
This article was useful to you ?
Yes
No
Vous avez noté 0 étoile(s)
Sommaire
Procédure
LWS offers you 3 premium plugins from Elegant Themes (Divi, Bloom and Monarch). These are updated regularly. Once you are an LWS customer, you will have free access to these plugins by choosing the 'Divi Builder' distribution when installing the Wordpress CMS with our Auto-Installer.
If you have a cPanel package or have already installed Wordpress with this distribution, but do not have access to all the themes or updates, please let us know by giving us the access details for the administration area of your Wordpress site so that a technician can update the licence.
Please note: you will need to take out an Elegant Themes licence to benefit from support. LWS does not provide support for these products.
You can use the Code module to add custom HTML and/or WordPress shortcodes to your layouts. In the example above, we've added an email opt-in form using a shortcode provided by the email opt-in plugin, Bloom.
Before you can add a code module to your page, you'll first need to switch to the Divi Builder. Once the Extra theme has been installed on your website, you'll notice a Use Divi Builder button above the post editor every time you create a new page. Click this button to activate the Divi Builder, giving you access to all of its modules. Then click on the Use Visual Builder button to launch the builder in visual mode. You can also click the Use Visual Builder button while browsing your website at the front if you are logged into your WordPress dashboard.
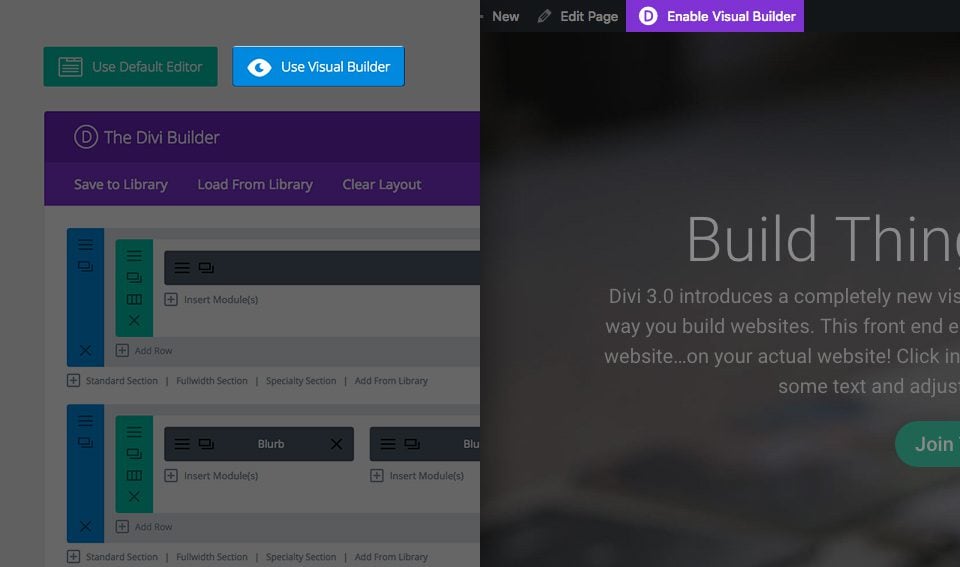
Once you have entered Visual Builder, you can click on the grey + button to add a new module to your page. New modules can only be added within rows. If you are starting a new page, don't forget to add a row to your page first.
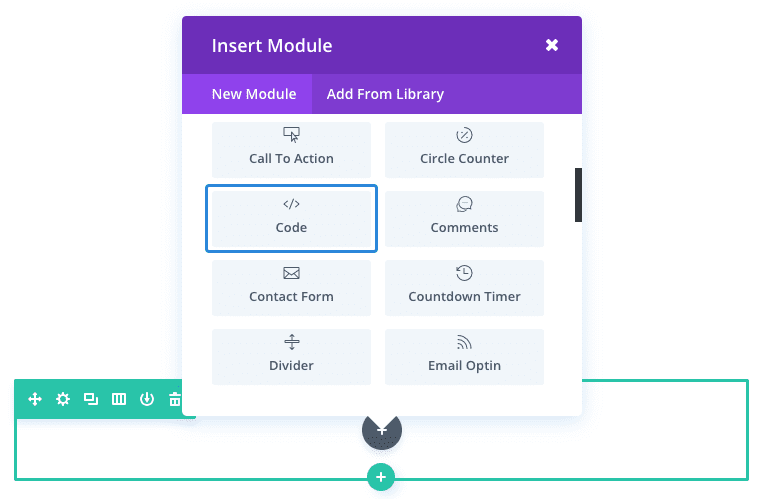
Locate the code module in the list of modules and click on it to add it to your page. The list of modules is searchable, which means you can also type the word "code" and then click the enter button to find and automatically add the code module! Once the module has been added, you will be greeted with a list of options for the module. These options are separated into three main groups: Content, Style and Advanced.
In this example, I'm going to add a link script to import Animate.css to add animation effects to the page elements. As the Animate.css file has a lot of code, it makes sense to load it only on the page I need.
Simply add a regular section and a full-width row (1 column) and add the Code module.
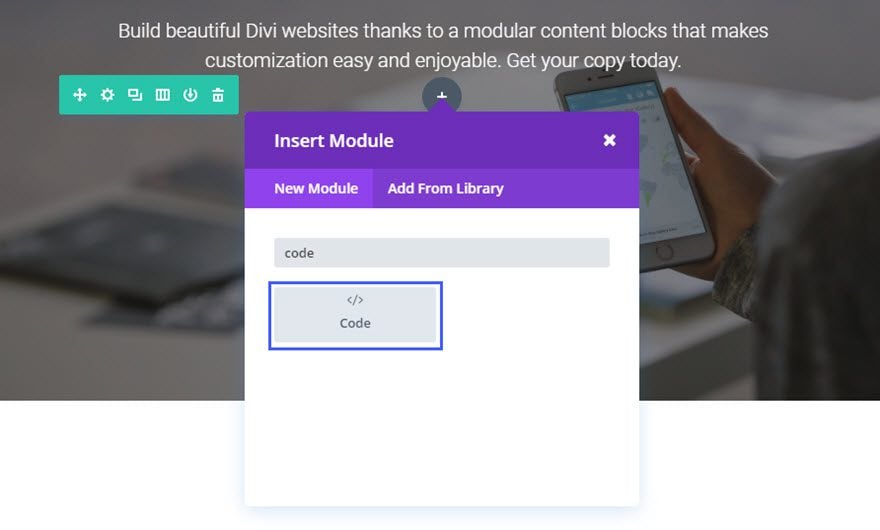
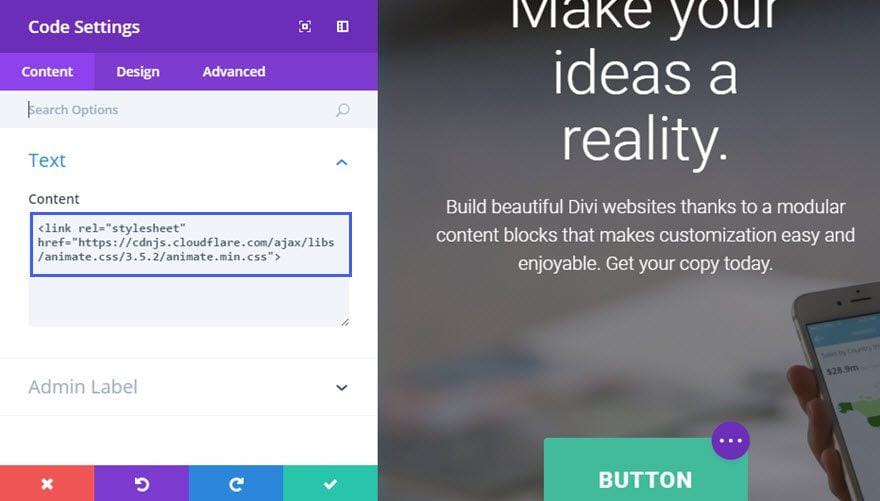
In the content text box, add the code snippet.
Now all you have to do is add some CSS classes to animate any element of your CSS classes page to your page. In this example, I'm going to make the button bounce when the page loads.
In the button module settings, on the Advanced tab, enter the two classes "animated" and "bounce" in the CSS class text box.
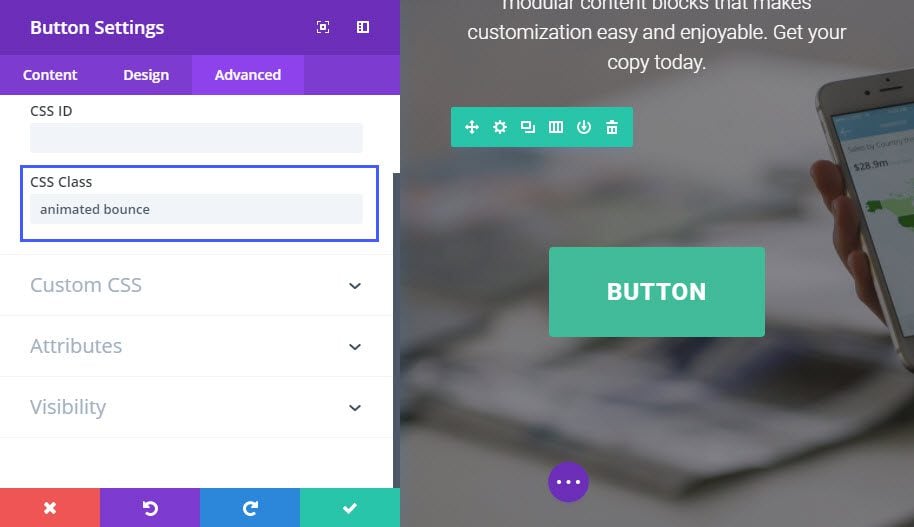
Now the button bounces when the page loads!

Thank you for following this tutorial!
Use the code module to place custom code on your page, such as HTML and JS, or enter short third-party codes.
See you soon for a new tutorial ;)
Creating a blog with the Extra theme
> Consult our Extra theme help section
Rate this article :
5/5 | 1 opinion
This article was useful to you ?
Yes
No
2mn reading
How do I install the Extra theme?
4mn reading
First step with the Extra theme
3mn reading
Extra theme options
4mn reading
Using the page templates in the Extra theme