Rate this article :
5/5 | 2 opinion
This article was useful to you ?
Yes
No
Vous avez noté 0 étoile(s)
Sommaire
Procédure
The LWS Panel offers a one-click restore feature to quickly restore lost data on your various web, MySQL and mail services.
To find out whether this feature is available in your package and what the limitations of the data backup and restore service are, please follow this documentation.
Step 1 : First, you need to log in to your LWS account and access the shared hosting for which you want to restore a backup of the web files.
Step 2: Click on the"Backups/Restores" button in the"Files" section.

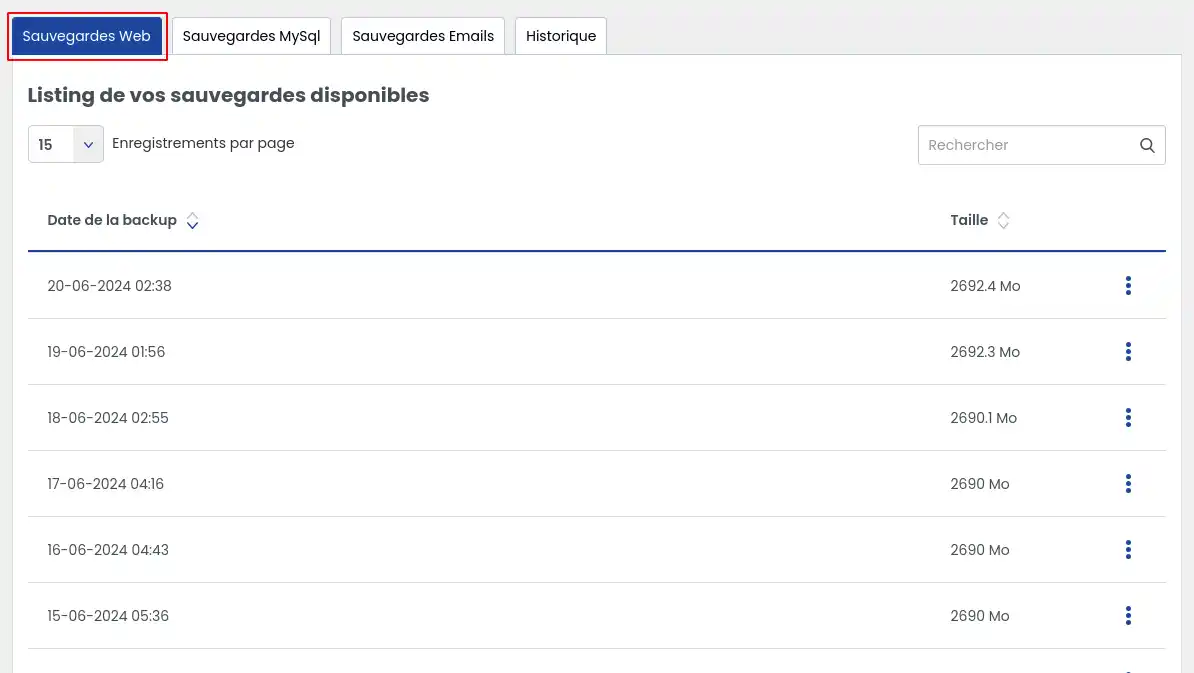
Step 3: Click on the"Web Backups" tab to access all the backups available on your hosting package.

The tab lists all the backups available immediately for downloading your website.
Depending on the service you've subscribed to, you'll be able to benefit from backups of the last 30 or 90 days.
Select the backup you wish to download , then click on the button to the right of the backup, which will allow you to choose different actions

Then click on the"Download link" option to generate a link enabling you to download your backup.
The following window will open:

Click on"Generate link" to launch the action.
Once this action has been completed, click on the history tab to check the progress of the link generation. The action may take several minutes depending on the volume of data involved.

You can refresh the page to check regularly if the status changes. Once the link has been generated, you will see a button enabling you to download your backup.

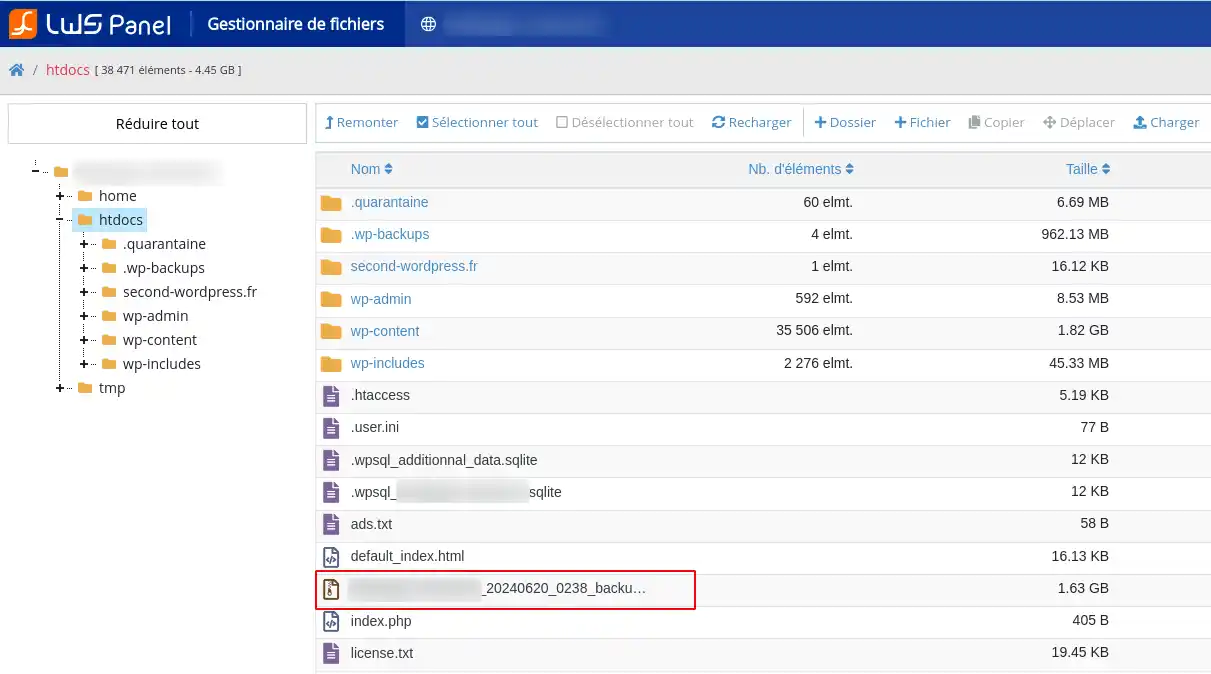
You can also find this backup in the root folder of your hosting and download it from an FTP client or the file manager.

The tab lists all the backups immediately available for restoring your website.
Depending on the service you subscribe to, you will be able to benefit from backups of the last 30 or 90 days.
Select the backup you wish to restore and then click on the button to the right of the backup, which will allow you to choose different actions

This first option, if selected, restores all the web files on your hosting.
Before restoring, all the files on your hosting are deleted and then the data from the backup is restored to your hosting.
Once you have selected the option, a confirmation window will appear:

Once the action has been confirmed, it will be impossible to stop the restore until it is complete.
This option only restores your site's index file located at the root of your hosting. This is therefore only the home file linked to your main domain site.
Once you have selected the option, a confirmation window will appear:

Once the action has been confirmed, it will be impossible to stop the restoration until it is complete.
This option restores only the file or folder you specify.
Once the option has been selected, a confirmation window appears:

Here are some examples of requests you can fill in:
Once the action has been confirmed, it will be impossible to stop the restore until it is complete.
This option restores all items linked to an additional domain added to your hosting or a sub-domain.
Once the option has been selected, a confirmation window will appear:

Select the desired domain or sub-domain.
Once the action has been confirmed, it will be impossible to stop the restoration until it has been completed.
Click on the history tab to view the restoration progress. This may take several minutes depending on the volume of data involved.

You can refresh the page to check regularly if the status changes. Once the restoration has been completed, you will see it in the status.

Then visit your restored site in your web browser as usual. Empty the cache or refresh the page if it is not yet displayed.
If the backup you want to restore is not listed, it is probably because your service level does not allow it. In this case, you need to subscribe to a Business support option to benefit from the possibility of restoring backups for up to 90 days instead of 30 days, or subscribe to "Backup Search" outsourcing for €49 excluding VAT so that a technician can carry out the operation for you.
If, after performing a restore, an error is displayed, please contact our technical support department directly so that a technician can analyse the problem and take action for you if possible.
You now know how to :
🌟 Well done! You're ready to maintain the continuity of your online services with complete peace of mind. 🛡️
Don't hesitate to share your experiences or ask any questions by leaving a comment below. We value your feedback! 💬
Thank you for reading and see you soon for new digital adventures! 🚀
Rate this article :
5/5 | 2 opinion
This article was useful to you ?
Yes
No
0mn reading
How do you back up or restore your emails?
0mn reading
How do you back up or restore your Mysql database?
0mn reading
What level of backup should I choose for my web hosting?
Bonjour,
Je vous remercie pour votre message.
Je vous rassure l'intégralitée des fichiers présent sur votre hébergement est sauvegardée (coeur WordPress et fichiers annexes, tel que les extensions, images...).
Je vous remercie de votre attention et reste à votre disposition pour toute autre question ou complément d'information.
Vous pouvez nous contacter depuis votre espace client ou sur cette page : https://www.lws.fr/contact
Cordialement, L'équipe LWS