Rate this article :
This article was useful to you ?
Yes
No
Vous avez noté 0 étoile(s)
Sommaire
Procédure
Memcached is an open source distributed caching system. It enables data that is frequently used by a web application to be stored in RAM, so that it can be retrieved more quickly than if it were stored in a database or file system.
Memcached can be used to improve the performance of web applications by reducing the response time of data read requests. It is often used in large-scale web environments to increase the scalability and speed of applications. Memcached is compatible with several programming languages and can be used with more advanced caching technologies such as Redis.
Linux shared hosting is popular with web developers because of its low cost and ease of use. However, these types of hosting can suffer from sometimes limited performance due to the limited resources shared between different users.
This is where Memcached can help. By caching frequently used data, MemCcached can reduce response times and increase the speed of your web application, even on Linux shared hosting with limited resources.
In this help, we'll show you how to activate Memcached on your service and how to use it for a WordPress or PrestaShop site.
If you have a LWS Linux shared hosting package (excluding cPanel), you can activate Memcached from your LWS customer area.
To do so, simply :
1. First, you need to log in to your LWS account and access the shared hosting for which you want to activate Memcached.
2. Search for the "Optimisation and performance" category and click on"Memcached Redis".
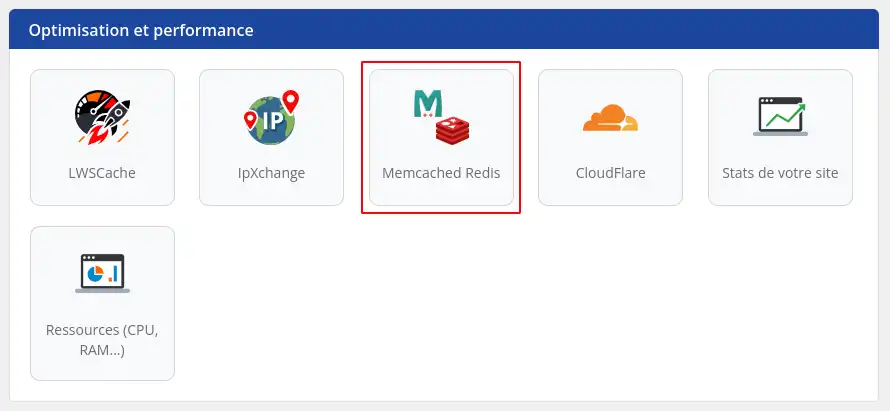
4. In the dialog box that opens, check the activate button.
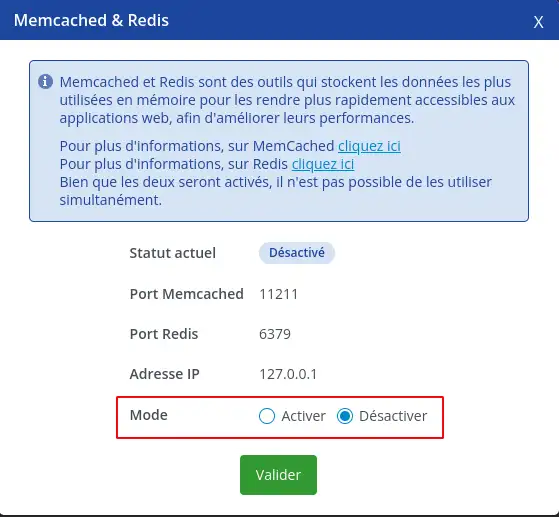
5. Confirm and wait about 5 minutes for Memcached to be properly configured on your service.

An indicator on your service management home page will show you the approximate time remaining before the service is taken into account.
Memcached is now operational on your service. We're now going to look at how to set it up for a WordPress site.
There are several solutions for using Memcached on WordPress via plugin installation. Here we will look at 2 different plugins.
1. LWS Optimize plugin
This plugin is the one we've developed on our side and allows you to optimise a large number of things on a WordPress site, including the Memcached part. So we're only going to look at the Memcached part here.
To do this, log into the admin area of your WordPress site and then go to"Extensions" in the left-hand menu.

Click on the Add button at the top of the page.

Search for the plugin in the search bar by entering LWS Optimize.
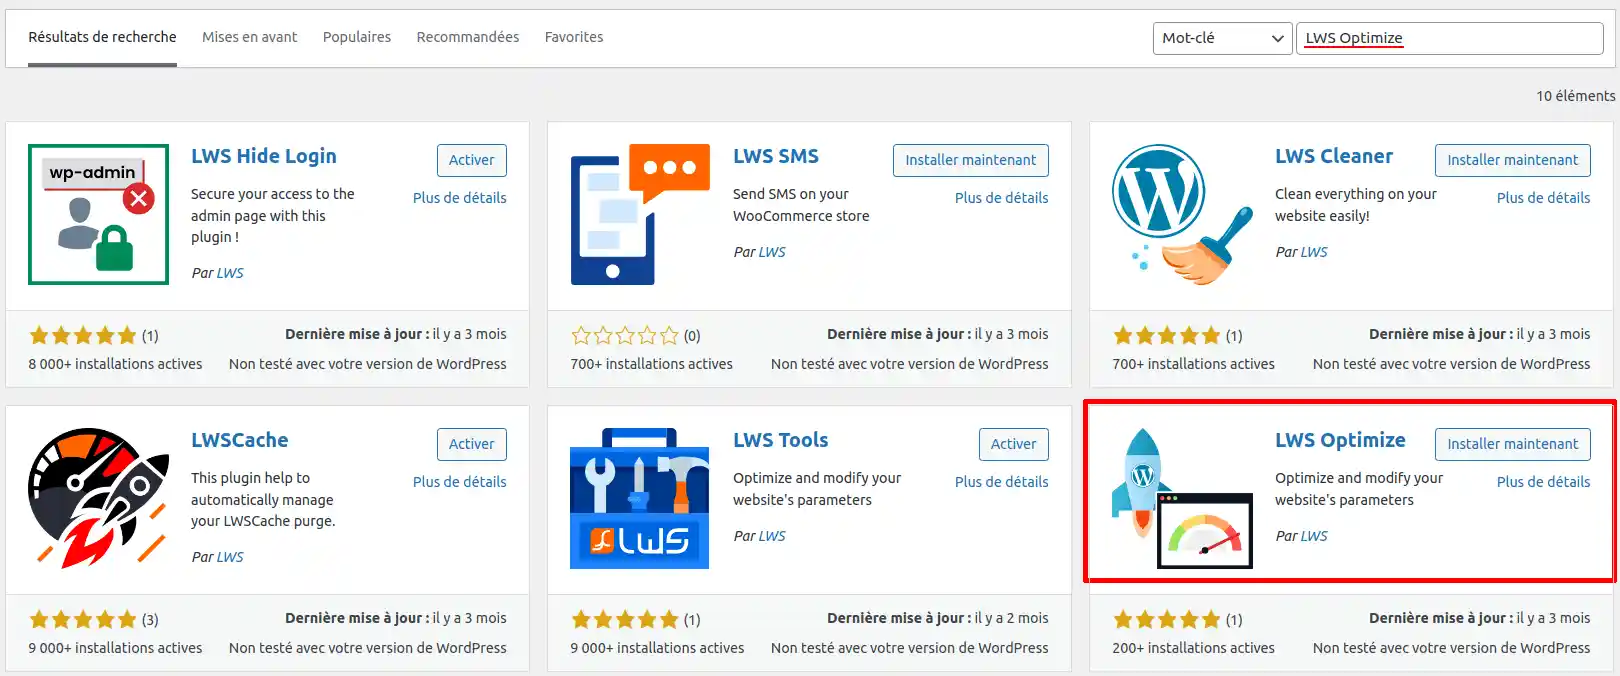
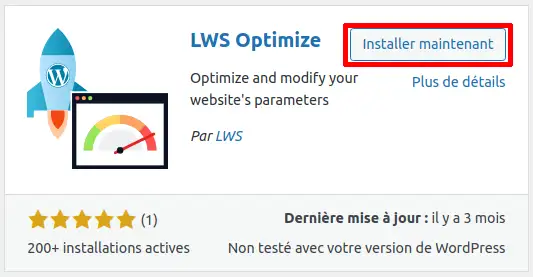
Once you've found it in the list, click Install and once that's complete, click Activate.
Then, in the left-hand menu, click on LWS Optimize, then click on the Caching tab.

If you have successfully activated Memcached on the LWS client panel, you will see an Activate button that you will need to click in order for Memcached to be operational for your WordPress site, you don't need to do anything else.
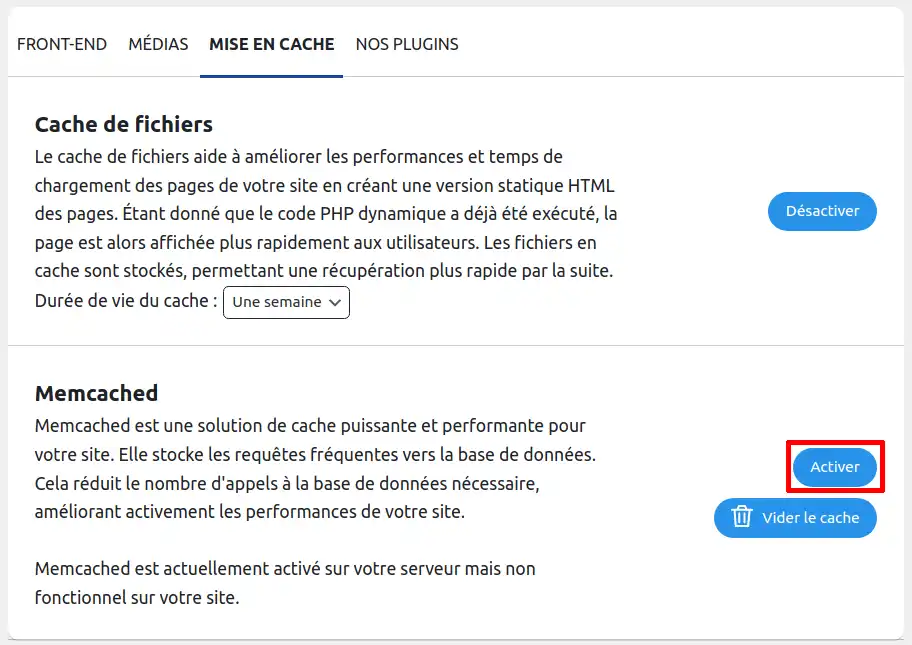
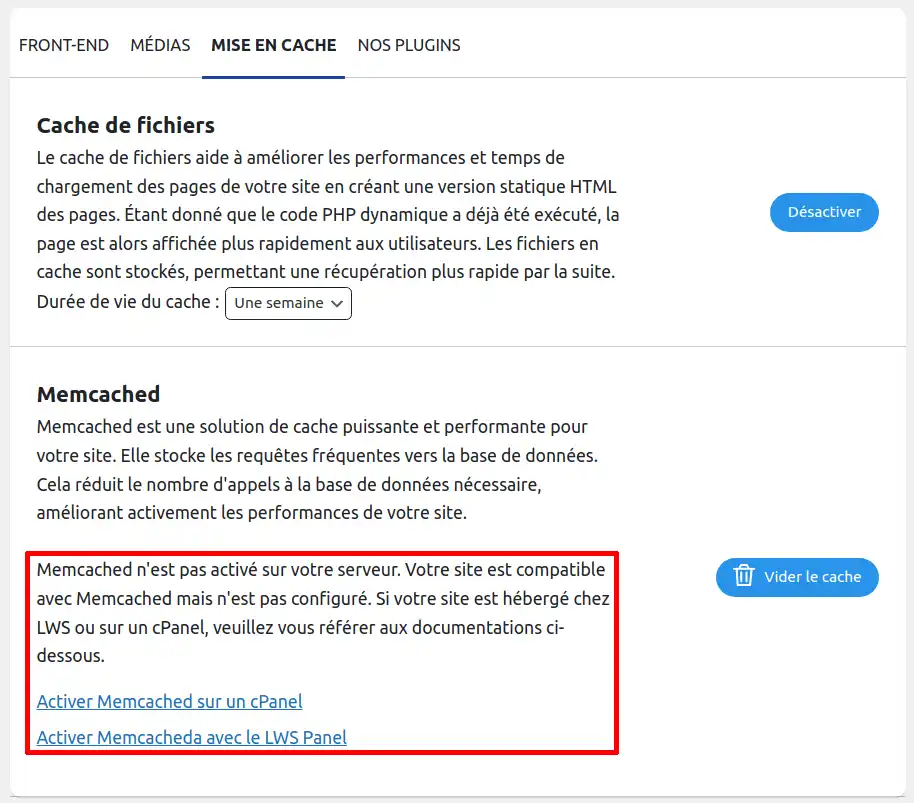
Otherwise, this button will not appear, meaning that Memcached is not activated on your service. If this is the case, please go back to the previous section.
2. W3 Total Cache Plugin
Here we're going to look at another possibility with a plugin external to our services, the W3 Total Cache plugin. To do this, log into the administration area of your WordPress site.
Then, in the left-hand menu, go to Extension

Click on the Add button at the top of the page.

Search for the plugin by typing W3 Total Cache in the search bar, then once you've found it, click on the Install Now button.

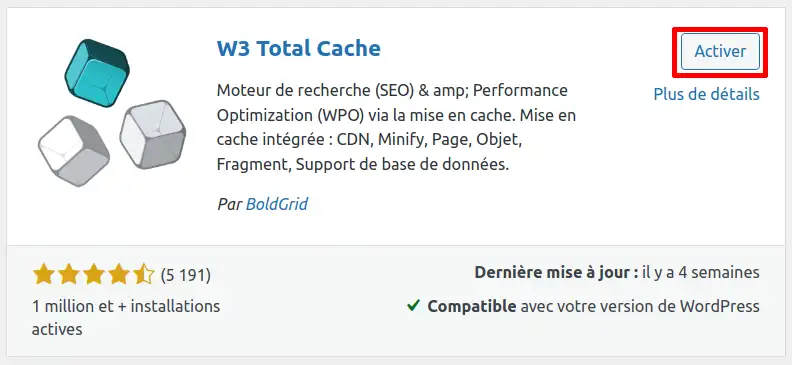
Once the installation is complete, click Activate.
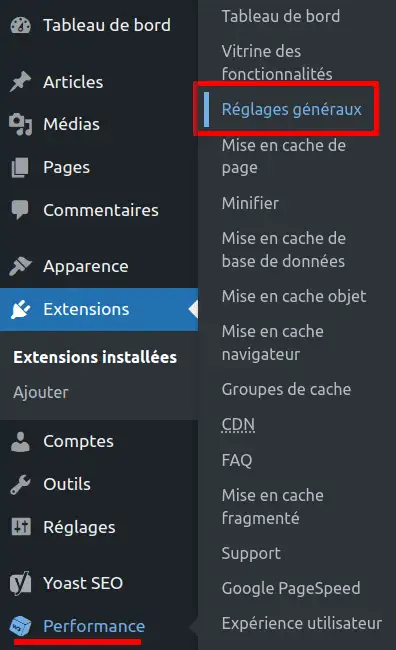
Then, back on the list of installed plugins, in the left-hand menu, move your mouse over the"Performance" menu and click on"General Settings".
You'll see two option blocks called"Database caching" and"Object caching", here you can select Memcached to use it. Don't forget to click on"Save all settings" to confirm use.
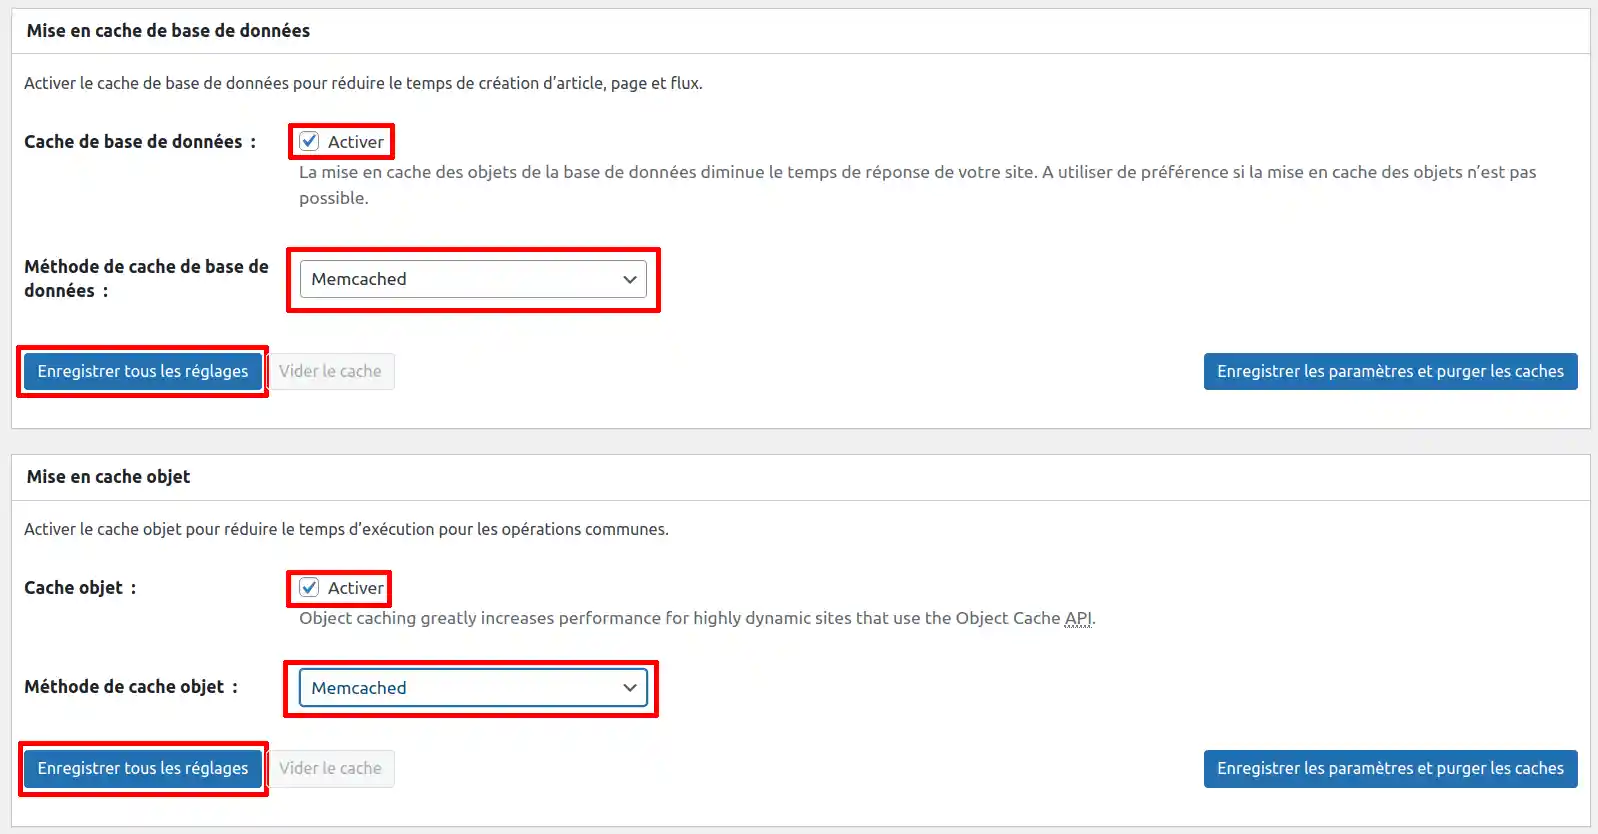
If you have a PrestaShop e-commerce site, you can also use the Memcached cache to improve the performance of your site.
To do this, you first need to connect to the administration area of your PrestaShop site.
Once you have done this, in the left-hand menu, in the"Configure" section, click on"Advanced settings" and then on"Performance".
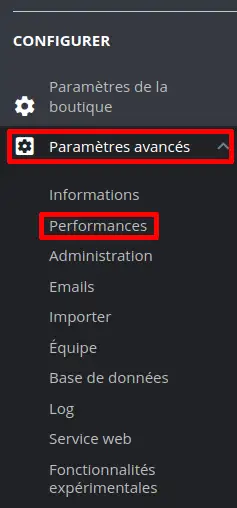
Look for the "Cache" block at the bottom of the page and select "Yes". Check the second option "CacheMemcached" then click on "Save" in the blue button at the bottom right.
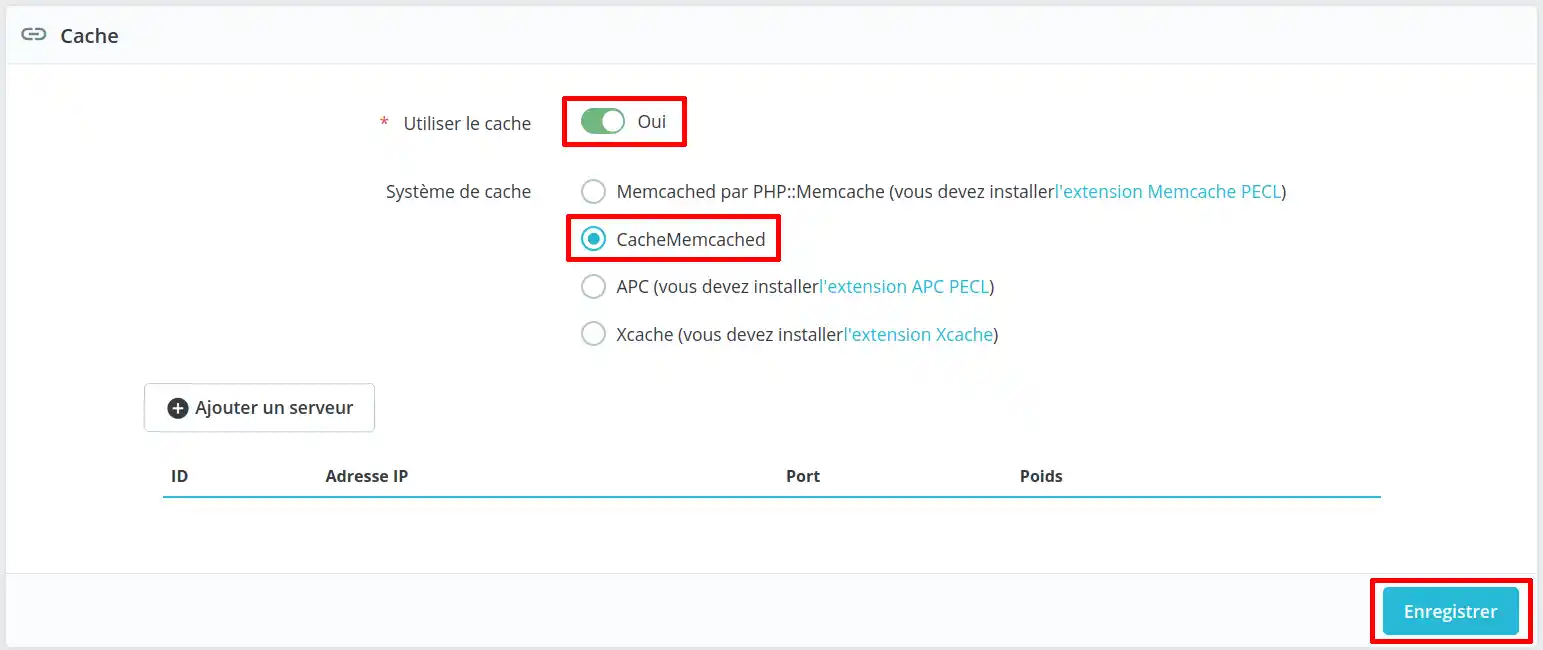
Your PrestaShop site is now configured with Memcached.
You now know how to :
By following these steps, you've taken a significant step towards optimising your online presence, ensuring a smooth and enjoyable user experience 😊. A fast, responsive site is no longer a luxury, but a necessity in today's digital world, and thanks to Memcached, you're perfectly equipped to meet this challenge 👍.
We hope you've found this guide useful and thank you for reading 🙏. If you have any questions, feedback or would like to share your tips on using Memcached, please feel free to leave a comment below. Your opinion matters to us and to the community!
Rate this article :
This article was useful to you ?
Yes
No
1mn reading
How can I access site visit statistics?
1mn reading
How do I activate Mod_PageSpeed on my site?
1mn reading
How do I use the cache modules on LWSPanel?
3mn reading
Speed up your site with LWS Cache