Rate this article :
This article was useful to you ?
Yes
No
Vous avez noté 0 étoile(s)
Procédure
The LWS Client API is a gateway designed to facilitate integration with the services and products offered by LWS (Ligne Web Services). This API allows users to efficiently order and manage their services, such as purchasing hosting, changing DNS and more.
In this documentation, we will guide you through the steps required to obtain your API key and start using the Client API features. Although it's aimed more at developers, even a novice can use it.
To prevent abusive access to the API, you will need to obtain an API key linked to your LWS account and define one or more IPs authorised to use the API. You must have an LWS account in order to use the API. If you don't have one, go to the official LWS website to register as a new customer.
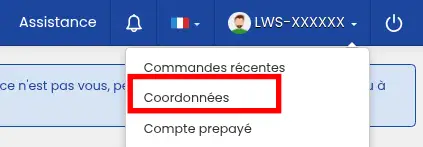
To obtain your API key, log in to your account from the LWS Panel and go to the "Contact details" page.
Here, click on the "LWS API" tab to access the API access management page.
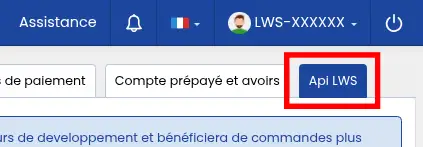
On this page, you will be able to see all the IPs authorised to use the API with your login details as well as the balance of your prepaid account, which can be used to purchase or renew domains and hosting purchased via the API. To generate your API key, click on the "view" button in front of the "API key in PRODUCTION mode" option to open a modal allowing you to generate it.

Here, click on the button to generate the key. Store it carefully so that you don't lose it. If you wish to generate a new one, return to this mode and click on the button again.
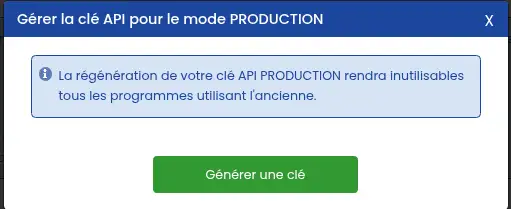
This key allows you to use the full API in its normal mode. If you wish to use the API in an isolated environment, in order to test it, you will need to use a key in TEST mode, which you can create in the same way as the Production keys, simply by clicking on "view" opposite the line "API key in TEST mode". It is not possible to use the test key in production and vice versa.
The second step in using the LWS API is to authorise one or more IPs to use the API. This is an additional method of protection so that someone who has managed to get their hands on your key can't make unwanted orders, such as buying domains for you.
This happens in the same place as for the API key; this time, click on the "Add an IP address" button to open the Add IP window.

In this window, select "Production" and enter your IP address. If you don't know it, you can use a site to obtain your current IP. Depending on the network you are connected to, your IP may be different, so you may need to specify several IPs to use the API everywhere. If you want to add the IP to use it in Test mode, select "Test" instead.
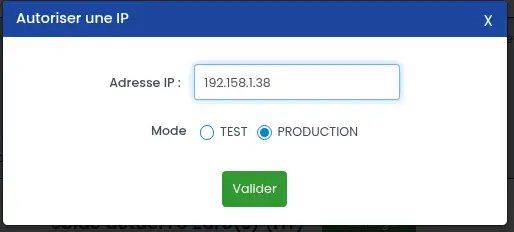
Once validated, you will be able to view and delete the IPs currently authorised to use the API in a table on the page. Up to 3 IPs can be added for each mode. If you wish to add more, you will need to delete them.

You can find the official documentation, with a list of all the commands available and examples of use, to find out how to use our API.
Select a category and a command from the menu on the left to obtain more information about them. The top of the page contains a summary of the action and the URL to be used for the command:

If the command requires an additional parameter, this will be indicated below, in the "Request" section. In our example, the command expects a domain name in the "PATH", the URL of the command (instead of :domain):

If other parameters are required, particularly in the body of the request, they will also be indicated in the "body" category.
All commands will return a message when executed. This can be an error message, a confirmation message or the data requested (in our example, information about the domain). You can find all the possible returns for a particular command in the 'Responses' section of the page:
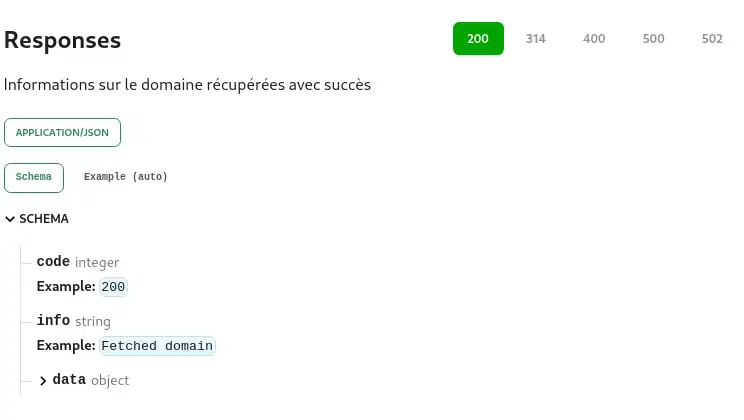
For an advanced user, this information is all they will need to use the API comfortably. However, with a view to making the API available to as many people as possible, whether beginners or experts, examples of use are available in several programming languages, such as PHP :
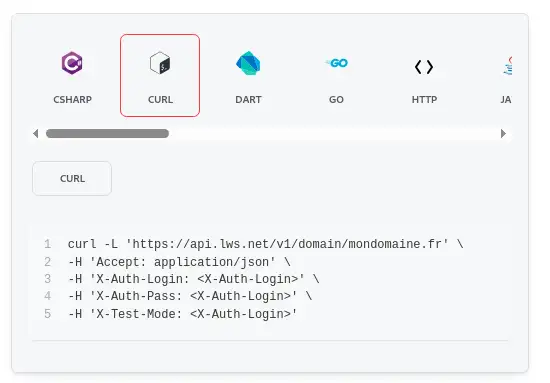
Here is an example of a cURL command to be executed in the Terminal. The X-Auth-Login and X-Auth-Path fields should be filled in with your LWS ID and your API key, obtained earlier, respectively.
The X-Test-Mode field is optional and can be removed if not required. If set to "true", it allows you to run the command in a test environment without taking any action on your account. This can be useful to see how the API works without having to manipulate your account. You will need to enter a Test API in the X-Auth-Pass field if you choose to use test mode.
Finally, you can use the API directly from the documentation:
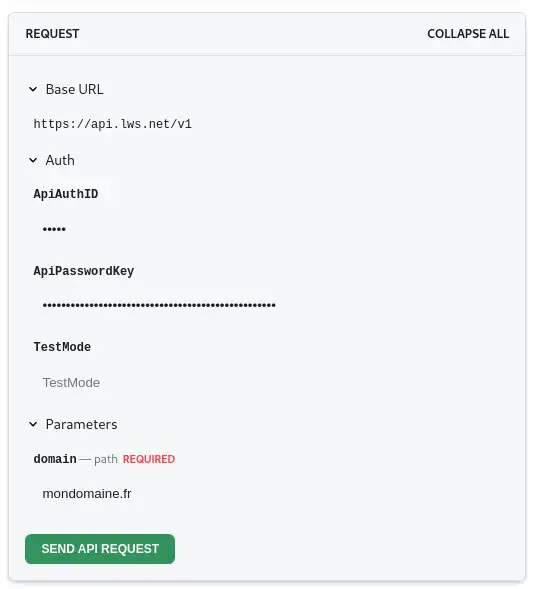
To do this, enter your LWS ID and API key in the ApiAuthID and ApiPasswordKey fields respectively, along with all the parameters required by the command, then click on "SEND API REQUEST". To run the command in the test environment, enter "true" in the TestMode field.
You will then see below the return of the command executed:
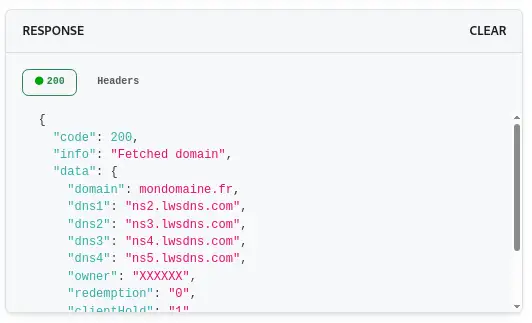
Although the majority of commands are free, some API commands will not work without prepaid credit on the account. Purchasing a domain, renewing a hosting package, changing a package, etc. As soon as the action requires payment, you will be debited for the corresponding amount from your LWS prepaid credit (only if the action is successful). There is no going back once the order has been placed. Make sure you know what you're doing before using paid orders.
The prepaid account is currently the only payment method accepted by the API. If you do not have sufficient funds in your account, you can top it up on the dedicated page.
You now know how to :
With this information, you're all set to take full advantage of the possibilities offered by theLWS Client API for optimal management of your online services. 🚀💻
Thanks for reading! If you have any questions or would like to share your experience with the LWS Client API, please don't hesitate to leave a comment. Your feedback is valuable to us and the community. 🤝📢
Rate this article :
This article was useful to you ?
Yes
No
0mn reading
How do I use my Customer Centre?
1mn reading
Customer account management
0mn reading
Moving a service, domain name or hosting to another LWS account
0mn reading
How do I change the language displayed in your customer area?