Rate this article :
5/5 | 1 opinion
This article was useful to you ?
Yes
No
Vous avez noté 0 étoile(s)
Sommaire
Procédure
LWS Cache is a system developed by LWS that improves the loading performance of your website by using advanced caching mechanisms configured at server level.
To do this, it uses Varnish technology, deployed on all recent shared hosting (excluding servers with php 5.3 available). It speeds up the loading of your site by temporarily storing static versions of pages, without affecting compatibility with third-party services such as Cloudflare or other CDNs.
This means your service can handle more requests to your website while speeding up page load times and reducing CPU and memory usage.
From your LWS Panel customer area, you can :
This temporary deactivation is very useful when developing or updating a website.
Step 1 : First, you need to log in to your LWS account and access the shared hosting for which you want to manage caching.
Step 2: Click on the"LWS Cache" button in the"Optimisation and performance" section.

In the new window, you can select a cache for general use or a more specialised cache for Prestashop or WordPress sites(1) and click on the"Save" button to save your request. You can also empty the cached data by clicking on the"Empty cache" button(2).
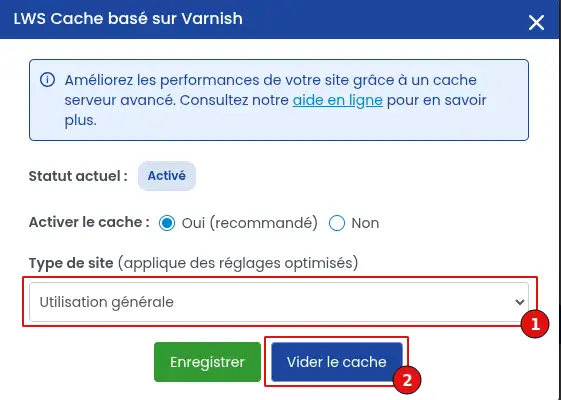
You can also deactivate the cache. Deactivating the cache should be considered carefully, as it will make your site slower and can both generate discomfort for your visitors and potentially dereferencing your site in search engines, which will favour sites that load more quickly. We recommend that you only use temporary deactivation while you develop a site or diagnose a problem.
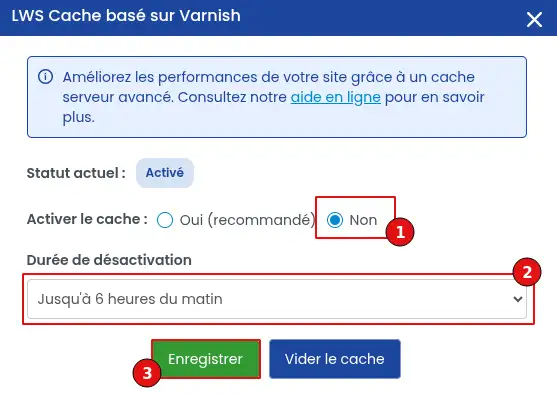
To temporarily deactivate the cache, click on the "no" radio button (1) then select "until 6am" (2) then click on the "Save" button (3). The cache will then be deactivated immediately and automatically reactivated the next morning. You can of course reactivate the cache at any time from this same page by selecting "yes (recommended)" and then clicking the "Save" button (3).
If you're using LWS Cache with a WordPress site, activating the service is just the first step. The tool offers many additional options that are not available by default. To benefit from all its features, you need to install the LWS Cache plugin developed by LWS. This article explains how to install and configure it.
1. Installing the LWS Cache plugin
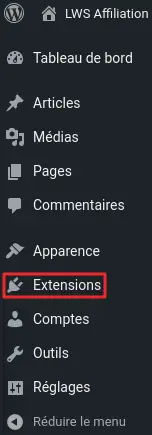
Before installing the LWS Cache plugin, first log in to your site administration. After logging in, click on "Extensions" in the left-hand menu to go to plugin management.
Locate the "Add" button at the top of the screen. Click on it to continue.

Use the search bar to find the LWS Cache plugin. After running the search, locate the plugin in the results and click "Install now".

Once the installation is complete, locate the button that now displays "Activate" and click on it to activate the plugin.
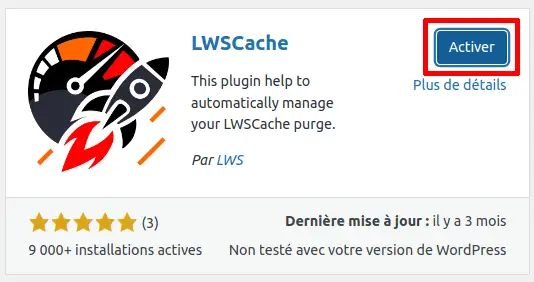
The plugin is now installed and activated on your WordPress site, and LWS Cache is ready to use. From now on, your site will use the LWS Cache to optimise loading performance.
2. Configuring the LWS Cache plugin
As mentioned above, after installing and activating the plugin, your site now uses LWS Cache with the recommended configuration for optimal use. However, in certain situations, you may wish to customise the elements you wish to cache. In this case, we'll explain how to proceed.
To start configuring the plugin, go to the left-hand menu and click on "LWS Cache".
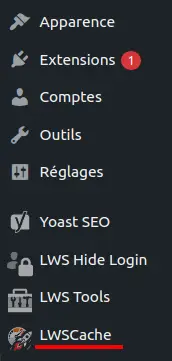
If you have not yet activated LWS Cache for your service from your LWS Client Control Panel, you will see an error message and will not be able to access the configuration options. Also note that there may be a waiting time of around 3 to 4 minutes after activation on the LWS client panel before the plugin recognises the activation.
Let's assume that LWS Cache has already been activated and recognised by the plugin. In this case, you will be redirected directly to the "LWS Cache" tab, which displays a list of available options.
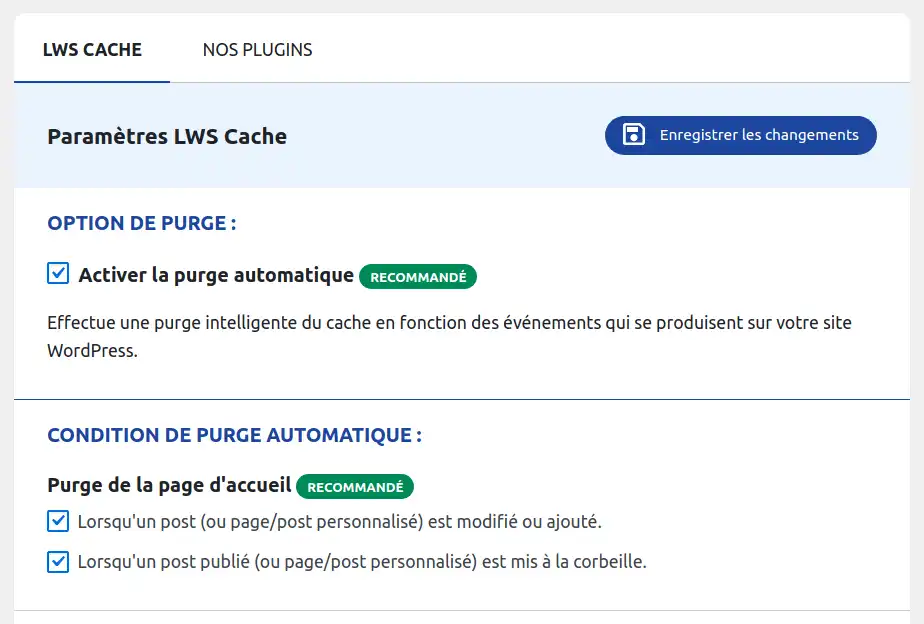
On this page, you can select the items to be cached using LWS Cache. To help you understand each option, a description is available in the tool.
3. Purge the cache
There may be times when you need to clear the cache (for example if you've made changes to your site). To do this, go to the plugin configuration page and click on the "Purge all cache" button.

You can also clear the cache from any administration page by clicking on "Purge LWSCache" in the menu at the top of the page. The cache will then be deleted immediately.

Memcache is an open source distributed memory caching system. It is used to speed up dynamic web applications by reducing the load on the database. In other words, every time a database request is made, it adds extra load to the server. Memcache reduces this load by storing data objects in dynamic memory.
Memcache works as follows:
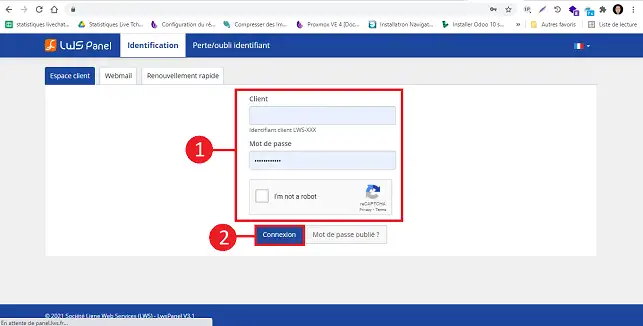
You can activate MemCache on your package by going to your customer interface at https://panel.lws.fr.
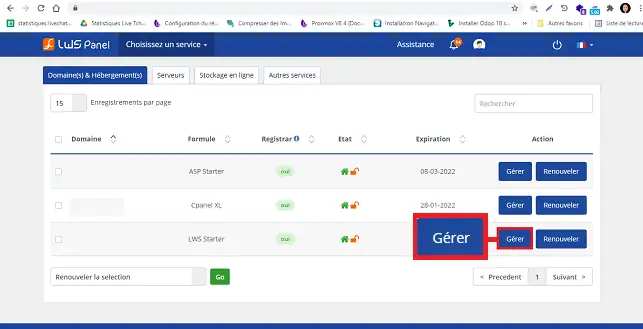
Click on"Manage" behind the package for which you want to activate MemCache.
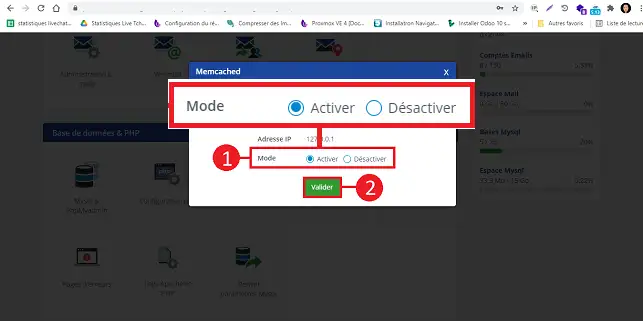
Click on the"MemCached" button in the"Database & PHP" section.
.webp)
In the new window, select"Activate" and click"Submit" to save your request.
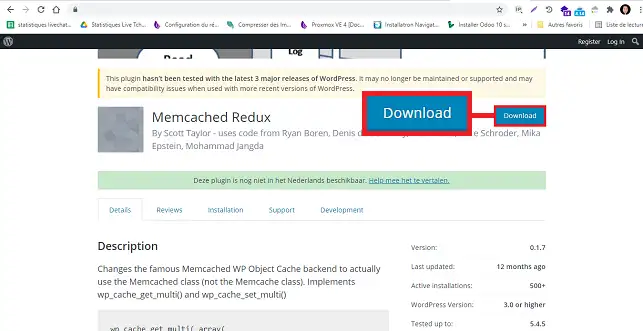
Download MemCached-redux from wordpress.org
Unzip the module on your computer.
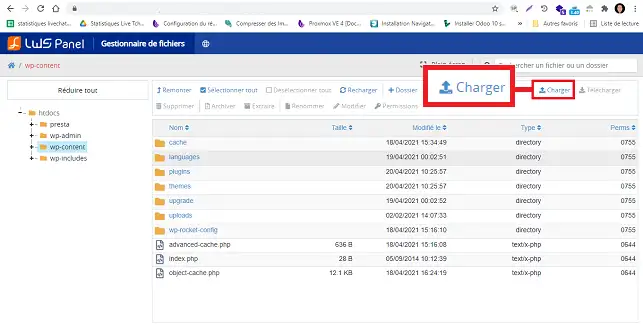
Go to your LWS customer area, click on"Manage" behind the formula on which you have installed Memcached, click on"File Manager" to access your FTP space. Go to"wp-content" and click on"Upload".
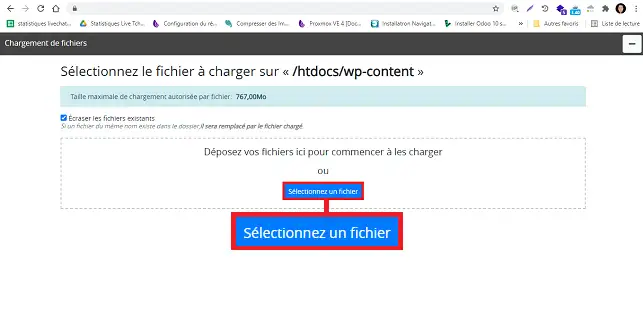
Click on"Select a file" and choose the object-cache.php file to upload it to the"wp-content" folder.
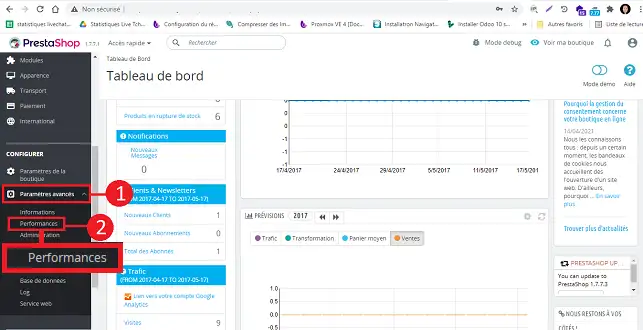
In order to configure Memcached on Prestashop, go to your Prestashop Dashboard and go to"Advanced Settings" found in the left-hand menu and then to"Performance".
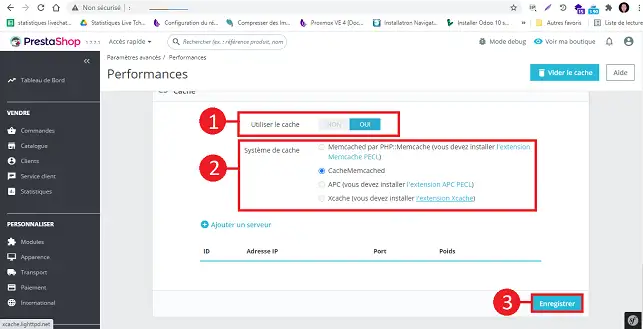
At the bottom of the page, in the"Cache" section, click"yes" to activate the cache and select"CacheMemcached".
In this section, click on"Add a server" and enter the following information:
IP address: 127.0.0.1
Port: 11211
Weight: 0
Click on the"Add a server" button to save the addition of this server.
To validate the activation of this service, click on the"Save" button to save your request.
Rate this article :
5/5 | 1 opinion
This article was useful to you ?
Yes
No
1mn reading
How can I access site visit statistics?
1mn reading
How do I activate Mod_PageSpeed on my site?
3mn reading
Speed up your site with LWS Cache
2mn reading
How do I activate the LWS Cache for my Wordpress LWS Cache plugin?