Rate this article :
4.5/5 | 2 opinion
This article was useful to you ?
Yes
No
Vous avez noté 0 étoile(s)
Sommaire
Procédure
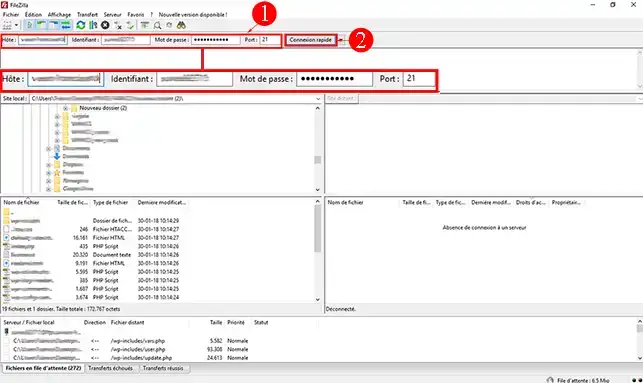
1. connect to your FTP space using your FTP software. You can use FileZilla to save your website on your computer. To do this, enter the"host name", identifier and password for your FTP space. You received this information by email when you placed your order. If you forget, you can request your connection details again by going to the following page: https://panel.lws.fr/frperte.php. Click on"Quick Connection" as soon as you have entered your connection details.
2. On the"Remote Site" side, select all your files. To do this, click on one of the files with your mouse and then press the "[CTRL] + A" keys simultaneously to select everything.
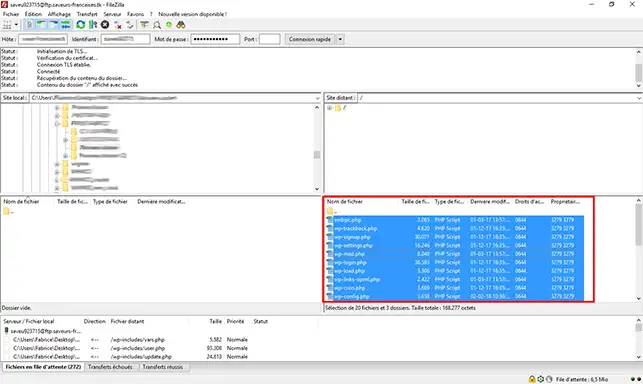
3. Drag and drop your files onto the left-hand side of your screen(in the "Local site" section) after defining the folder in which you want to save your backup.
Do not close the software until you have finished backing up your website.
To back up your database, please refer to the tutorial"How to export a database"?
1 Log in to your LWS customer account, click on"Servers" and then on"Admin/administration" to go to your VPS management table. In the"Information" section, check that you are running"Debian 9 + ISPConfig". If this is not the case, you can change Distributions for your VPS by scrolling to the bottom of the page.

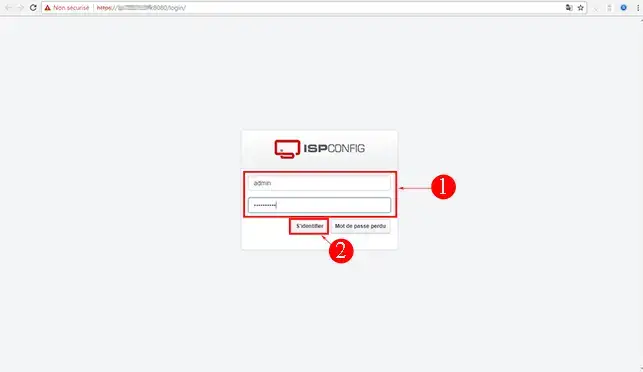
2. Connect to your ISPConfig interface. You should have received all the information you need to log in by email. If you have forgotten your connection details, please follow the procedure described on the following page: https://help.lws-hosting.com/en/Lost-ISPConfig-password#content-2
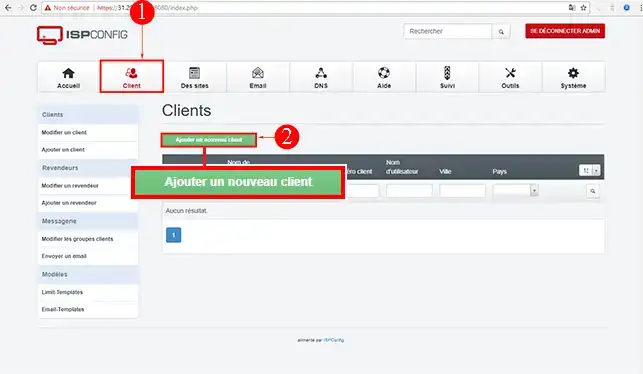
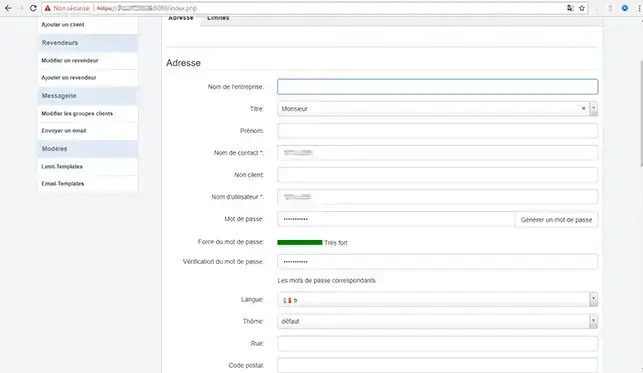
3. Once you are connected to your ISPConfig interface, click on"Clients" and then on"New Client" to add a client to your VPS server.
4. Create your client by filling in the form. Then click on the "Save" button at the bottom of the page.
5. You can now create your domain name on the VPS server using the tutorial"How to associate a domain name with my VPS server".
6. You can now create the customer's FTP account using the"How to create an FTP account on ISPConfig" documentation. You can also create your database using the"How to create a MySQL database on ISPConfig" documentation. It is important to keep this information in your possession as you will need it to upload your website and modify the configuration file for your website.
7. In order to change the DNS Zone of your domain name to point it to your VPS server, I invite you to connect to the administration of the offer concerned, click on the"DNS Zone" button.

9. Change the value"cName WWW" to the IP address of your VPS server and click on the "Validate" button.


To do this, connect to the FTP space on your VPS using the connection details you created earlier. You can use the help on publishing a website with FileZilla to do this. Note that you will need to upload the files to the"web" directory in the FTP space on your VPS and not to the root directory.
1. connect to your ISPConfig interface, click on the"Database" tab and on"PhpMyAdmin" to open the database management interface.
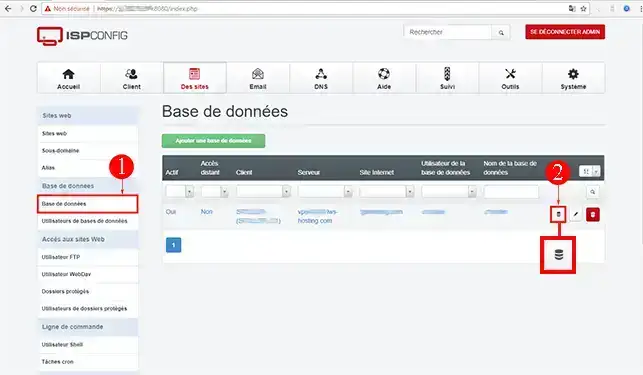
Don't forget to modify the configuration file that allows your website to connect to your MySQL database on your VPS server. To do this, open the configuration file with Notepad++ or any other word processor. Change the database server, user name, database name and password to the new information you obtained when you created your database on the VPS.
You are now ready to migrate your site from your shared hosting with LWS to a VPS server.
Don't hesitate to share your comments and questions!
Rate this article :
4.5/5 | 2 opinion
This article was useful to you ?
Yes
No
2mn reading
How do I switch my shared WordPress web hosting?
2mn reading
How do you initialise your shared hosting account?
0mn reading
How do you manage your Magento online shop?
1mn reading
How do I resolve the Err_Connection_Timed_Out error?