Rate this article :
4/5 | 2 opinion
This article was useful to you ?
Yes
No
Vous avez noté 0 étoile(s)
Procédure
This documentation describes the procedure for the older version of SiteBuilder. If you are using the latest version of SiteBuilder, you will need to refer to this documentation.
To insert a table in SiteBuilder Pro, log in to your website administration.
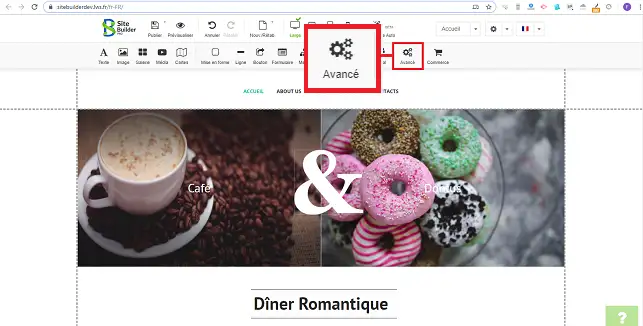
1. Click on the"Advanced" tab to open the window showing all the available advanced options.
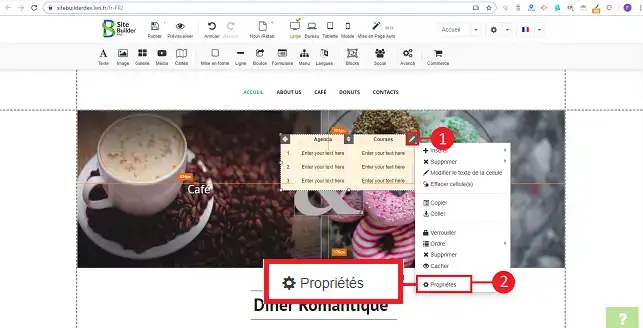
2. Select the table by clicking on it.

3. You can change the parameters of your table. To do this, click on the stylus on the right-hand side of your panel and then on"Properties".
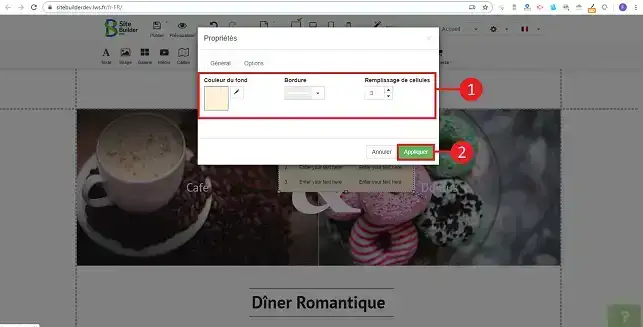
4. The"General" section in"Properties" allows you to change the background colour, border and cell fill. Click on the"Apply" button as soon as you have made your changes.
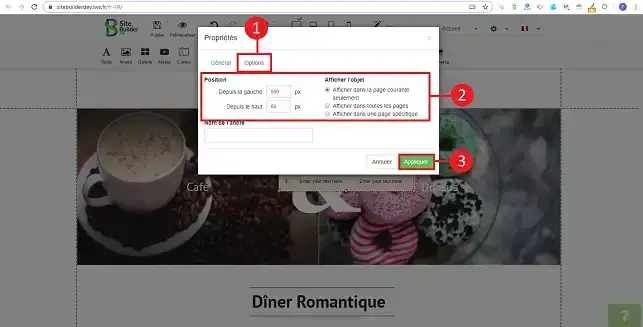
5. The"Options" tab lets you change the position of your table on your website. You can also set the page on which you want to display your table. Click on the "Apply" button once you have made your choice.
You are now able to create a table on your website created with SiteBuilder Pro from LWS. The table can be used to lay out certain elements of your website as well as to create a pricing table or other, depending on your needs.
Don't hesitate to share your comments and questions!
Rate this article :
4/5 | 2 opinion
This article was useful to you ?
Yes
No
2mn reading
How do I insert a new element in SiteBuilder Pro?
1mn reading
How do I edit an existing element in SiteBuilder Pro?
1mn reading
How do I insert an image gallery in SiteBuilder Pro?
1mn reading
How do I insert comments in SiteBuilder Pro?