Rate this article :
2.5/5 | 2 opinion
This article was useful to you ?
Yes
No
Vous avez noté 0 étoile(s)
Sommaire
Procédure
This documentation describes the procedure for the older version of SiteBuilder. If you are using the latest version of SiteBuilder, you will need to refer to this documentation.
It is possible toadd elements to SiteBuilder Pro, including text, images and videos, in order to add different content to your website.
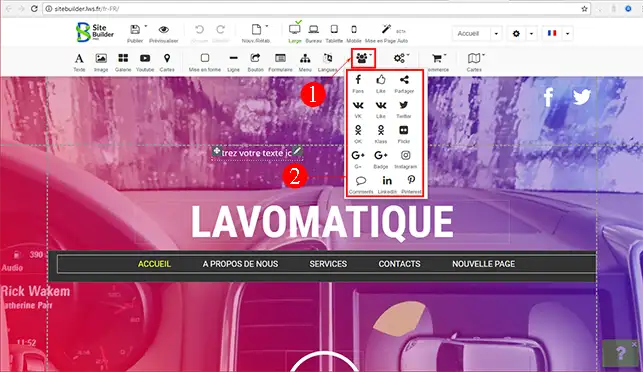
You can alsoadd features such as a share button on social networks and an online shop from the SiteBuilder Pro Starter package.
The content and features will enhance your website.
1. First log in to the administration area of your website
2. Click on the element you want to insert on your website and drag it to the desired location.

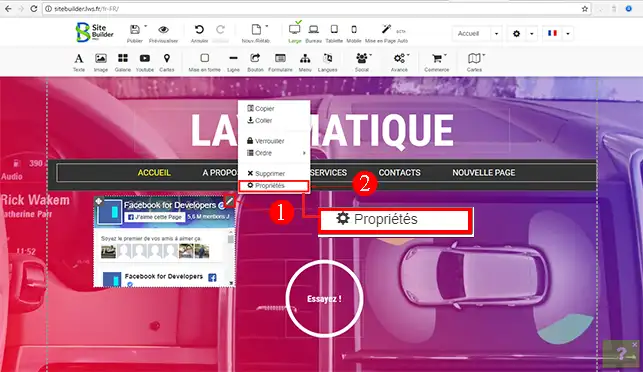
3. Once the element has been placed in the desired position on your page, click on the stylus at the top right of your element and then on"Properties" to configure the new module.

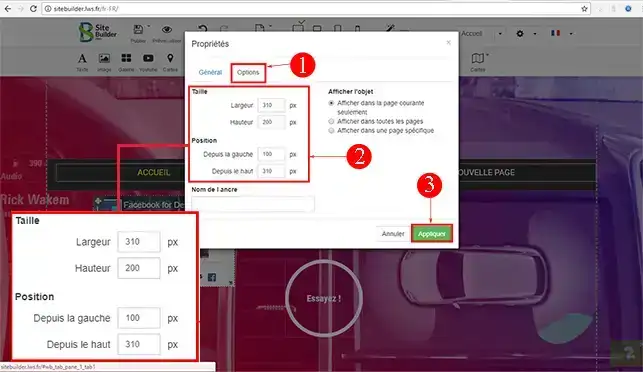
4. In the"Options" section of each element, you can enlarge and/or reduce the size(width and height) of your module. You can also define the position of your module(from the left or from the top).

You are now ready to use SiteBuilder Pro to set up your various elements, such as text elements and videos, as well as an online shop or blog.
Don't hesitate to share your comments and questions!
Rate this article :
2.5/5 | 2 opinion
This article was useful to you ?
Yes
No
1mn reading
How do I edit an existing element in SiteBuilder Pro?
1mn reading
How do I insert an image gallery in SiteBuilder Pro?
1mn reading
How do I insert comments in SiteBuilder Pro?
0mn reading
How do I insert a Flash video into SiteBuilder Pro?