Rate this article :
This article was useful to you ?
Yes
No
Vous avez noté 0 étoile(s)
Sommaire
Procédure
1. Connect to your SiteBuilder interface
2. Click on the"Advanced" tool at the top of the page to access all the advanced options available.

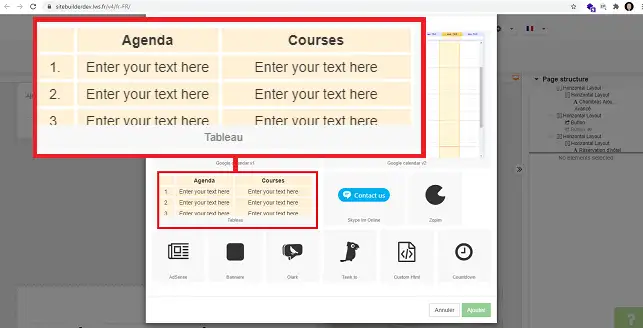
3. Click on"Table" to select this option
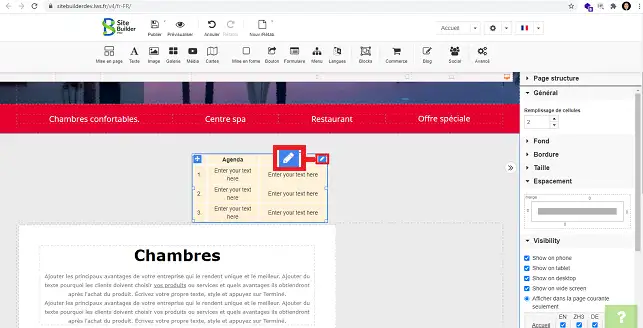
1. Select the table by clicking on it. Then click on the stylus at the top right of the table.
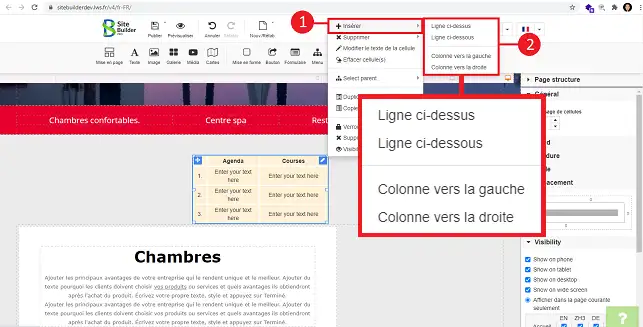
2. To insert a row or column, click on"insert" and choose thelocation you want for your row or column.
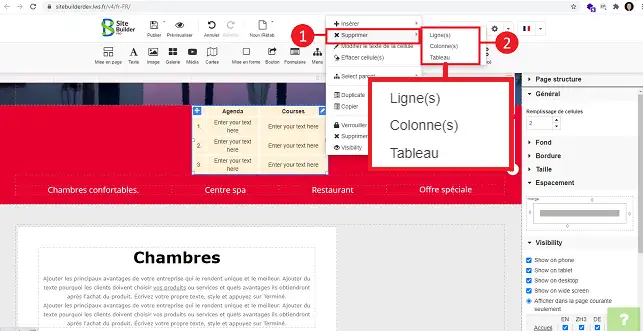
3. To delete the row or column, select"Delete" and choose the desired option.
In the right-hand column of SiteBuilder Pro, you can configure the table as follows:
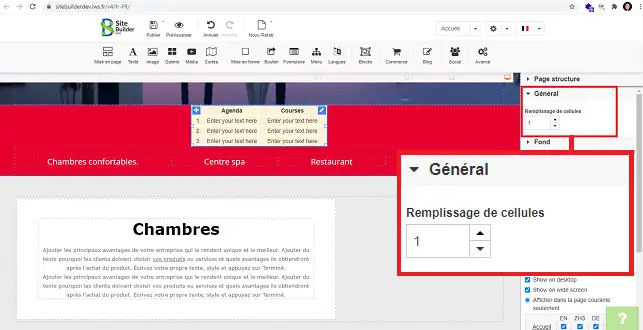

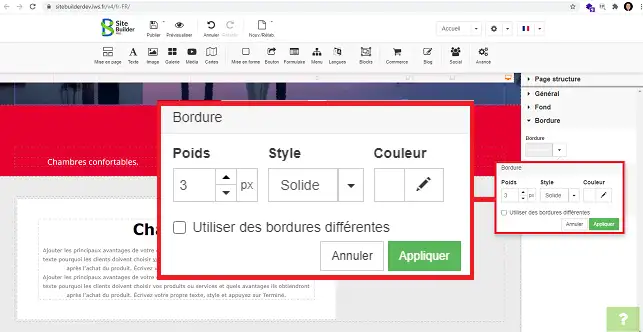
You are now ready to create and configure your Table in your SiteBuilder Pro formula.
Don't hesitate to share your comments and questions!
Rate this article :
This article was useful to you ?
Yes
No
2mn reading
How do I insert a new element in SiteBuilder Pro?
1mn reading
How do I edit an existing element in SiteBuilder Pro?
1mn reading
How do I insert an image gallery in SiteBuilder Pro?
1mn reading
How do I insert comments in SiteBuilder Pro?