Rate this article :
5/5 | 1 opinion
This article was useful to you ?
Yes
No
Vous avez noté 0 étoile(s)
Sommaire
Procédure
Spam is a nuisance and there are many ways of countering it. However, spammers are getting smarter and trying to get round the filters. What's more, ICANN has recently approved large gTLDs (generic top-level domains), such as .biz, .info, etc. Some of these gTLDs are used exclusively by the Internet. Some of these gTLDs are used exclusively by spammers.
ISPConfig offers some global filters and they can be used to block emails from certain extensions. We will see how to configure this.
1. Connect to your ISP Config Panel
2. Go to the global filters configuration.
To do this, click on the "E-mail" tab in the navigation menu at the top of the page.

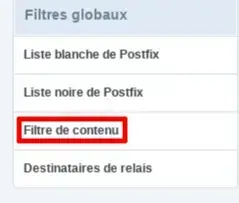
Then, in the left-hand menu, under "Global filters", click on "Content filter".

3. Configuring the content filter
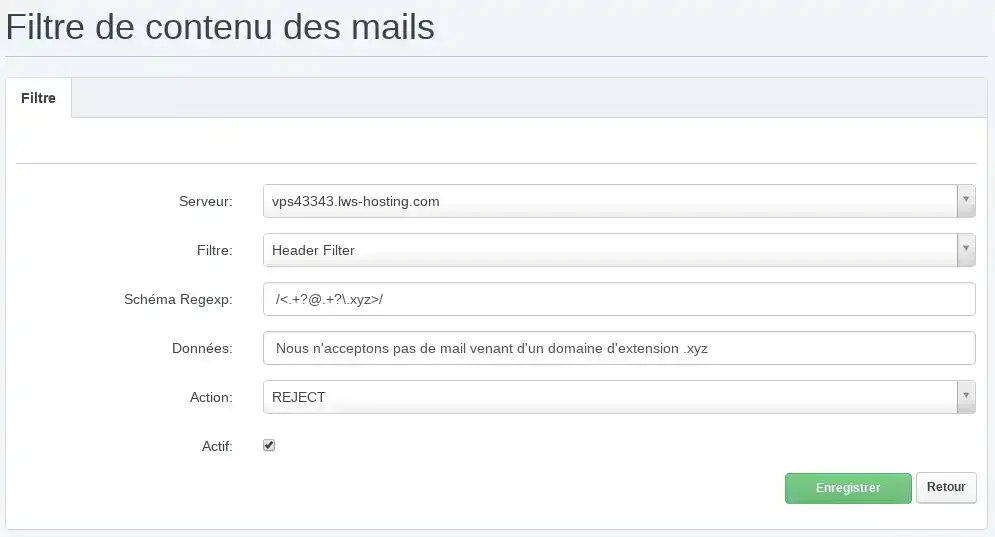
Click on the green "Add a new content filter" button. This takes you to the content filter configuration form.

Server field: Indicate your server
Filter field: Select "Header Filter".
Regexp Schema field:
This is used to check whether the header of an e-mail contains an unwanted domain extension.
For example, if you want to prevent emails from a domain with the extension .xyz, you will need to enter the following in this field
/<.+?@.+?\.xyz>/
Simply replace "xyz" with the extension you want.
Data field: This is where you can enter a message to find out why the email has been rejected. For example, in the case of an email with a .xyz extension, you could indicate: "We do not accept email from a .xyz domain".
Action field: Here you can indicate the action you would like to take if an email with an unwanted extension arrives. In our case, we can either choose Discard for simple deletion of the email, or Reject which refuses the email sent and gives the reason (indicated in the Data field) to the server sending the email.
To activate your filter, simply tick the box next to atif and then save. You will need to repeat this procedure for each extension you wish to reject.
Rate this article :
5/5 | 1 opinion
This article was useful to you ?
Yes
No
1mn reading
How do I create an email address on a dedicated VPS server?
5mn reading
Optimise the way you send your emails
2mn reading
How do I create a DKIM key on ispconfig?
0mn reading
How to change the VPS/ISPCONFIG email password