Rate this article :
5/5 | 1 opinion
This article was useful to you ?
Yes
No
Vous avez noté 0 étoile(s)
Sommaire
Procédure
In this documentation, we'll take a step-by-step look at how to configure two-factor authentication on Nextcloud.
Two-factor authentication (2FA) improves the security of your Nextcloud accounts by securing access with a notification to confirm each new connection. This way, even if your password has been found by a malicious person, they won't be able to connect to your Nextcloud accounts without having access.
Step 1: To activate 2FA on Nextcloud, you first need to go to your account's security settings.
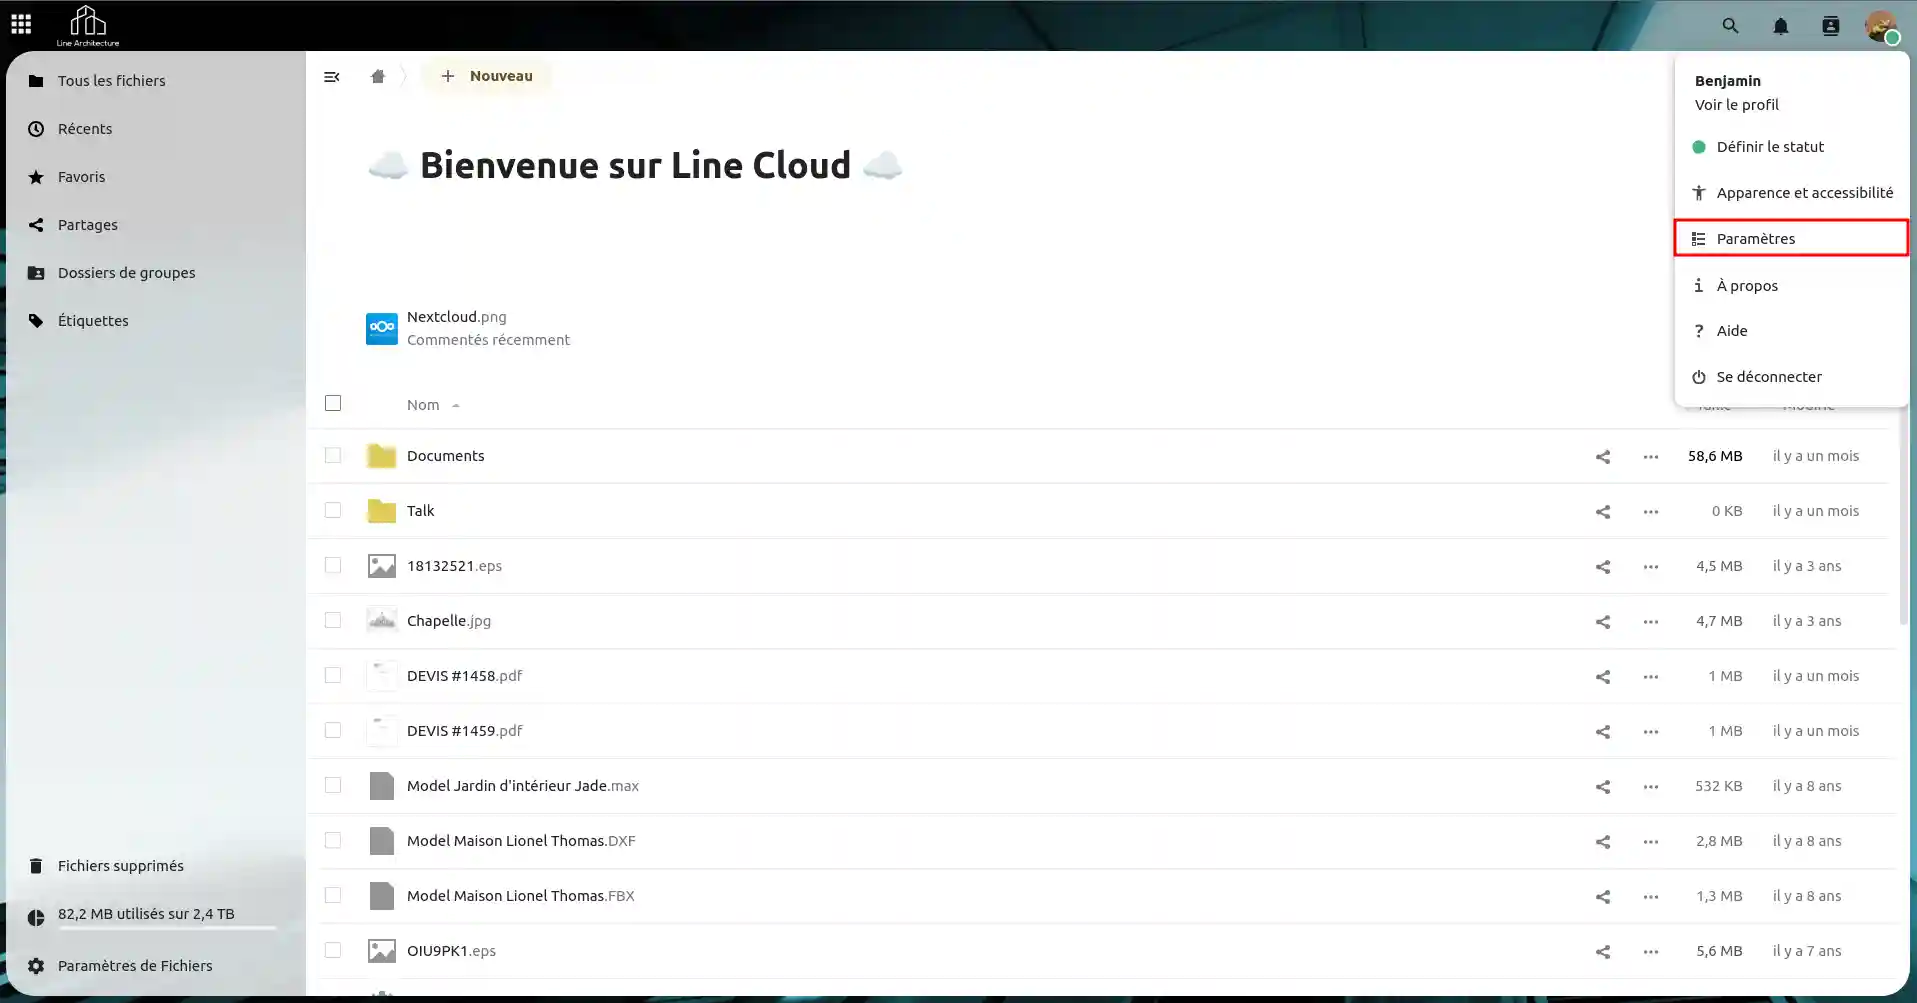
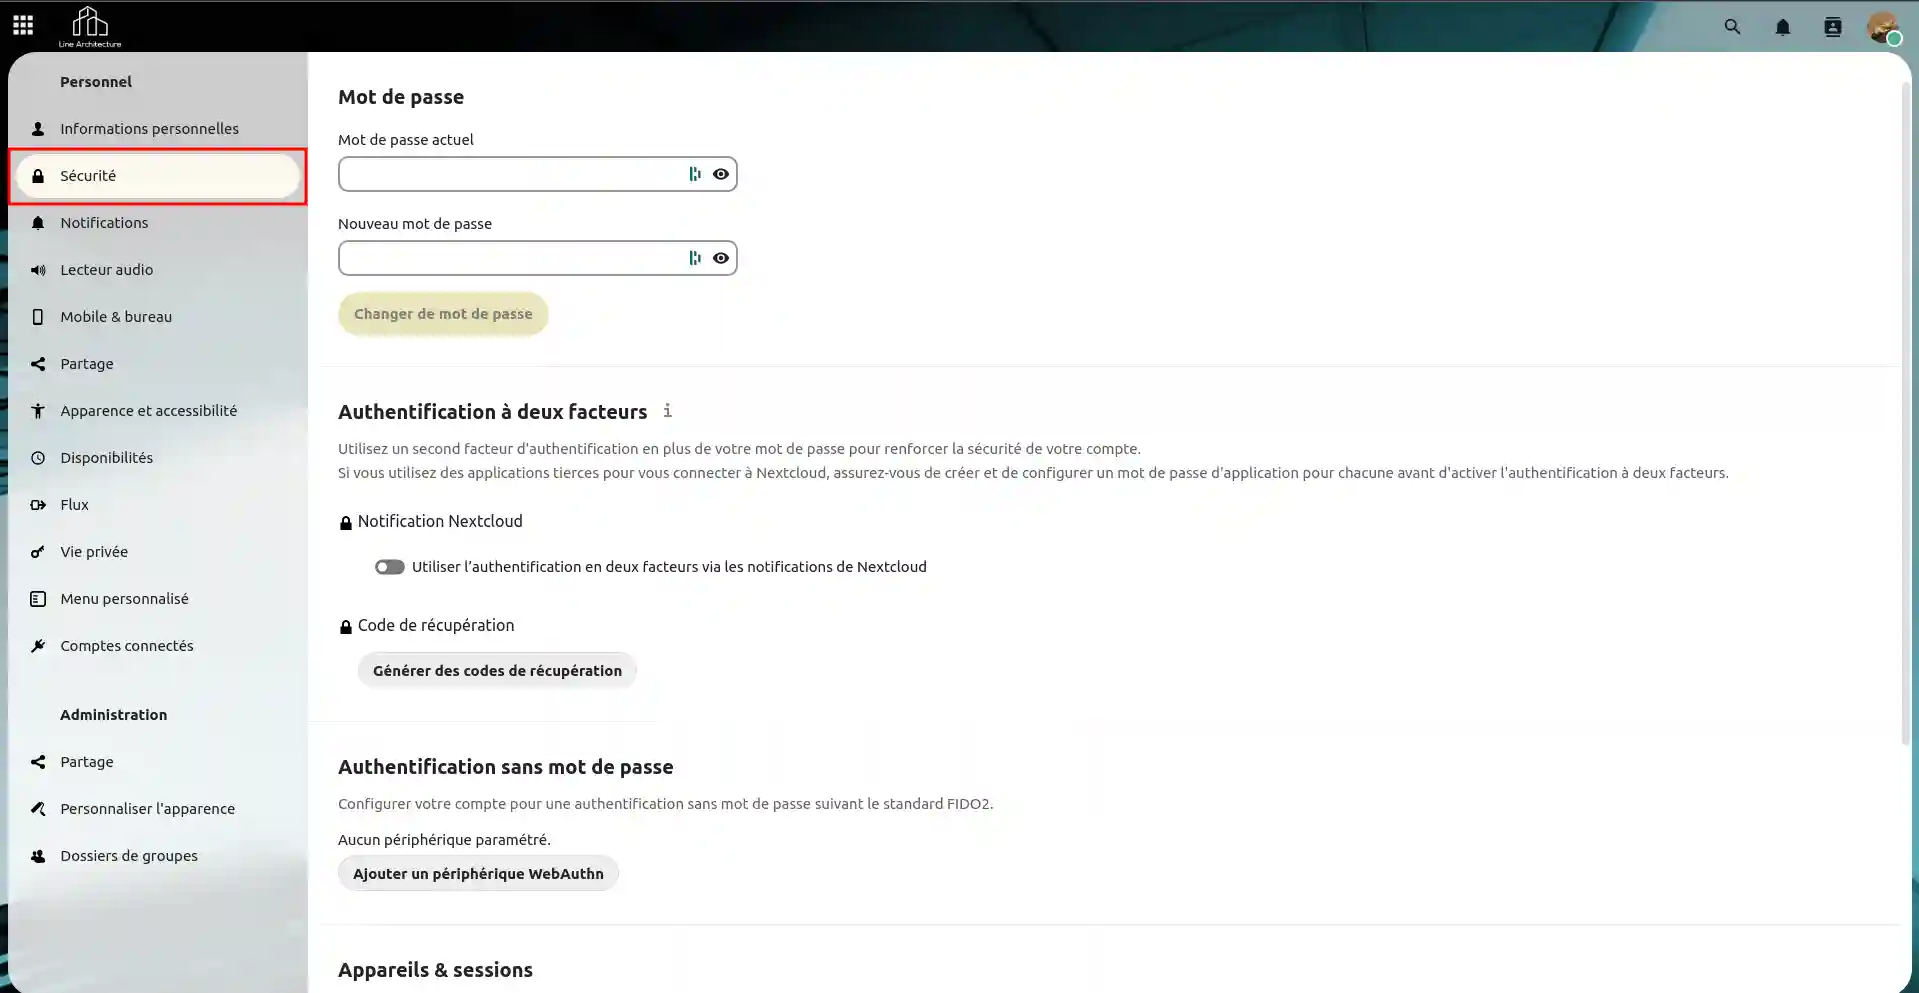
Step 2: Once in the security settings, click on the "Use two-factor authentication via Nextcloud notifications" button.

Two-factor authentication is now properly enabled on your Nextcloud account. When you try to connect to your Nextcloud account, a notification will be sent to the other devices connected to it to accept the connection from the new device. But to be on the safe side, it's a good idea to generate a recovery code. We'll look at this in the next section.
Once you've activated the 2FA, it's a good idea to generate a recovery code in case you no longer have access to any devices connected to your Nextcloud.
Step 1: To generate a recovery code, click on the "Generate recovery codes" button in the security settings of your Nextcloud account.

Step 2: After clicking on the button, Nextcloud will generate 10 codes that you can save by clicking on the "Save recovery codes" button.
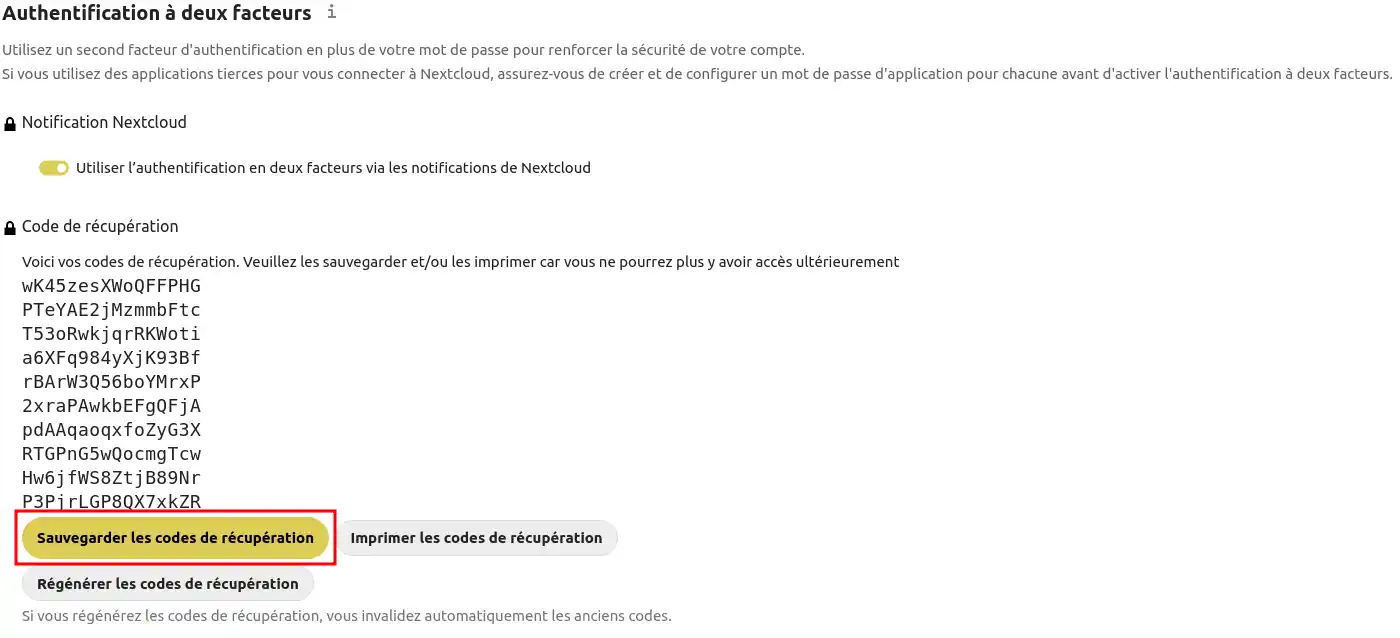
You now know how to generate recovery codes for your Nextcloud account. The "Save recovery codes" button allows you to download a text file (.txt) with the codes written in it. The "Print recovery codes" button takes you back to printing your recovery codes on paper.
After activating two-factor authentication, you may need to log in. And when you log in, you'll need to accept the connection from another device.
Step 1: Sign in to your Nextcloud account.
Step 2: Next, you'll see this visual on your screen, telling you that you need to accept the connection request from an already authenticated device.
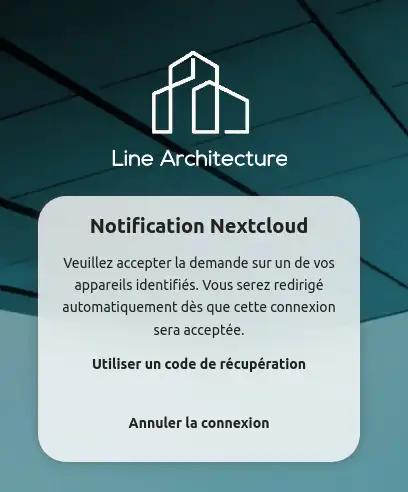
Step 3: You then need to go to an identified device to accept the connection request. In our case, we go to our smartphone and approve the request.
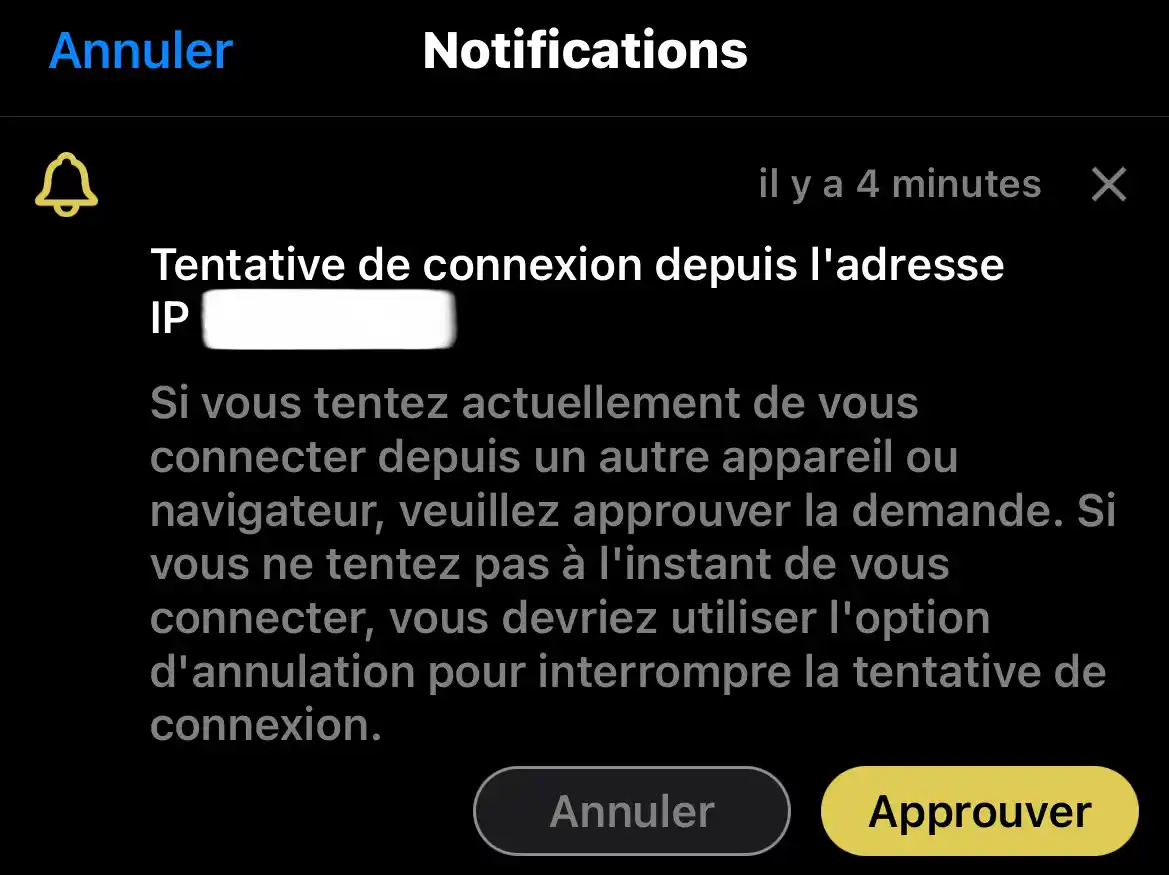
Once the request has been approved, you can access your Nextcloud account! You now know how to connect to your Nextcloud account after activating two-factor authentication!
If you don't have access to your account from another device, you'll need to use a recovery code. We'll look at this in the next section.
If you no longer have access to your Nextcloud account from another device, then you will need to use one of the recovery codes generated earlier in this documentation.
Step 1: Log in to your Nextcloud account.
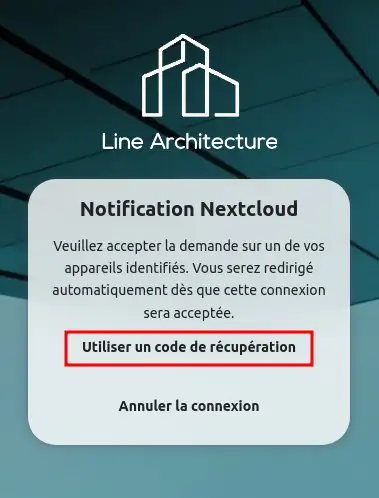
Step 2: Then, you will see this visual on the screen, you will have to click on the button "Use a recovery code".
Step 3: Then enter one of the recovery codes (1) and submit the request (2).
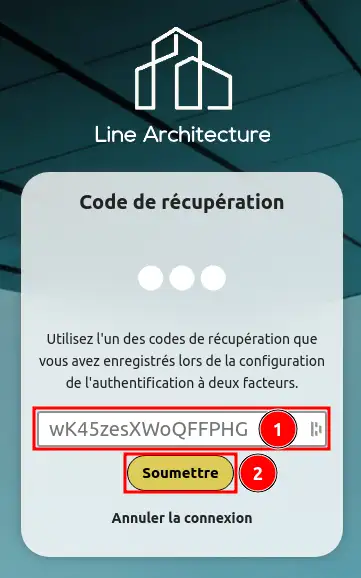
Once done, if the recovery code is correct, you will be redirected to your Nextcloud account.
You now know how to :
By following these steps, you have taken an important step to protect your data on Nextcloud from unauthorised access.
If you don't yet have an online storage package or would like to upgrade to a cloud storage package with advanced features, consult this documentation to place your order, and find information about Nextcloud and Nextcloud Pro packages here.
Don't hesitate to leave a comment to tell us about your experience or if you have any further questions 👇.
Rate this article :
5/5 | 1 opinion
This article was useful to you ?
Yes
No
9mn reading
Getting started with Nextcloud
5mn reading
Access your Nextcloud web application
0mn reading
How do I use the NextCloud web interface?
3mn reading
FAQ The possibilities of the Nextcloud web application