Rate this article :
4.3/5 | 3 opinion
This article was useful to you ?
Yes
No
Vous avez noté 0 étoile(s)
Sommaire
Procédure
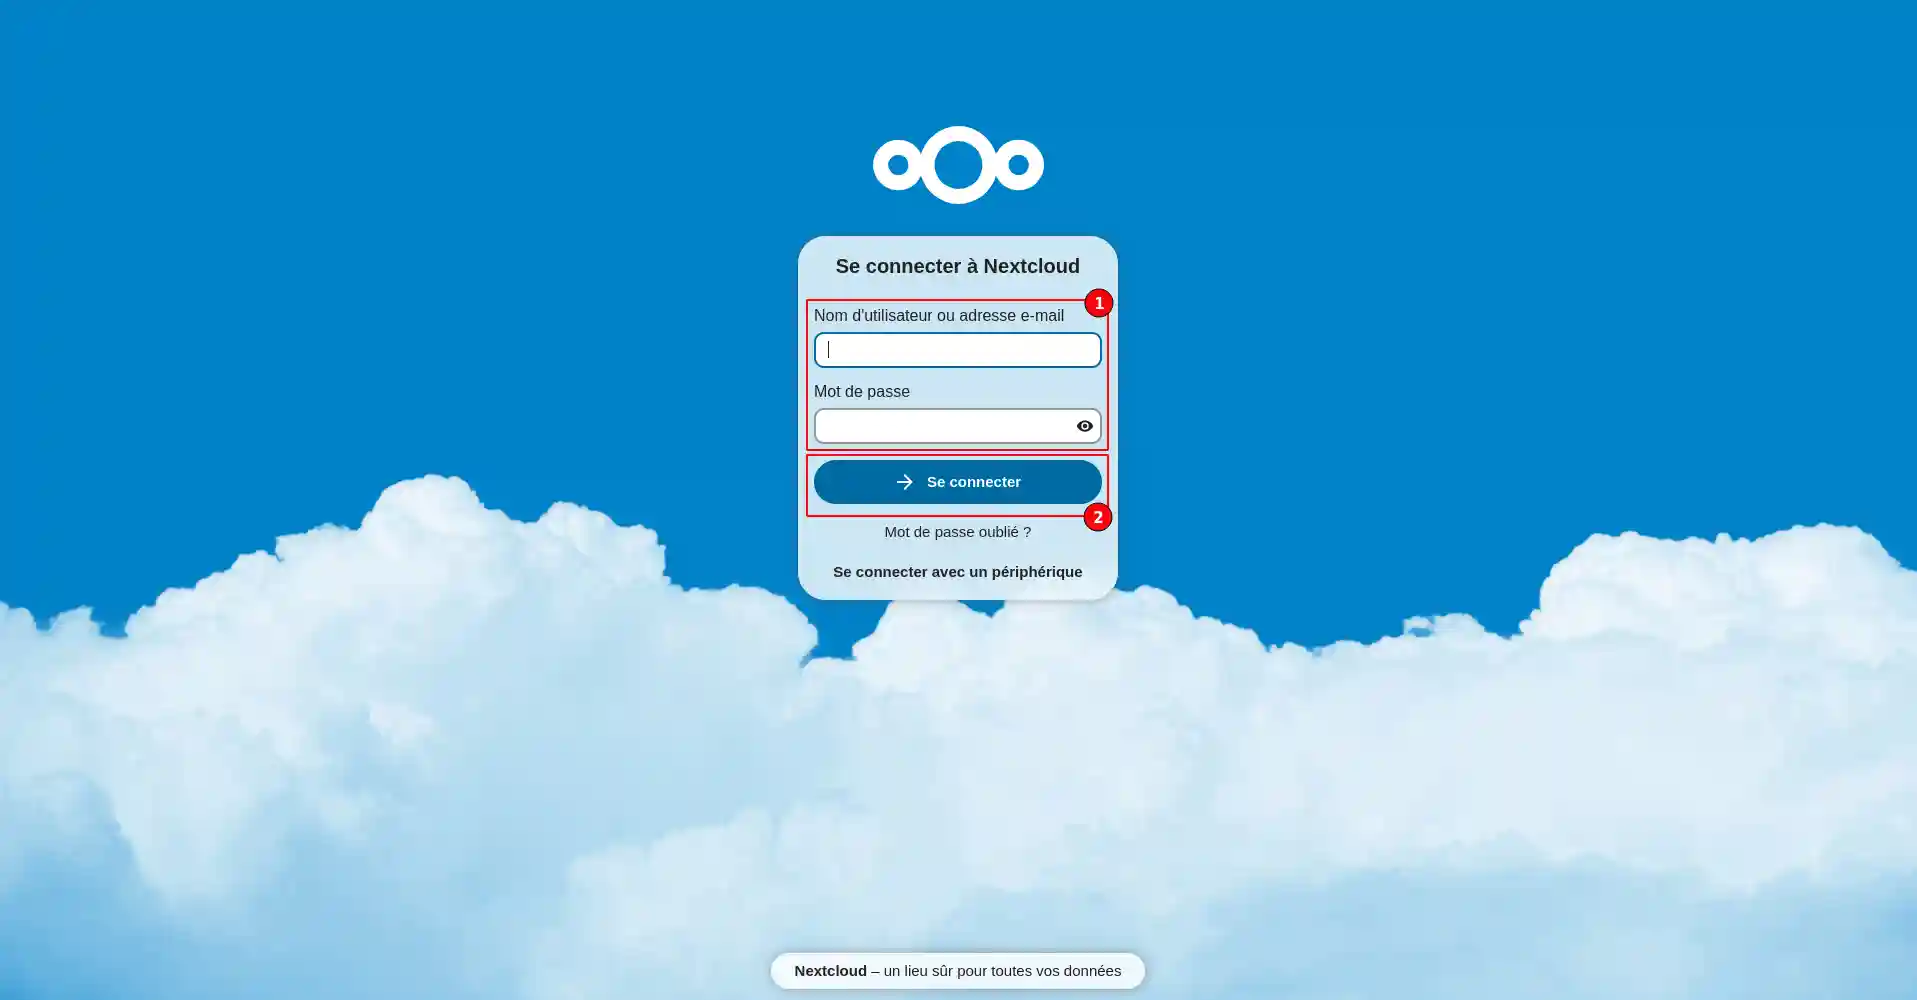
1. Go to the web address you received by email. Enter your username and password. Click on the"Connect" button to access the interface for managing your online storage space.
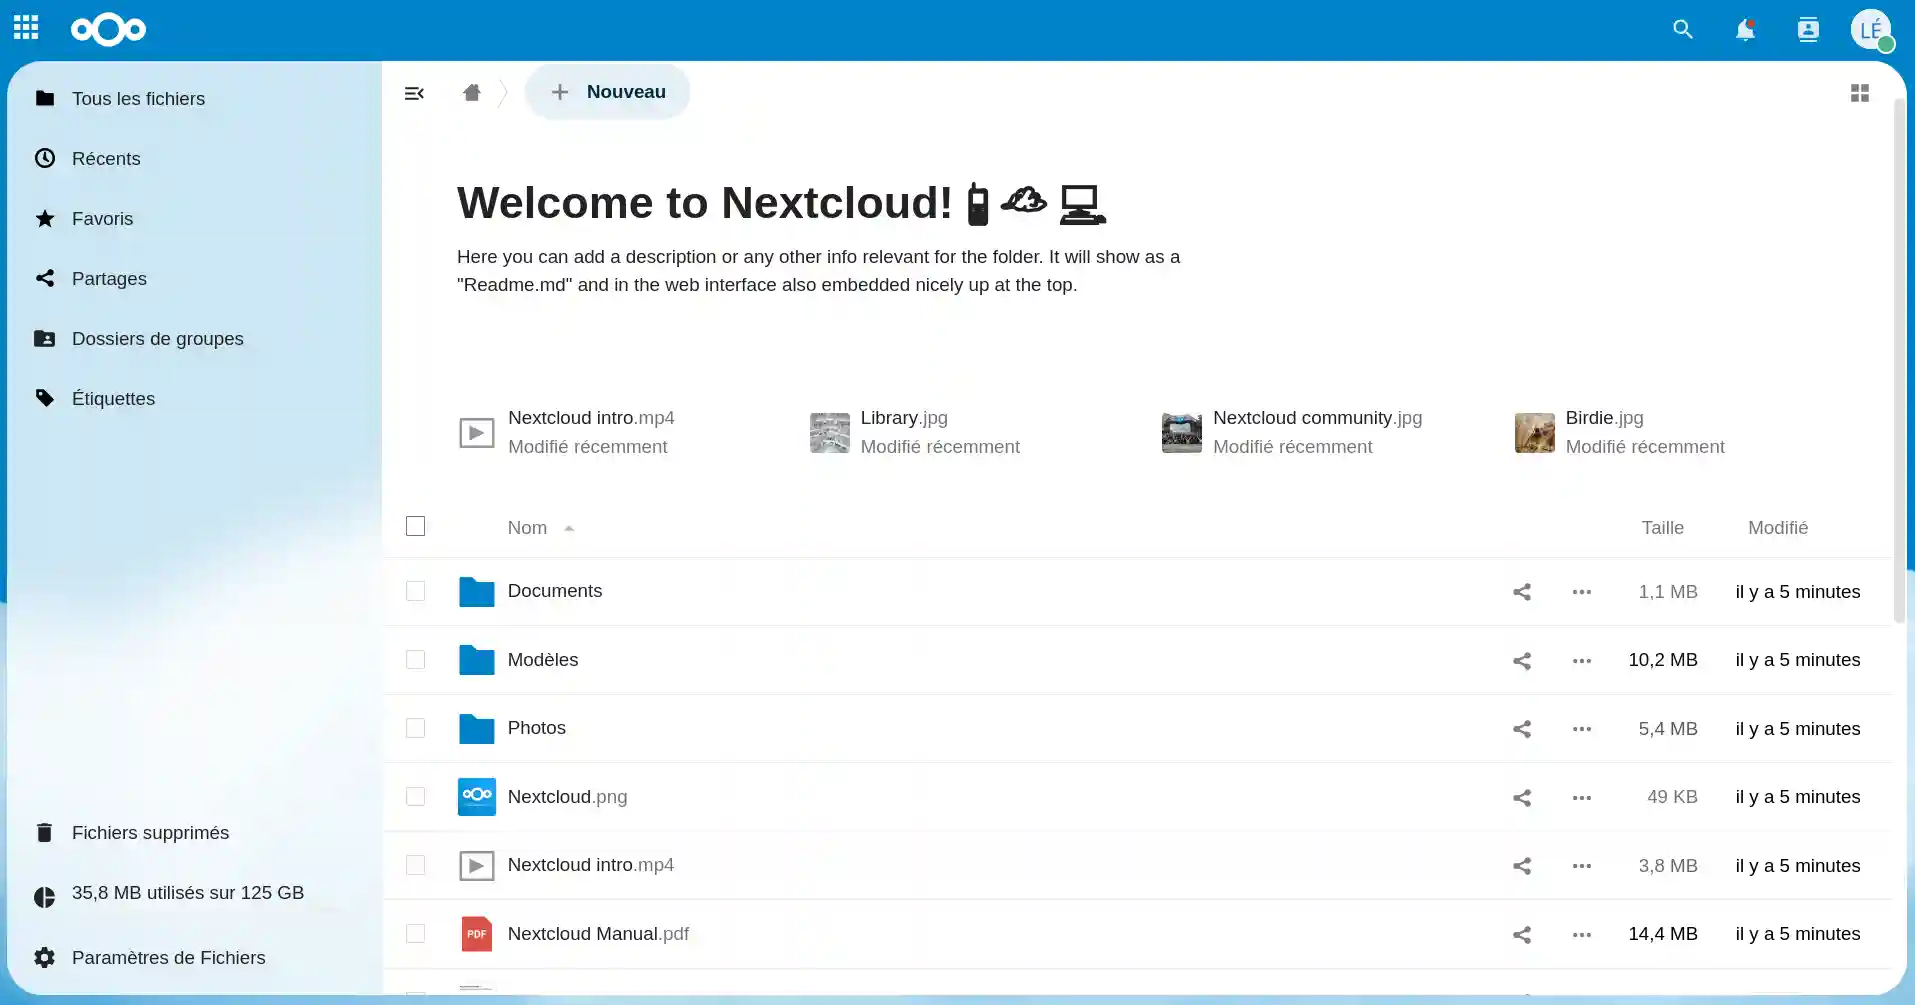
2. If the connection was successful, you will be redirected to the"files" section of your Nextcloud storage space. This section allows you to view your various web storage directories, recently added files and shared files.
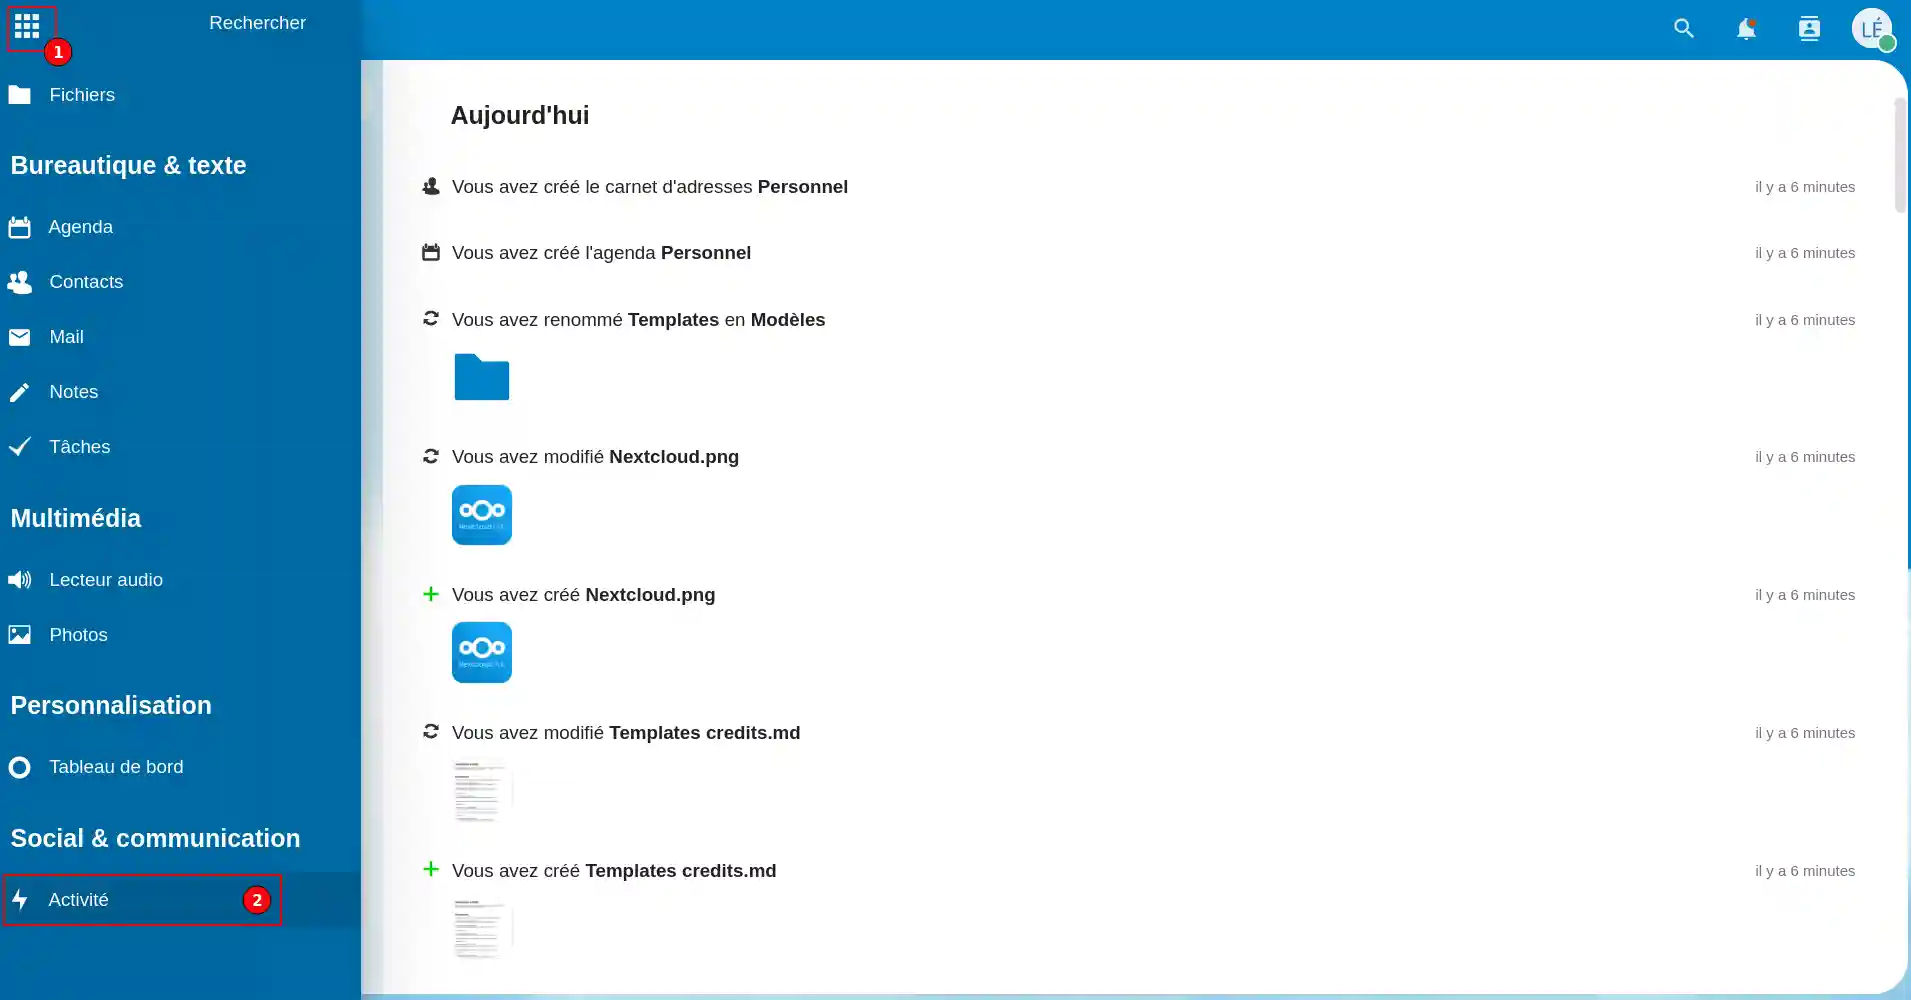
The"Activities" item (2) in the menu (1) allows you to monitor the activity of your storage space. You can find the last files synchronised, the last files modified and the person who modified the file. This is a log showing all the activity of your Nextcloud application.
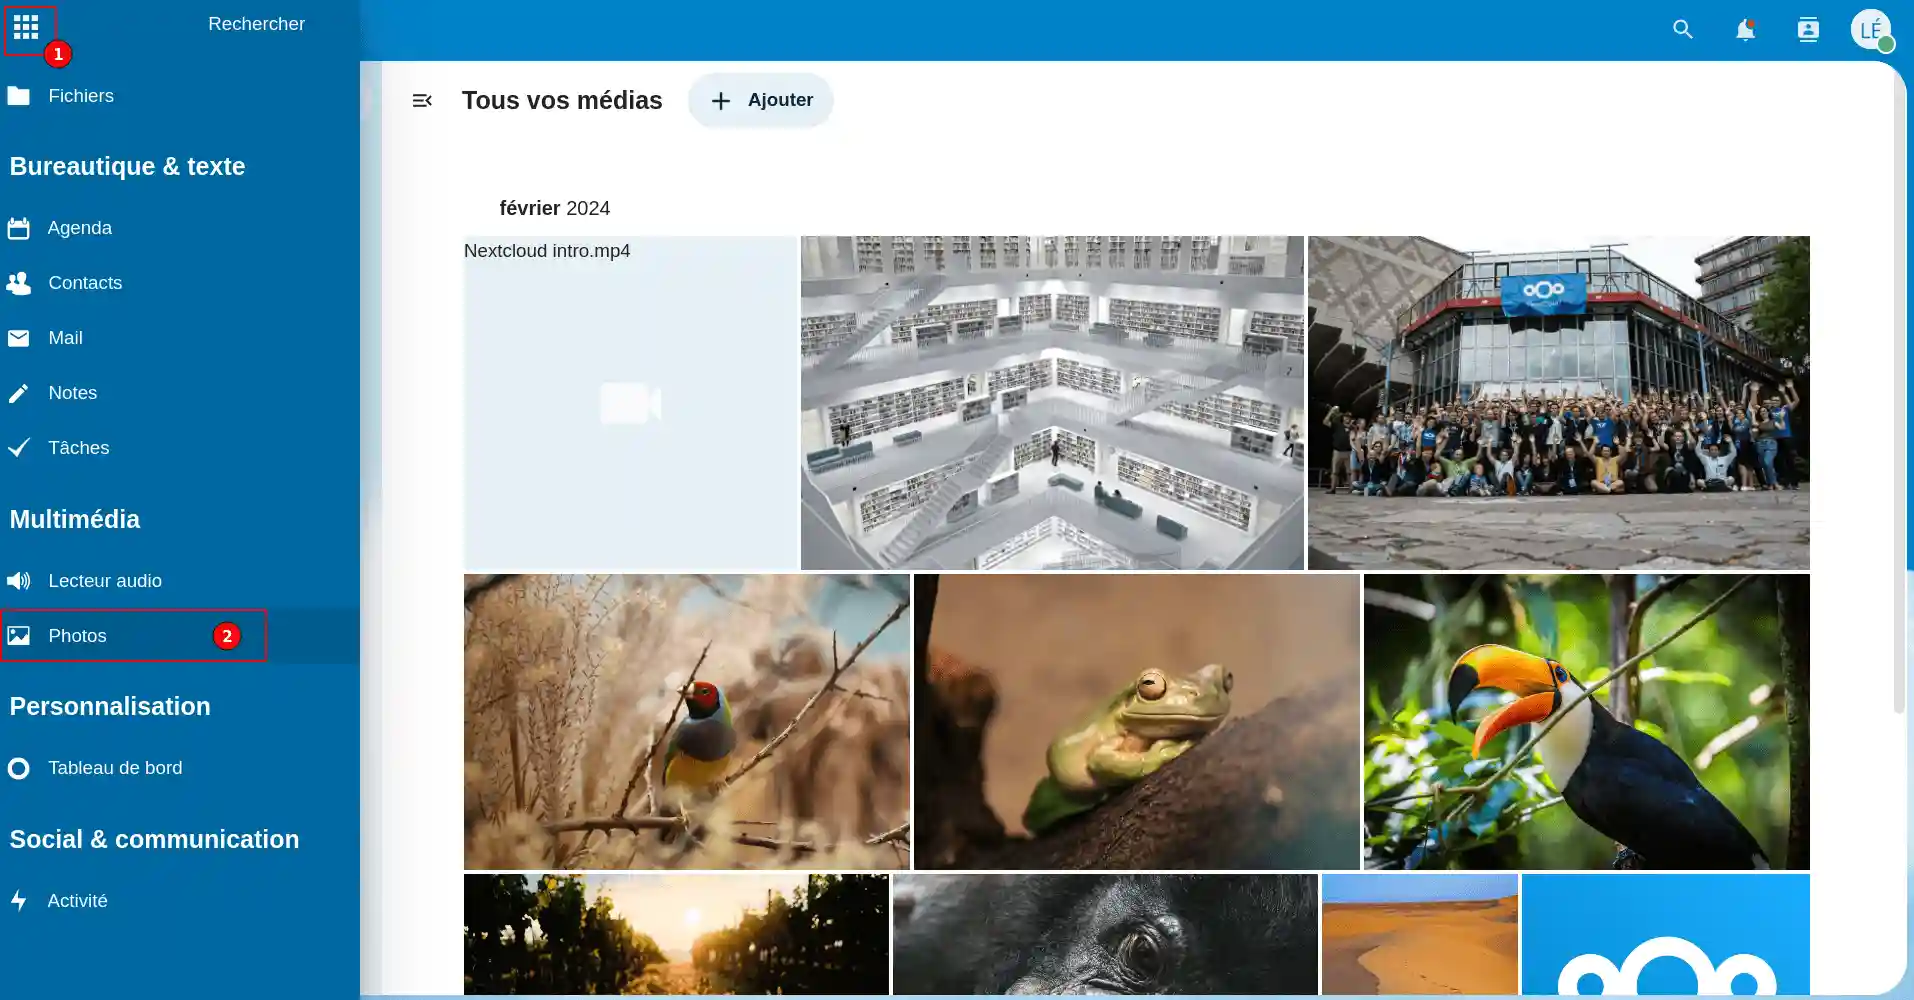
The"Photos" item (2) in the menu (1) allows you to view your various photo folders.
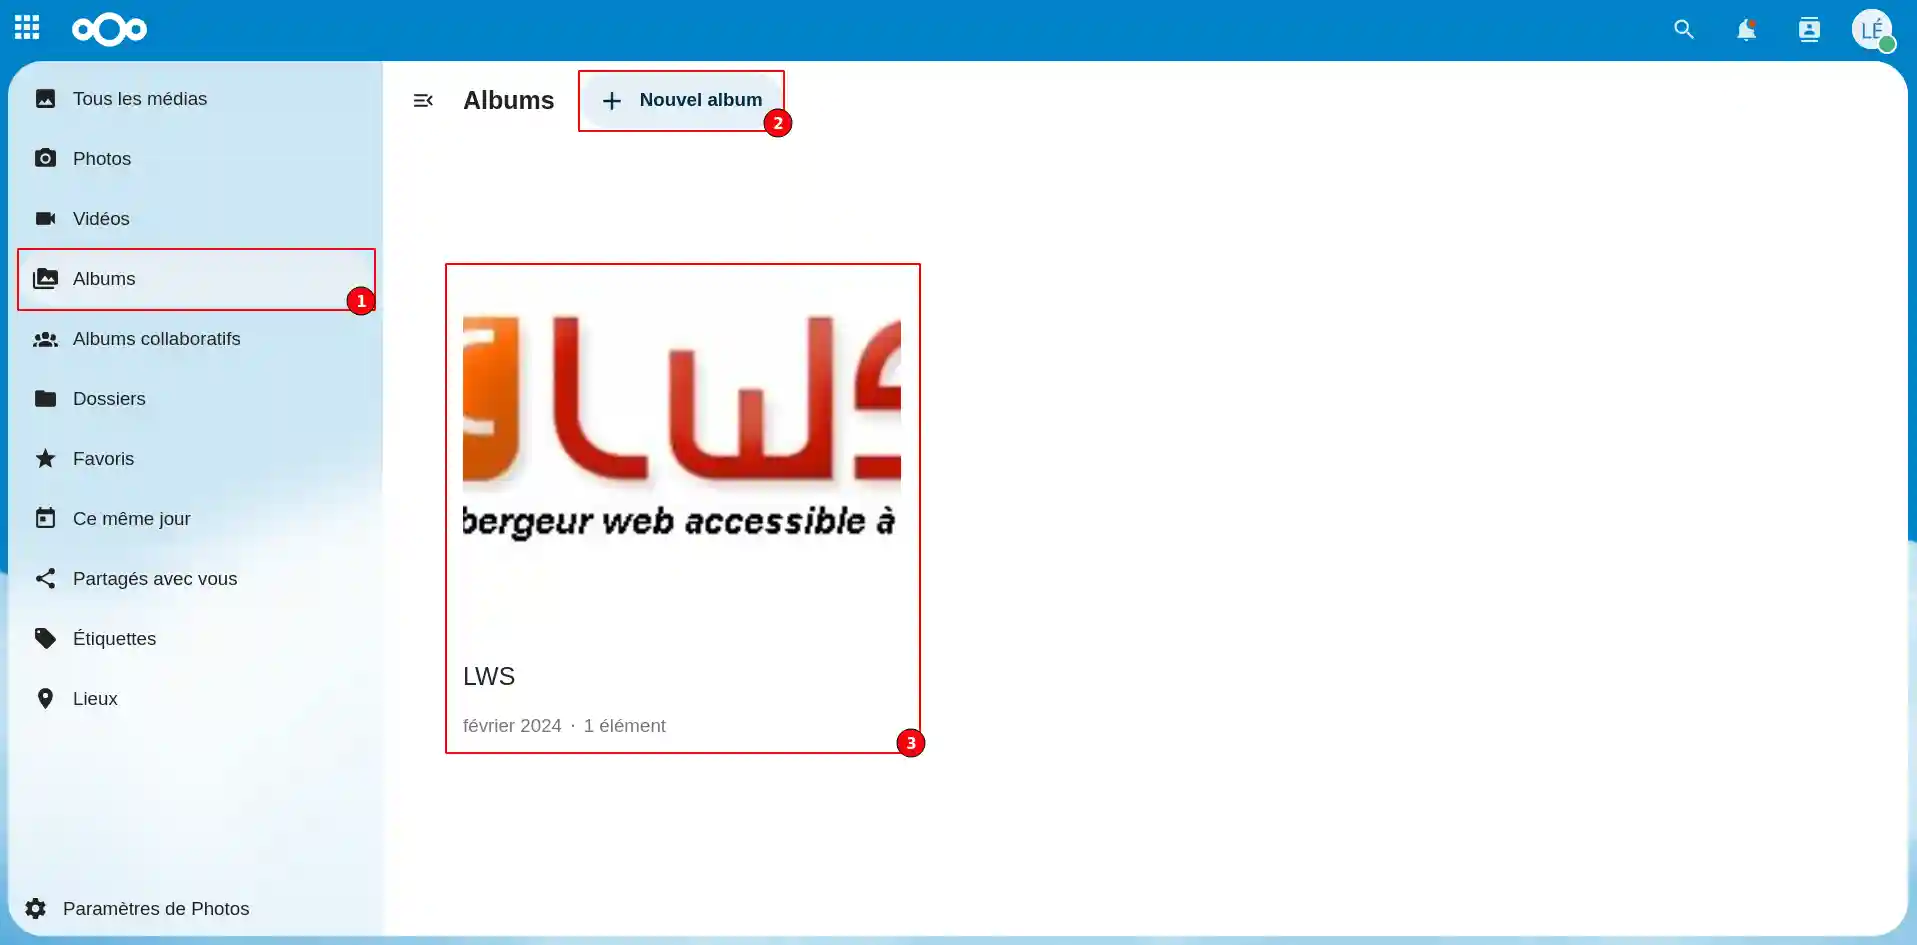
To add media (photos or videos), click on the"Albums" item (1) in the left-hand menu and then create an album by clicking on the"+ New Album" button (2). If you want to add the media to an existing album, simply select it (3).
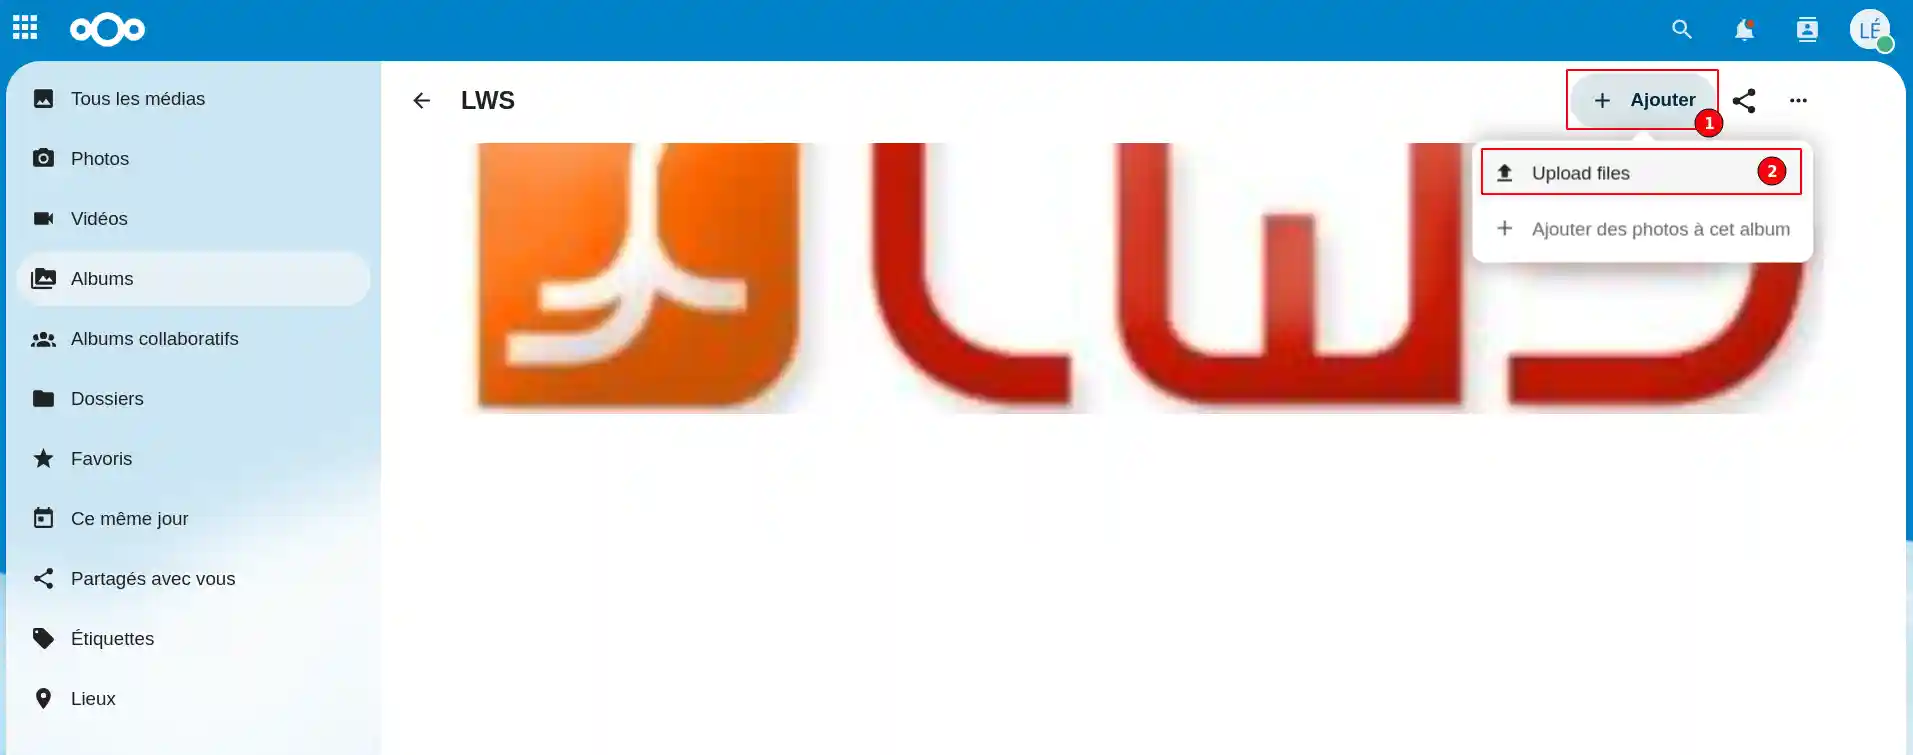
Once in the album of your choice, click on the"Add" button (1) then"Upload files" (2) to upload the documents you want.
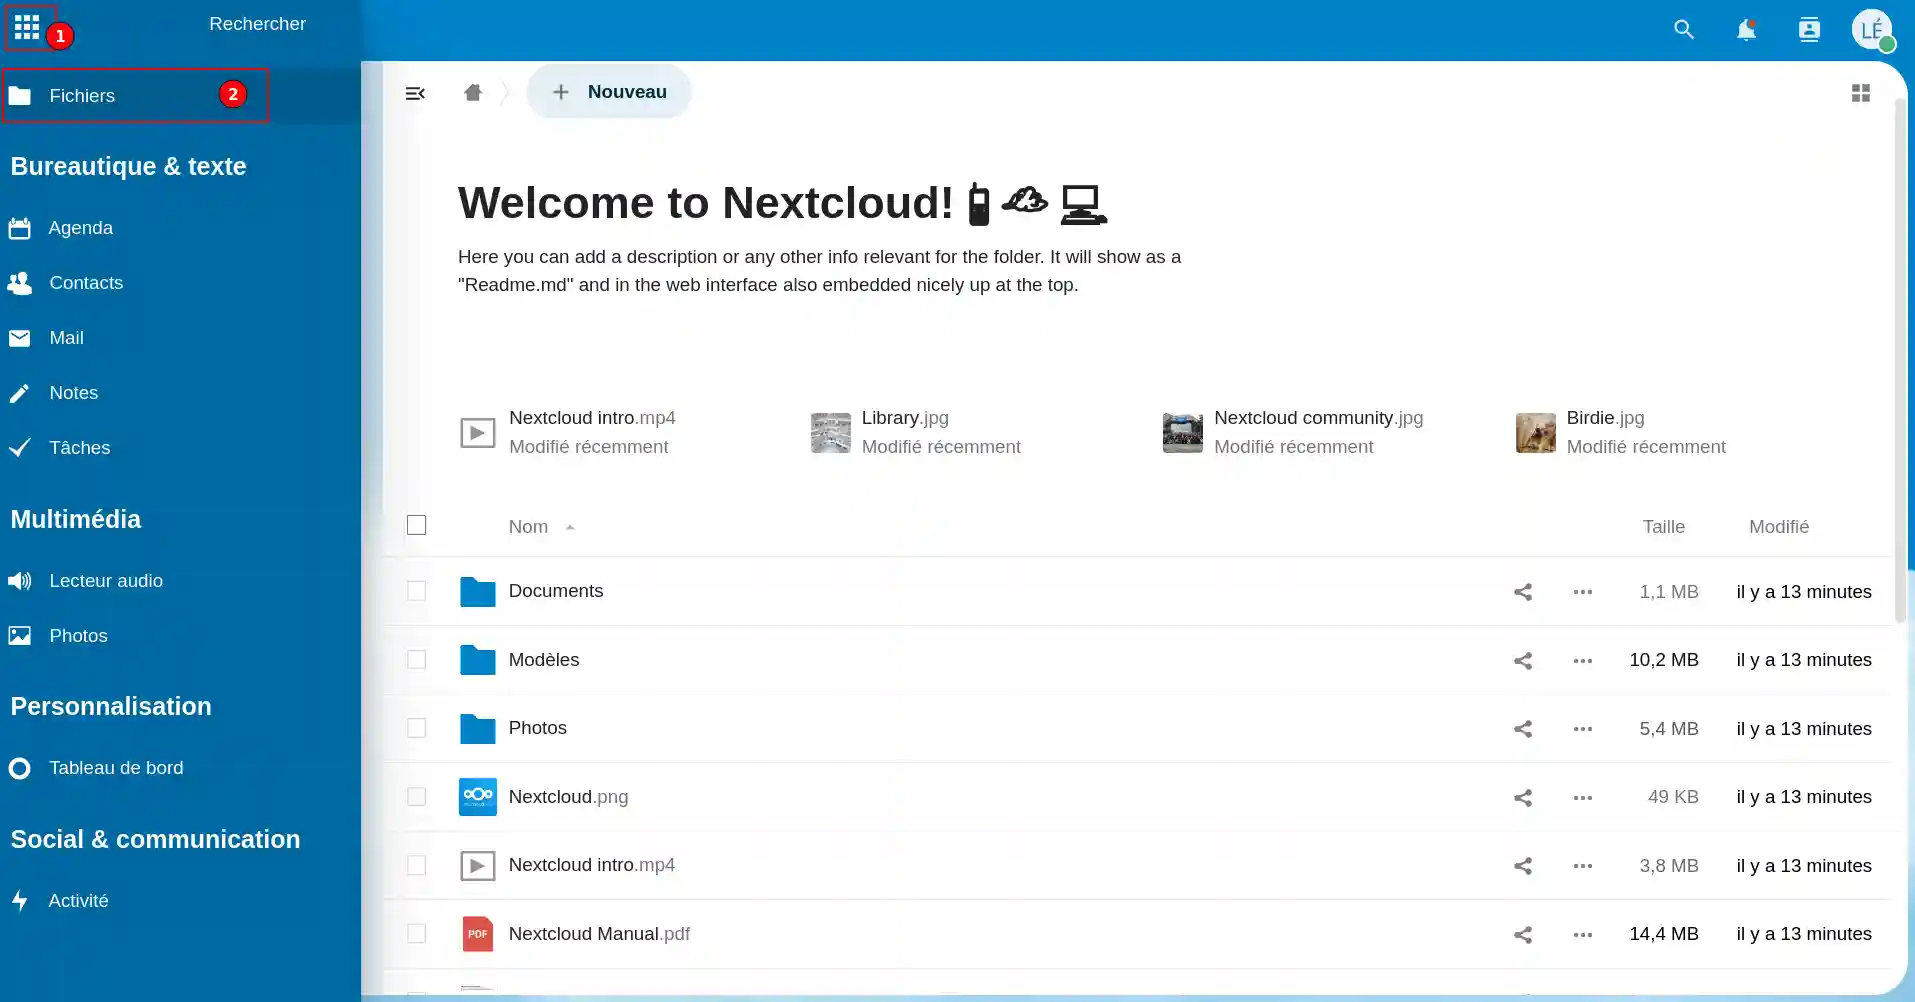
The"Files" item (2) in the menu (1) allows you to view your various documents.
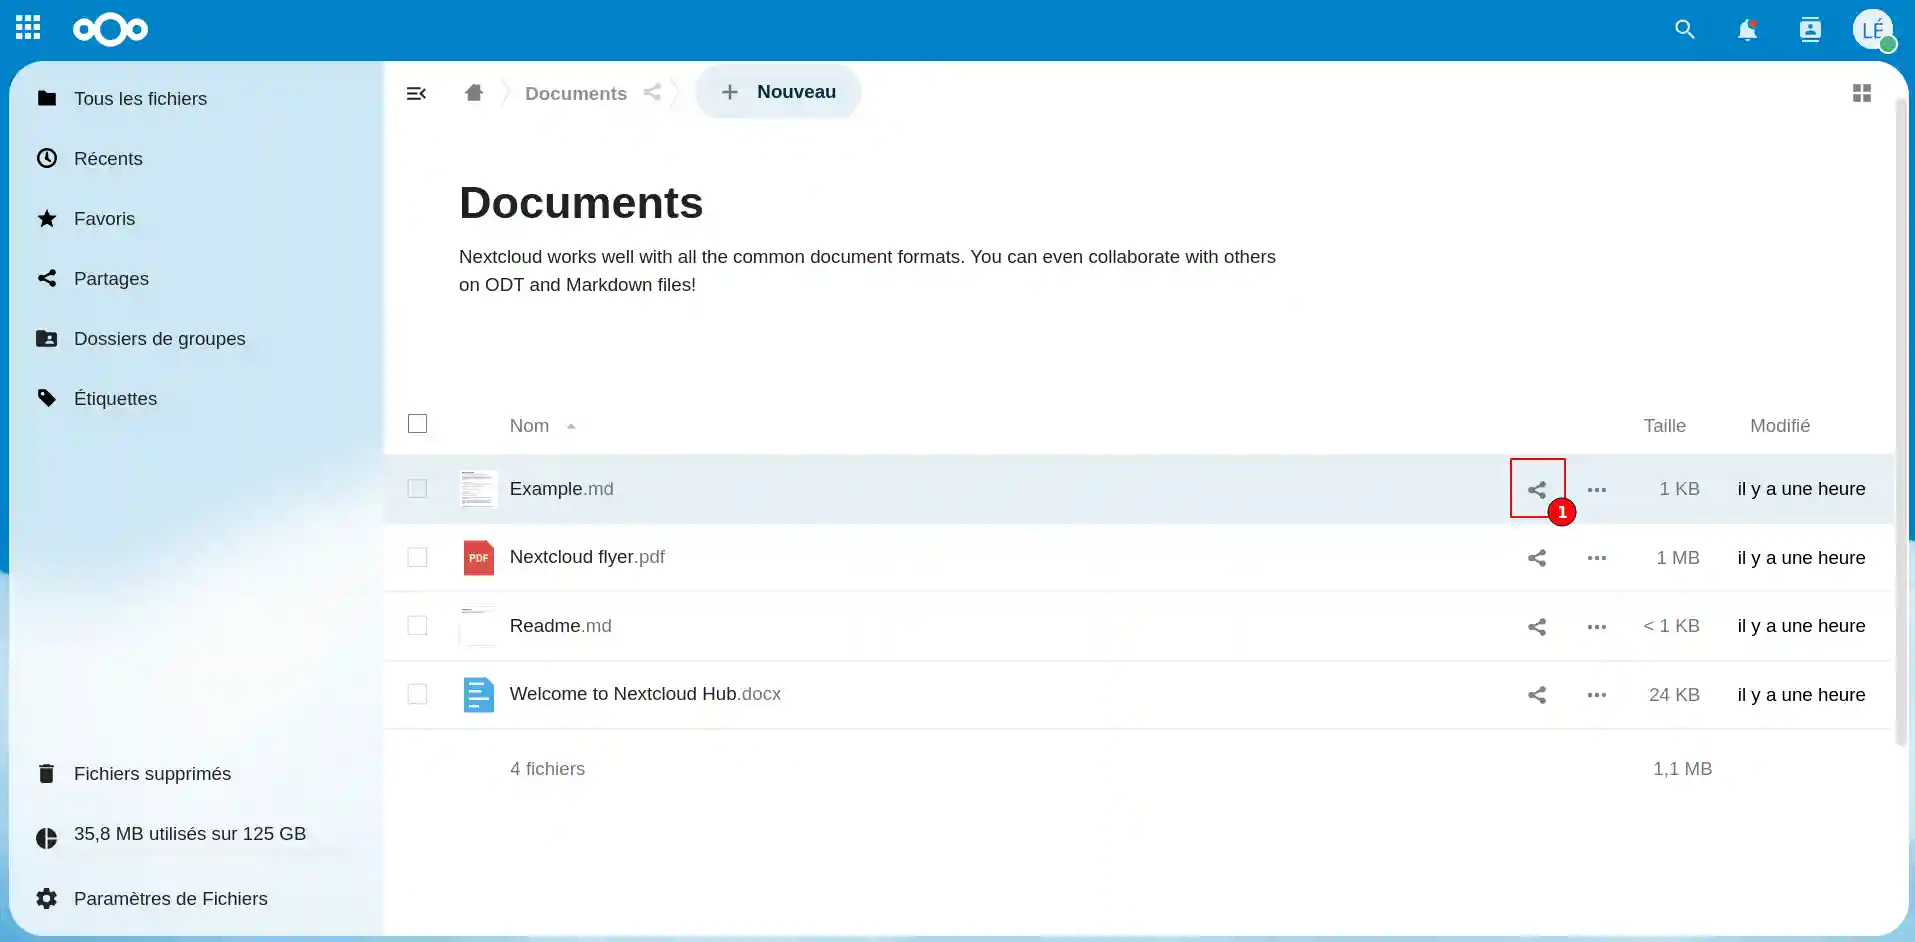
You can share all the files on your web application. To do this, click on the folder to view the files. Click on the share icon (1) located on the line of the document you wish to share.
You can share the document with one of your contacts or share it publicly. If you share it publicly, anyone who knows about the link will be able to view the document. To prevent your document from being seen by everyone, you can personalise the link to protect it with a password.
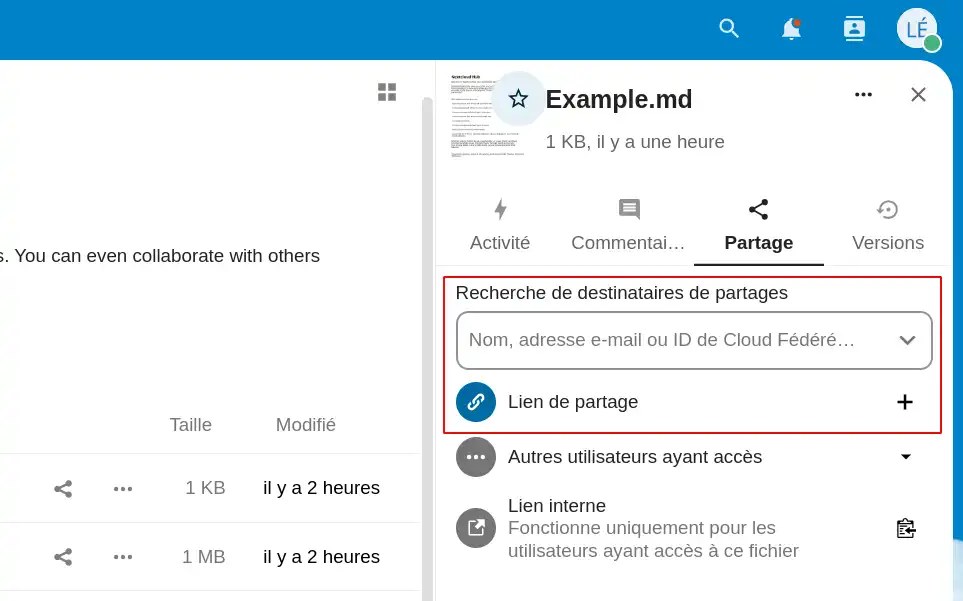
If you put a password on your document, you can set a validity period for it. As soon as the period expires, the password will no longer be valid for viewing the document, but it will still be protected.
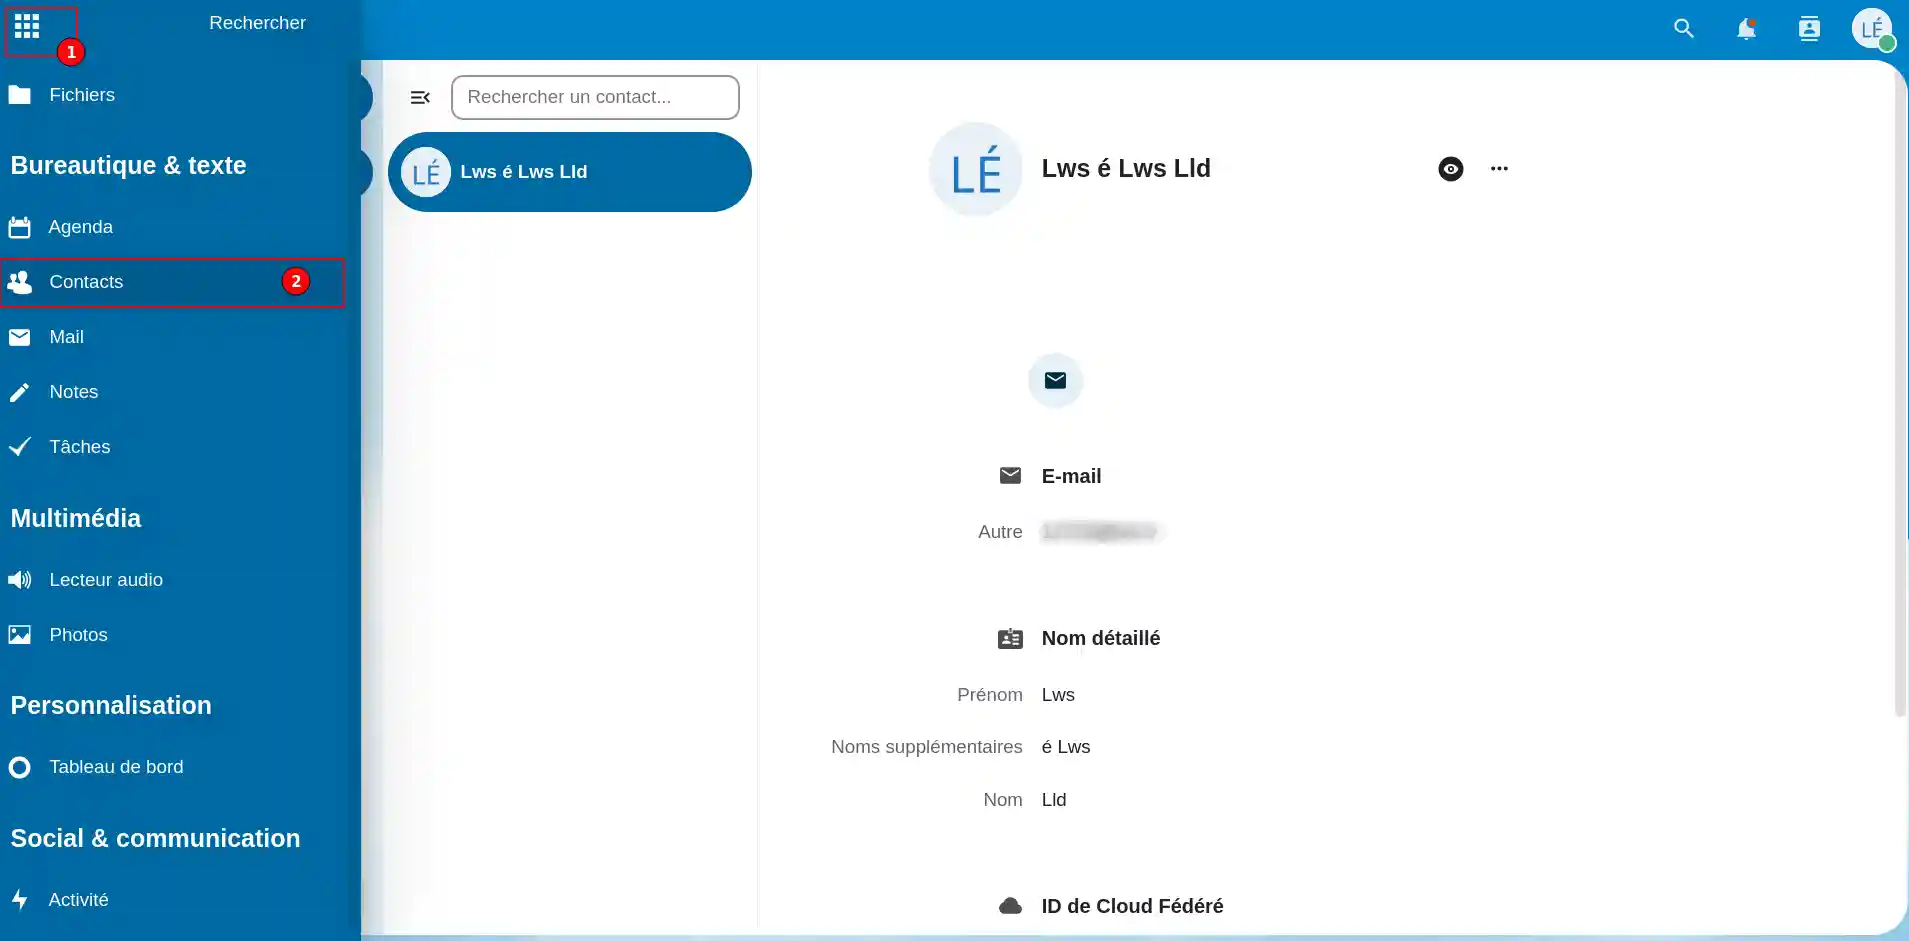
The"Contact" item (2) in the menu (1) allows you to manage your contacts efficiently. You can create groups of contacts (by job, by activity), and enter the email address of each contact as well as personal information.
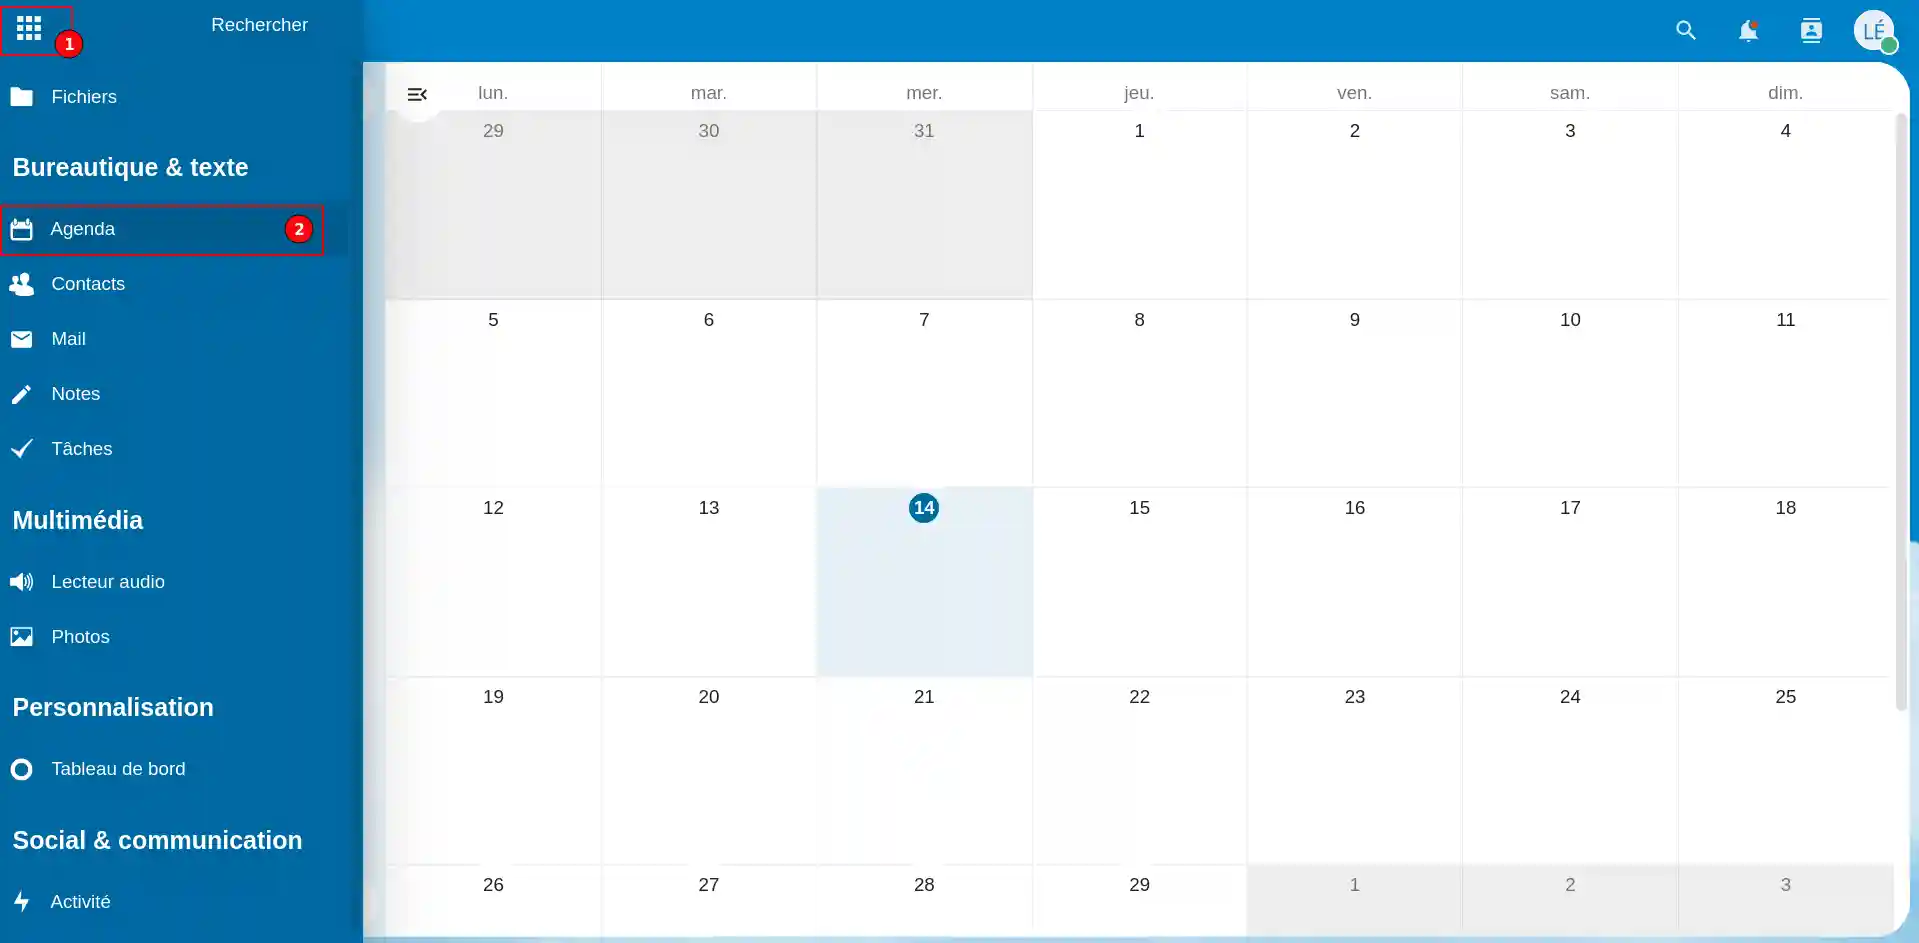
The"Diary" item (2) in the menu (1) allows you to manage a collaborative diary online. You can also share your diary with one of your contacts or another person who has a personal diary on another online storage application.
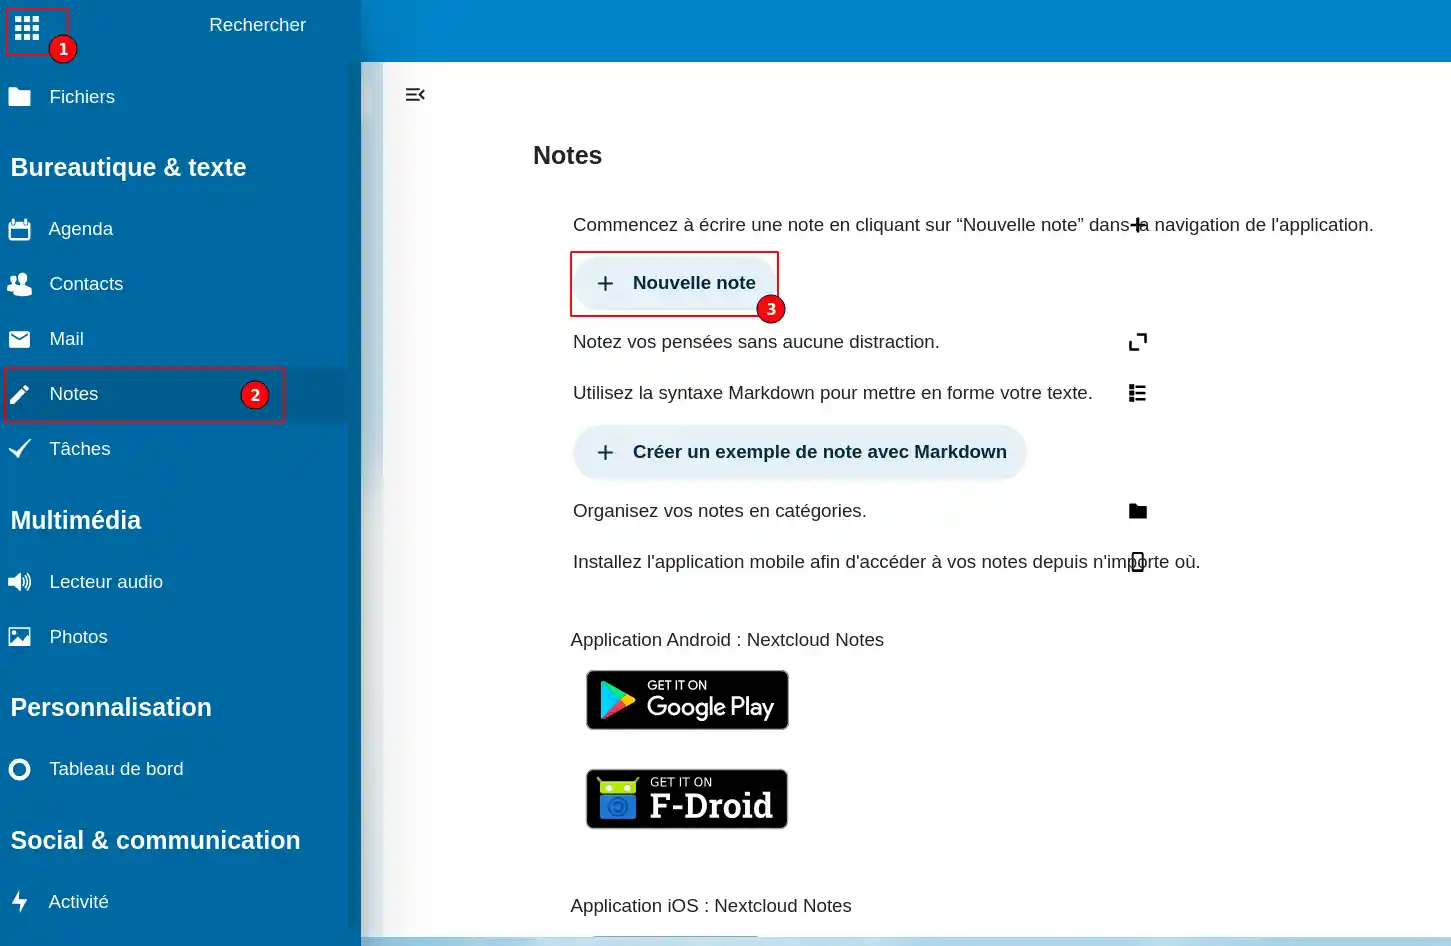
The"Notes" item (2) in the menu (1) lets you add a note so that you don't forget a task you need to do, for example. To add a note, click on the"+ New note" button (3).
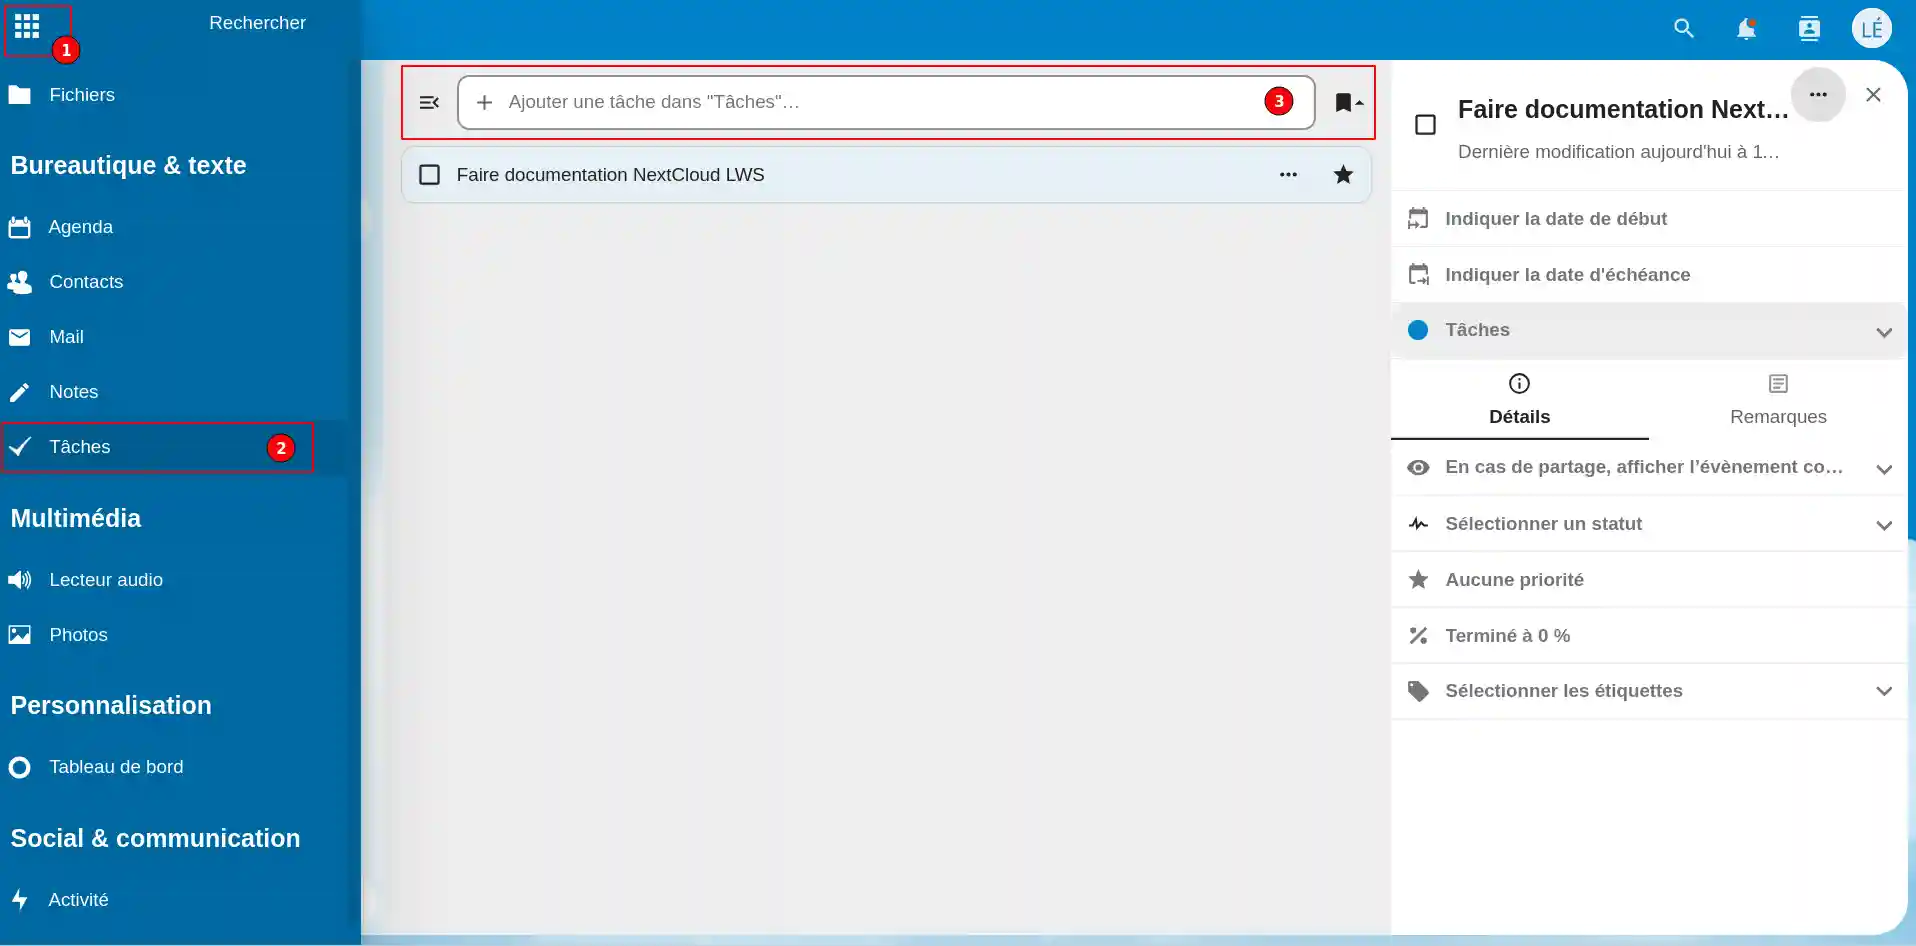
The"Tasks" item (2) in the menu (1) lets youadd tasks (3) to be carried out, specifying a start and end date for each one. You can set a priority for each task.
If you don't yet have an online storage package or would like to upgrade to a cloud storage package with advanced features, consult this documentation to place your order, and find information about Nextcloud and Nextcloud Pro packages here.
Rate this article :
4.3/5 | 3 opinion
This article was useful to you ?
Yes
No
9mn reading
Getting started with Nextcloud
5mn reading
Access your Nextcloud web application
3mn reading
FAQ The possibilities of the Nextcloud web application
0mn reading
Configure two-factor authentication on Nextcloud (2FA)
Bonjour,
Merci de votre retour.
Malheureusement, Nextcloud étant une plateforme commune à tous nos clients, les changements de menus et autres modifications ne peut-être, car cela reviendrait à changer l'interface de tous nos clients.
Je vous remercie pour votre attention et reste à votre disposition pour toute autre question ou complément d'information.
Nous vous invitons à contacter notre service support à travers votre espace client, afin de vous apporter une aide si vous rencontrez des difficultés quelconques. (https://aide.lws.fr/a/268)
Cordialement, L'équipe LWS