Rate this article :
This article was useful to you ?
Yes
No
Vous avez noté 0 étoile(s)
Procédure
This documentation describes the procedure for the older version of SiteBuilder. If you are using the latest version of SiteBuilder, you will need to refer to this documentation.
A page header is a defined area of your website. This area is often calledthe "Header" by web developers. The header generally contains the title of your site, a logo or a banner.
When creating your website, the header is the most important element because it is positioned at the top of the page. It is the first thing visitors will see on your website. As the header is an element present on every page of your website, it is important that it is not too intrusive and that it does not bore the interest of your visitors. It is also essential that your header loads quickly. If it takes too long to appear, visitors may well decide to visit other websites rather than yours.
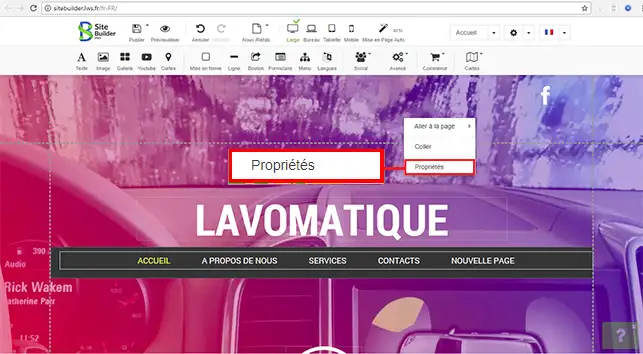
1. To add a header image to your website, right-click in the centre of your page, then click on"Property".

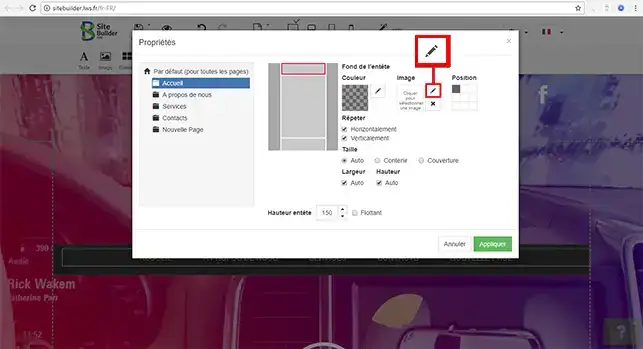
2. A new window will open. You can define the background colour of your header, the image and the position of the header. Click on the stylus in the image area. This will allow you to select an image.

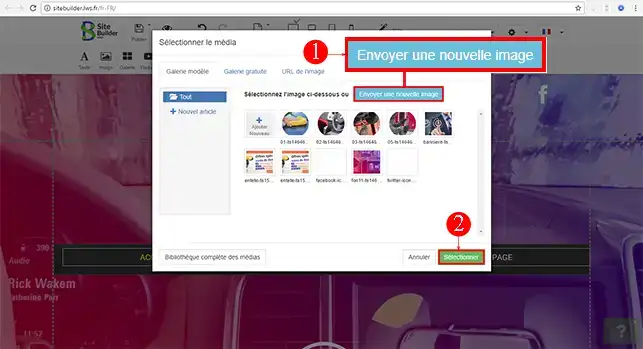
3. Click on the"Send a new image" button to select one from your computer. Once the image has been uploaded, click on the"Select" button to define your choice.

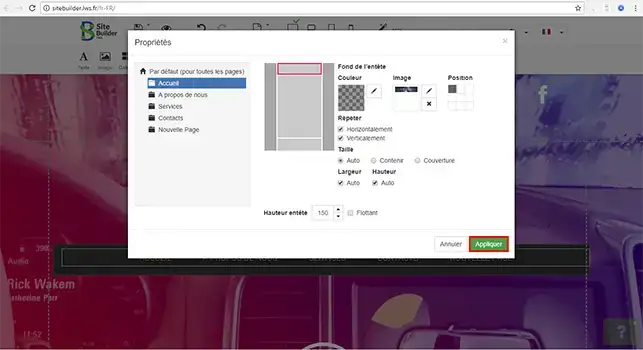
4. Finally, click on"Apply" to place your image on your page header.

You can now add a header to your website created on your web hosting with LWS. The header remains an important element of your website that shouldn't be neglected as it's the first thing your visitors will see when they arrive on your website.
Don't hesitate to share your comments and questions!
Rate this article :
This article was useful to you ?
Yes
No
1mn reading
How do I create a forced redirect in SiteBuilder Pro?
0mn reading
How do I migrate a website to SiteBuilder Pro?
0mn reading
How do I add documents for download in SiteBuilder Pro?