Rate this article :
2/5 | 2 opinion
This article was useful to you ?
Yes
No
Vous avez noté 0 étoile(s)
Sommaire
Procédure
The logo is essential when designing your website. It is often a point of reference for your visitors. It conveys the image of your brand on the web through its design.
It identifies your company at a glance. A logo is used to:
For your logo to be successful, it must:
Some websites, such as Fiverr, offer professional logo creation services.
1. Log on toyour site administration in SiteBuilder Pro
2. Click on the"Image" tab on the SiteBuilder Pro toolbar and drag and drop the tool to the desired location on your website.
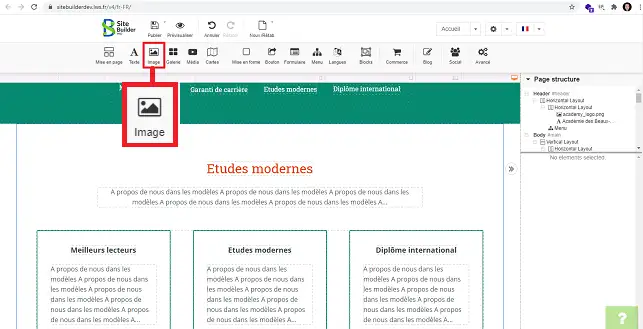
3. A new window will open, allowing you to select the type of image you want.
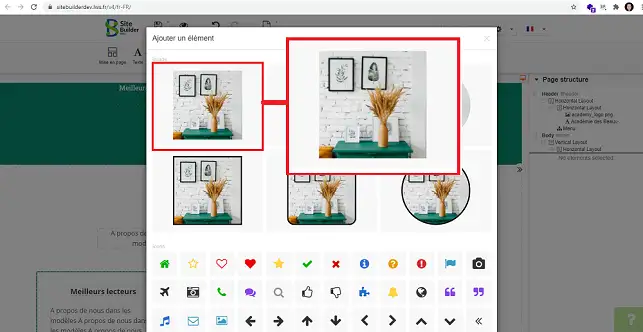
4. Click on"Add New" to upload your logo.
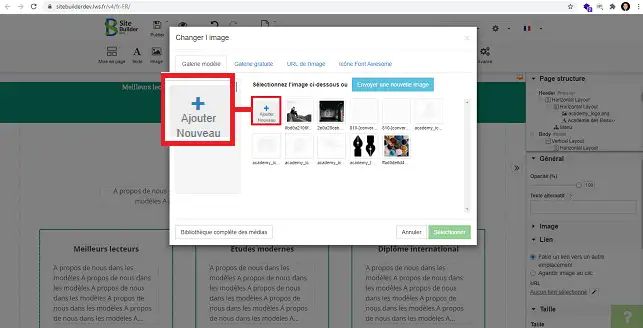
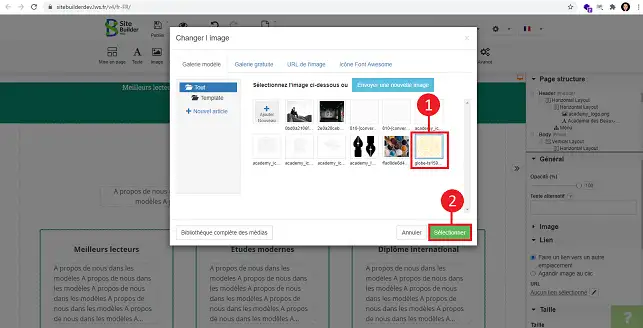
5. Select the logo you have just uploaded and click on the"Select" button.
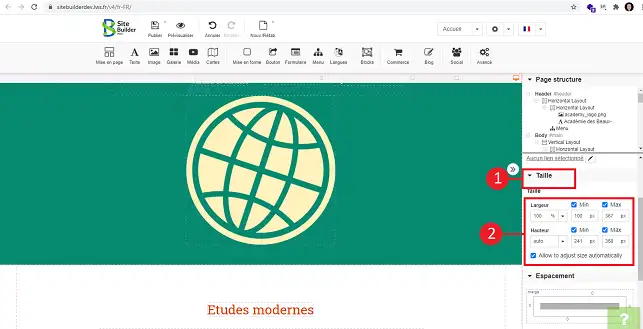
6. To change the size of your logo, select it and go to"Size" in the right-hand column of SiteBuilder.
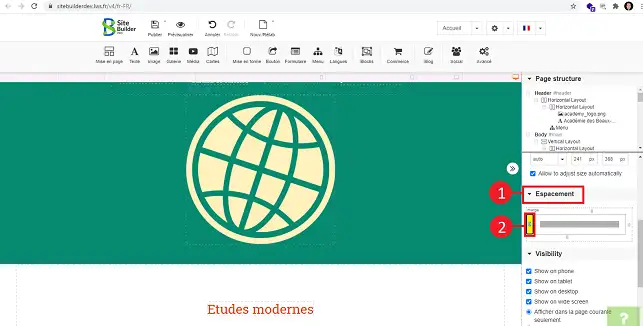
7. You can define the spacing of your logo (top, bottom, left or right) by going to the"Spacing" section in the right-hand column of your SiteBuilder interface.
You can now add a logo to SiteBuilder Pro with your LWS web hosting. Adding a logo is essential to help your visitors identify you and to build loyalty.
Don't hesitate to share your comments and questions!
Rate this article :
2/5 | 2 opinion
This article was useful to you ?
Yes
No
3mn reading
Changing the font and colour of text in SiteBuilder Pro
2mn reading
How do I add a Favicon to SiteBuilder Pro?
2mn reading
How do I create or edit a menu with SiteBuilder Pro?
1mn reading
How can you optimise your site for Smartphones and Tablets?