Rate this article :
5/5 | 4 opinion
This article was useful to you ?
Yes
No
Vous avez noté 0 étoile(s)
Sommaire
Procédure
The Let's Encrypt project, sponsored by major web companies, aims to offer free SSL certificates with simplified installation.
Let's Encrypt free SSL certificates enable you to offer secure connections on your website, encrypt the content exchanged, ensure the identity of the server and prevent the content from being altered.
Installing a Let's Encrypt SSL certificate helps to reassure visitors and improve natural referencing, given that Google favours https websites.
If you have already configured a self-signed certificate on your site or if you have an invalid certificate on your domain, you will first need to disable redirection to https before configuring your Let's Encrypt certificate.
To do this


1. My ISPconfig panel has the Let's Encrypt option.

In this case, please refer to this documentation: https://help.lws-hosting.com/en/activate-SSL-with-ISPConfig-3-https
2. My ISPconfig panel does not have the Let's Encrypt option
This method is performed partly on the command line from an SSH console. If you don't know how to use SSH, please contact our technical support team.
Download the Let's Encrypt software (from the SSH console):
cd /root/
git clone https://github.com/letsencrypt/letsencrypt.git
cd letsencrypt/
Run the binary that will generate our certificates. This may take some time. The program will ask you for an email address, so make sure you enter a valid address. Make sure you also enter a valid domain name:
/root/letsencrypt/letsencrypt-auto certonly --webroot -w /var/www/monsite.com/web/ -d monsite.com -d www.monsite.com
The "-d " option is used to specify the site for which the certificate is being created (note that the domain is specified with www). The " -w " option specifies the root directory of the site in question. It is possible to create several certificates at once:
/root/letsencrypt/letsencrypt-auto certonly --webroot -w /var/www/monsite.com1/web/-d monsite1.com -d www.monsite1.com -w /var/www/monsite2.com/web/ -d monsite2.com -d www.monsite2.com
The generated certificates are stored in the directory: /etc/letsencrypt/live/monsite.com/.
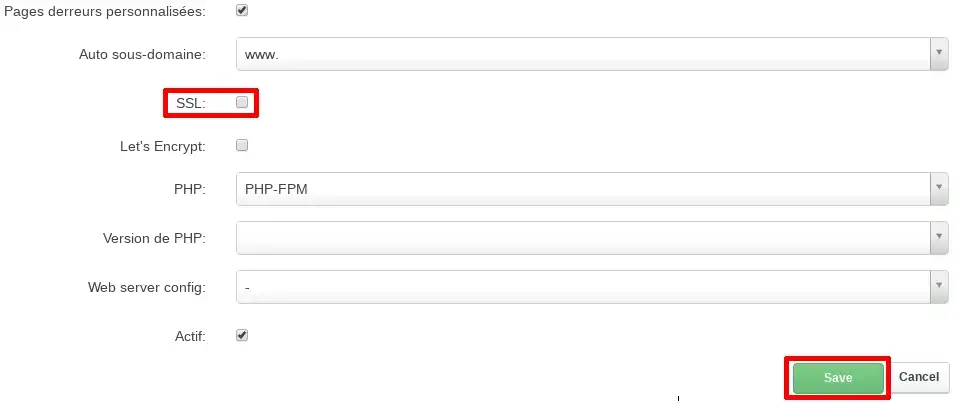
We start by creating a self-signed certificate for the desired site. To do this, please see our documentation on the subject: How do I activate SSL on my VPS server?
Make sure you select your domain without "www" in the "SSL Domain" field.
Once the self-signed certificate has been created, we'll replace it with the one generated via Let's Encrypt.
To do this, simply create a symbolic link between the certificates set up by ISPconfig and those from Let's Encrypt:
WARNING: In all the commands that follow, "monsite.com" must be replaced by the name of your site without "www".
rm -f /var/www/monsite.com/ssl/monsite.com.key
rm -f /var/www/monsite.com/ssl/monsite.com.crt
ATTENTION: "/etc/letsencrypt/live/monsite.com" may take the form "/etc/letsencrypt/live/monsite.com-xxx". In this case, please find the exact name of the directory with the command "ls /etc/letsencrypt/live/" and adjust the following two commands.
ln -s /etc/letsencrypt/live/monsite.com/privkey.pem /var/www/monsite.com/ssl/monsite.com.key
ln -s /etc/letsencrypt/live/monsite.com/cert.pem /var/www/monsite.com/ssl/monsite.com.crt
service apache2 reload
WARNING: if you make any changes in ISPconfig under the SSL tab, this will overwrite the configuration we have just set up.
3. Automatic renewal via a CRONTAB
By default, certificates are only valid for three months. We are therefore going to set up an automatic task that will update them for us.
00 04 1 * * /root/letsencrypt/letsencrypt-auto certonly --renew-by-default--webroot -w /var/www/monsite.com/web/ -d monsite.com -d www.monsite.com >> /var/log/letsencrypt_monsite.com.log
Renewal will take place every first of the month at 04:00 in the morning.
This step can also be carried out on the command line from an SSH console. If you don't know how to use SSH, please contact our technical support team, who can help you generate your certificate.
cd /root/
git clone https://github.com/letsencrypt/letsencrypt.git
cd letsencrypt/
Run the letsencrypt-auto binary :
./letsencrypt-auto
This first run will allow the software to install the prerequisites it needs (python etc...).
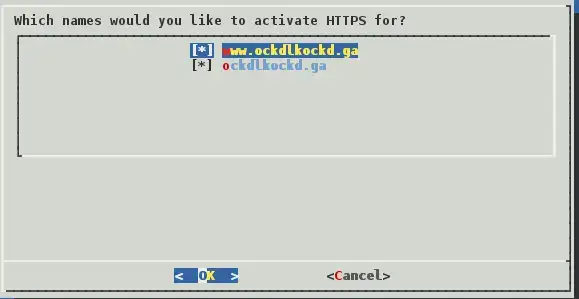
By default, the software will scan your Apache configuration and find the existing site (here ockdlkockd.ga). Leave the two boxes (with www and without) ticked and click OK:

Enter a contact email address:

Confirm the last steps and that's all. Your site is now accessible in HTTPS.
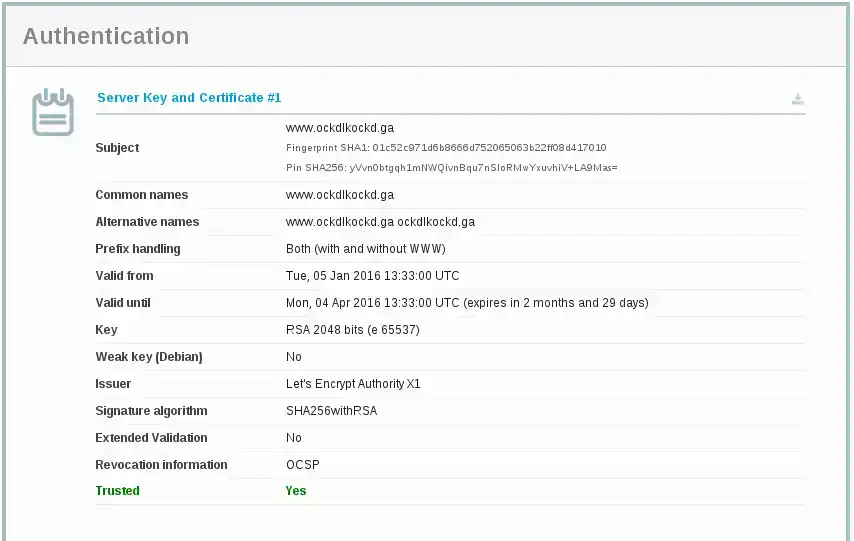
To do this, use the link provided by Let's Encrypt. Here: https: //www.ssllabs.com/ssltest/analyze.html?d=ockdlkockd.ga

The certificate is valid for 30 days. It is therefore essential to renew it regularly.
To do this, simply use the following command:
cd /root/letsencrypt
./letsencrypt-auto
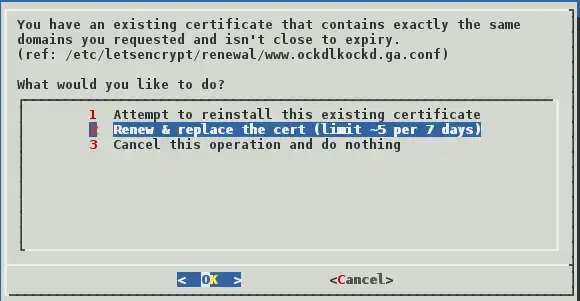
The software will prompt you to create a new certificate or renew the existing one:

Rate this article :
5/5 | 4 opinion
This article was useful to you ?
Yes
No
1mn reading
How do I activate an SSL certificate via ISPConfig3?
1mn reading
How do I activate SSL on my site with ISPConfig 3 (https)?