Rate this article :
5/5 | 1 opinion
This article was useful to you ?
Yes
No
Vous avez noté 0 étoile(s)
Sommaire
Procédure
Welcome to this practical guide dedicated to backing up your Qnap NAS server to the LWS Cloud Drive service via the WebDav protocol. The purpose of this document is to provide you with a clear and concise method of securing your important data using the advanced features of Qnap and the robust cloud storage solutions offered by LWS. Whether you're an individual looking to protect your personal memories or a business looking to preserve critical information, this guide will help you set up and run your backups efficiently and securely. Follow the detailed steps to enjoy the full benefits of a hybrid backup solution, guaranteeing the security and availability of your data.
In order to back up or synchronise your data from your Qnap NAS to your LWS Cloud Drive package, you will need to install an application on your NAS to perform this task. In this documentation, we'll take the example of the most popular application in this field: HBS 3 Hybrid Backup Sync.
To install the application, you first need to log on to your NAS server and then complete the following steps:
Step 1: Access the App Center on the NAS server

Step 2: Once in the App Center, select "All applications" from the menu(1), then click on the magnifying glass in the top right-hand corner(2) and search for "HBS 3"(3), then click on "Install" in the button below the HBS 3 application(4).
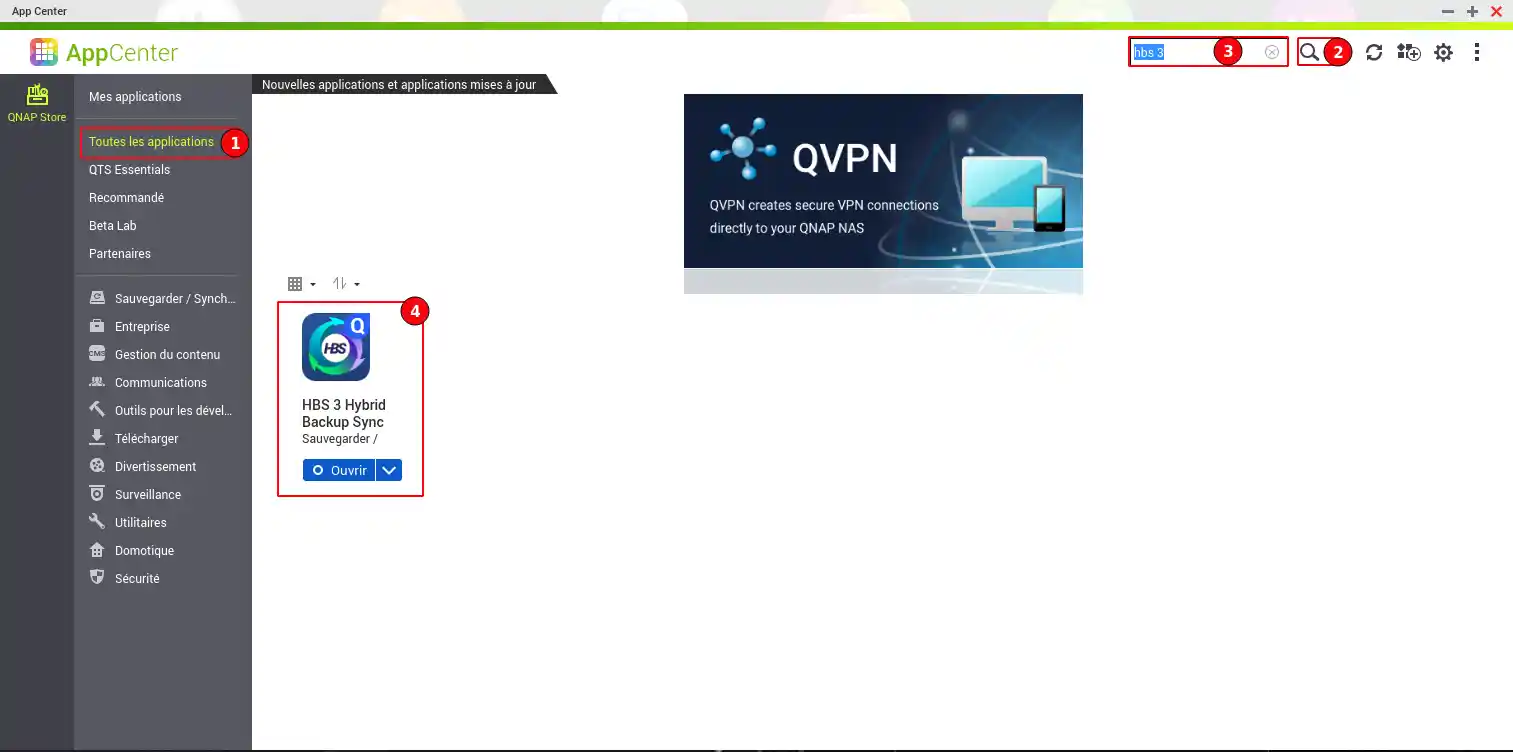
Once the application has been installed, you can open it directly from the App Center or return to the dashboard where the application icon appeared.

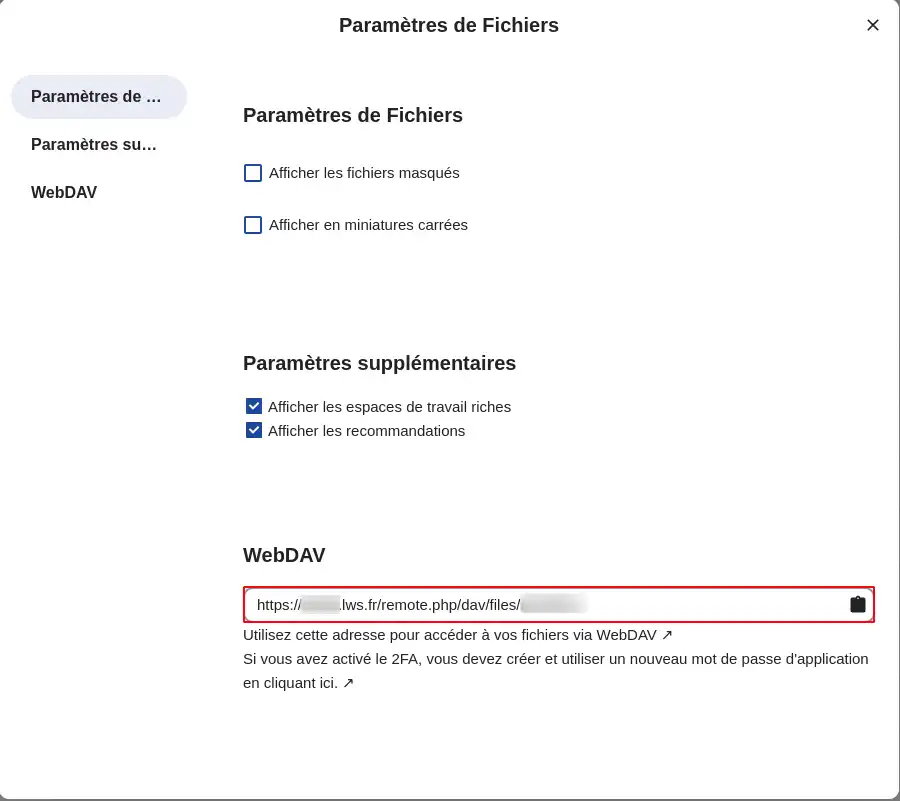
To find the WebDAV address to use to configure a backup job on a Nextcloud package, you need to follow this procedure:
Step 1: Log in to the Nextcloud application using your login details.
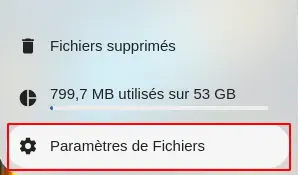
Step 2: In the left-hand menu, click on"File Settings".
Step 3: You will find the URL to use under"WebDAV".
To find the WebDAV address to use to configure a backup job on a Cloud Drive FTP/Rsync formula, you need to follow this procedure:
Step 1: Log in to your LWS customer area using your login details.
Step 2: Go to your Cloud Drive FTP/Rsync plan management.
Step 3: You will find the address of your storage server at the top.
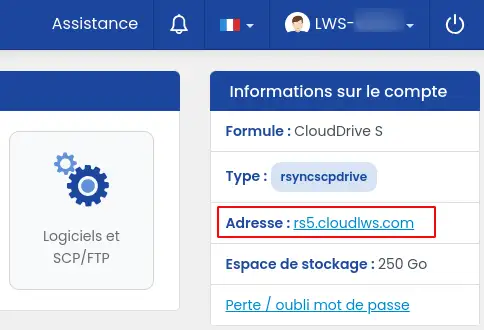
If the address of your storage server is, for example,"rs5.cloudlws.com", then the WebDAV URL to use will be: https: //rs5.cloudlws.com/files
Before you can set up a backup job between your Qnap NAS server and the Cloud Drive LWS, you must first make the connection between the two spaces.
Once the HBS 3 application has been launched, you can view the storage spaces already linked to your NAS server on the dashboard.
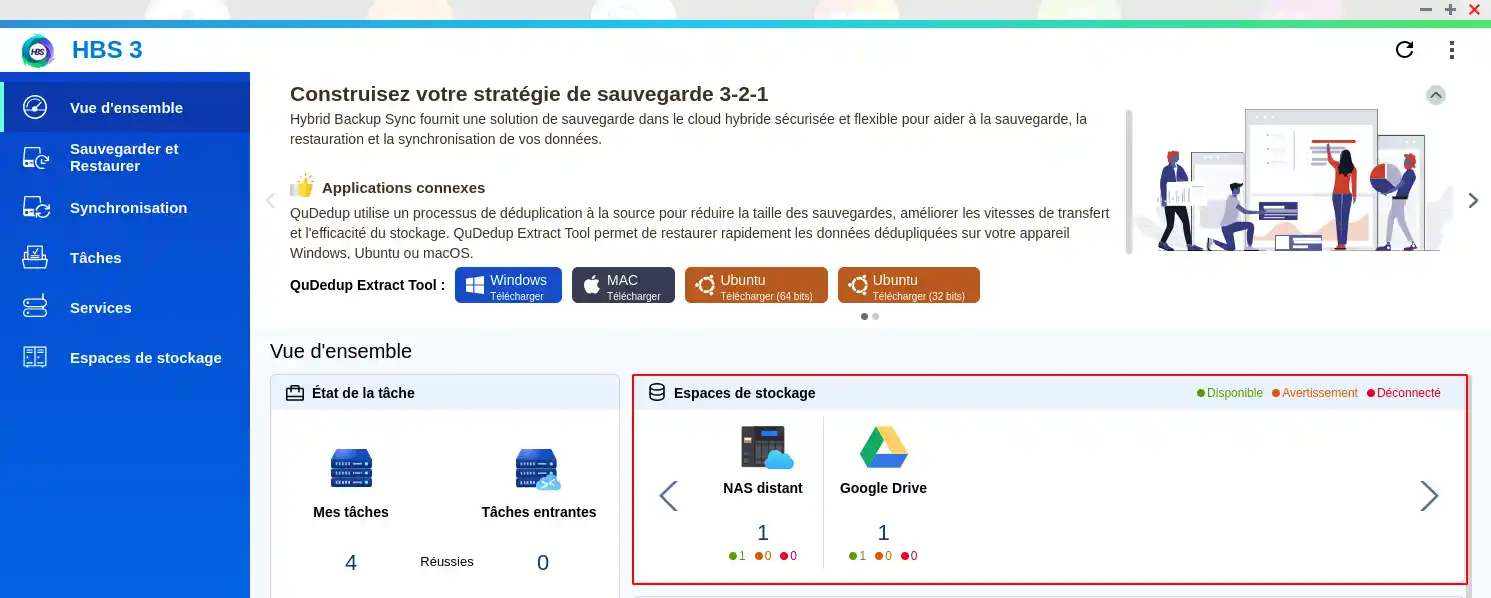
To add a new storage space, follow the steps below:
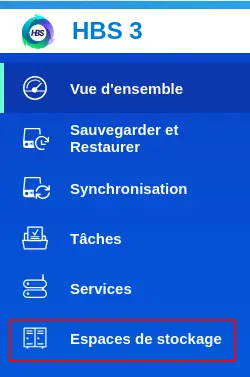
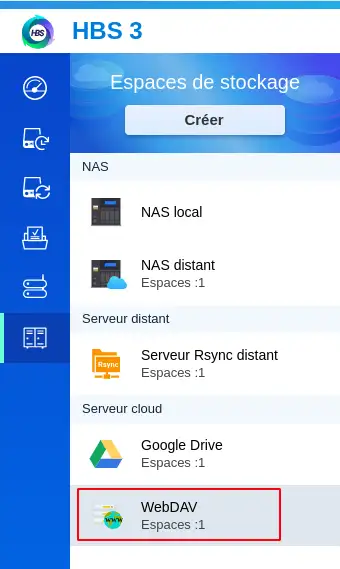
Step 1 : In the left-hand menu, click on"Storage space".
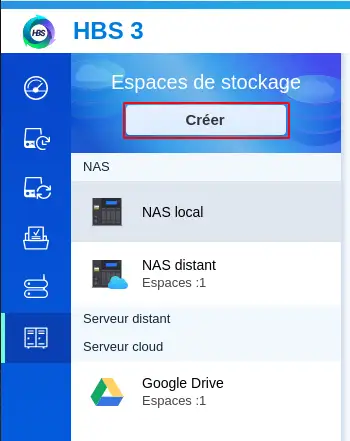
Step 2 : You will then see the storage spaces already linked to your NAS, then click on the"Create" button.
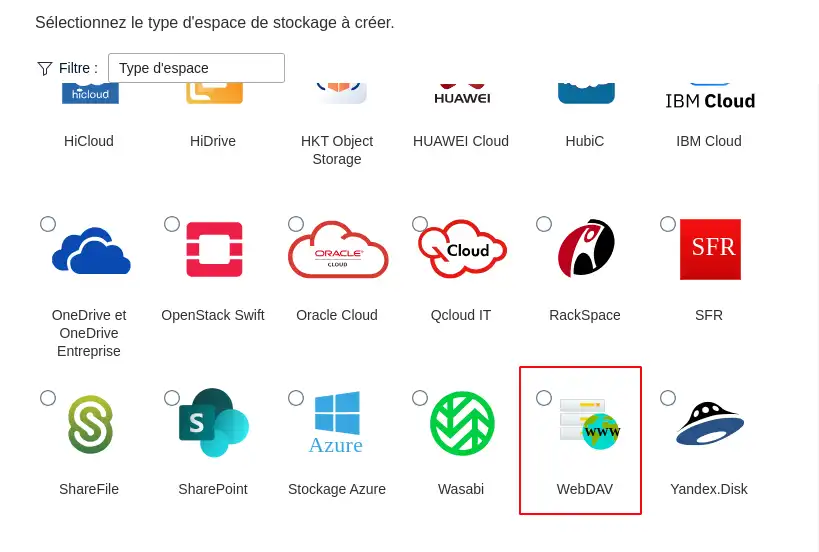
Step 3: Select the"WebDAV" storage type by scrolling through the different types available.
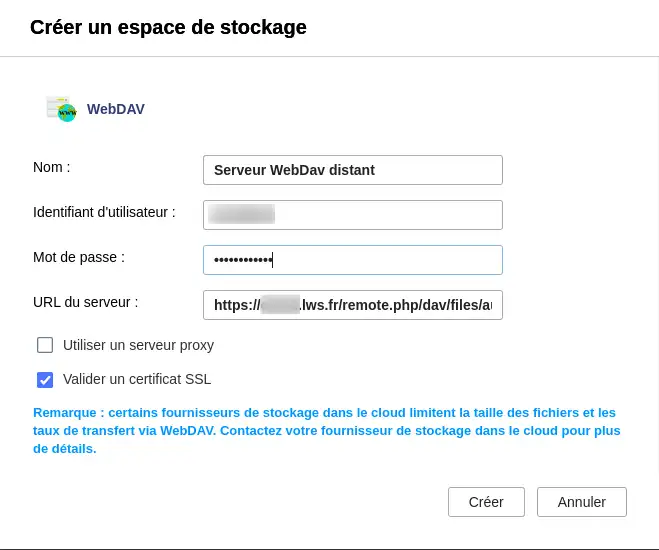
Step 4: Fill in the various configuration and connection details (1) :
Once this configuration has been completed, click on the"Create" button.
Step 5: Your storage space now appears in the list and is ready for use.
Once your remote server has been configured on the HBS 3 application on your Qnap NAS server, you can create a backup job that will allow you to back up the desired data between the two servers.
To perform this operation, follow the steps below:
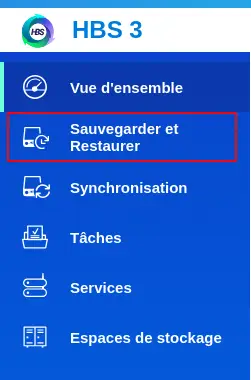
Step 1: In the left-hand menu, click on"Backup and Restore".
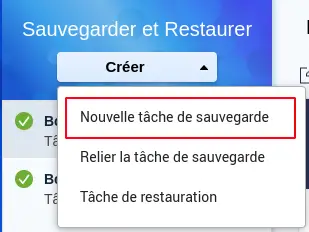
Step 2: Click on the"Create" button and select"New backup job".
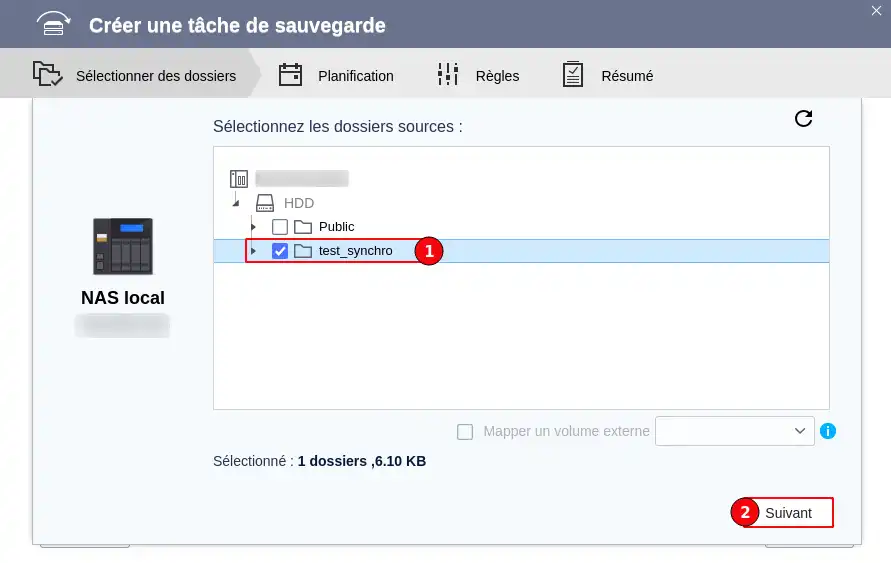
Step 3: Select the local folder on the NAS: Navigate in the tree then select your folder (1) then click"Next" (2)
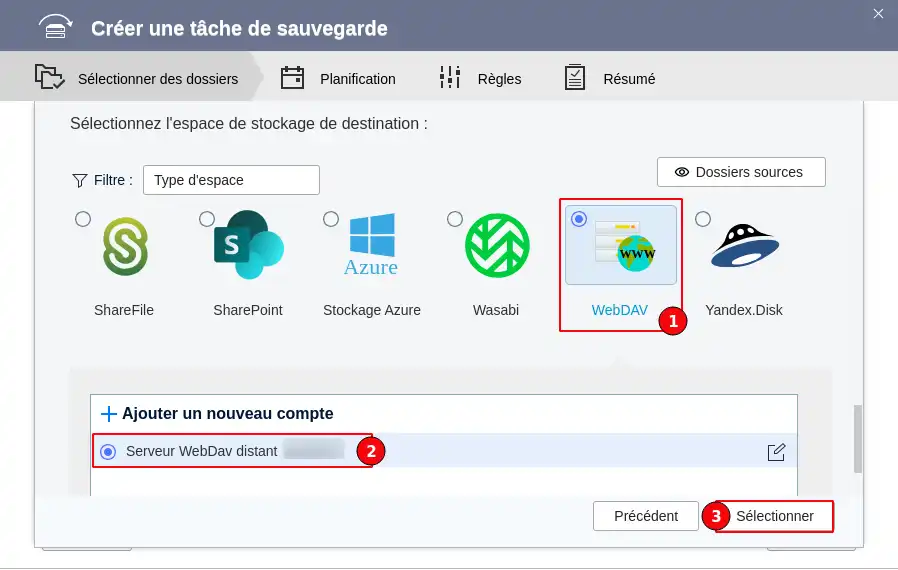
Step 4: Select the type of destination space (1) that will be used for this Job, then the desired storage space corresponding to the type selected (2). Finally, click on"Select" (3) to move on to the next step.
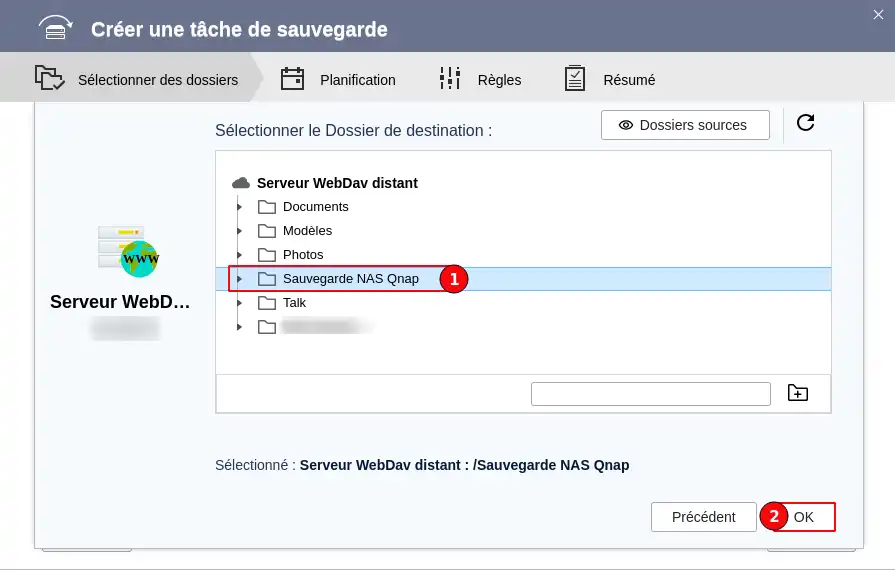
Step 5: Selecting the remote folder on Cloud Drive: Navigate through the folder tree and select the folder that will receive the data (1), then click"OK" (2).
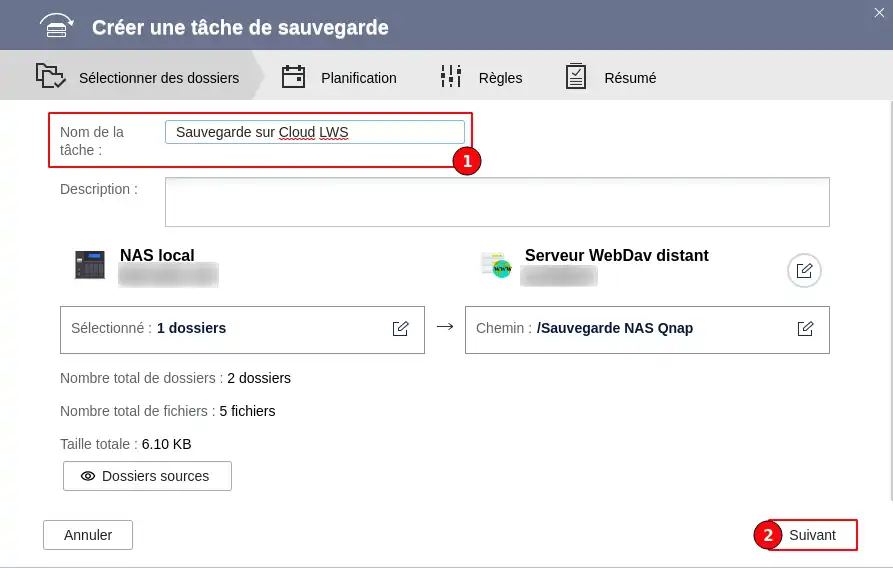
Step 6: At this stage, enter a name for the task so that you can find it later (1). Then click on"Next" (2)
Step 7: At this stage, you can choose when the backup should be made.
You can choose :
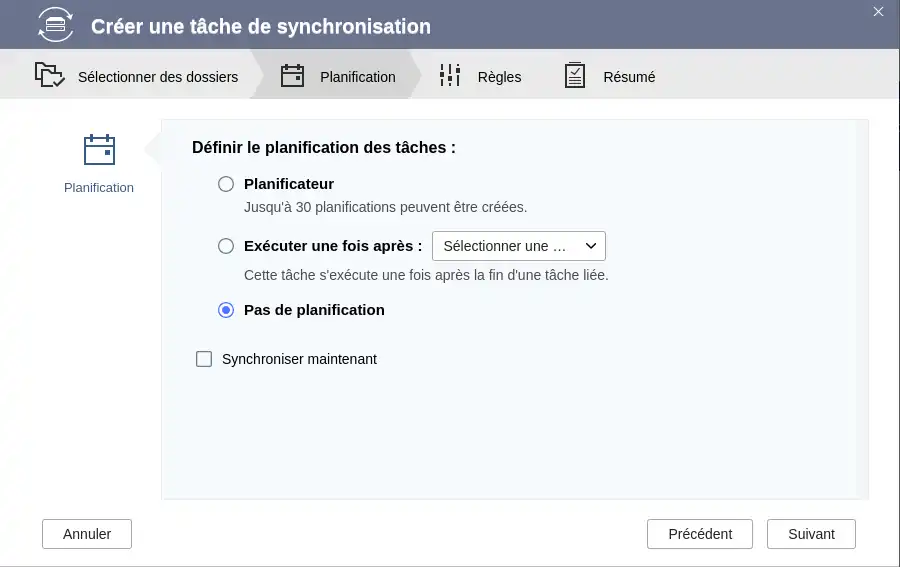
To schedule a period for the task to run, select"Scheduler" from the choices available, then click on the"+" to add a schedule.
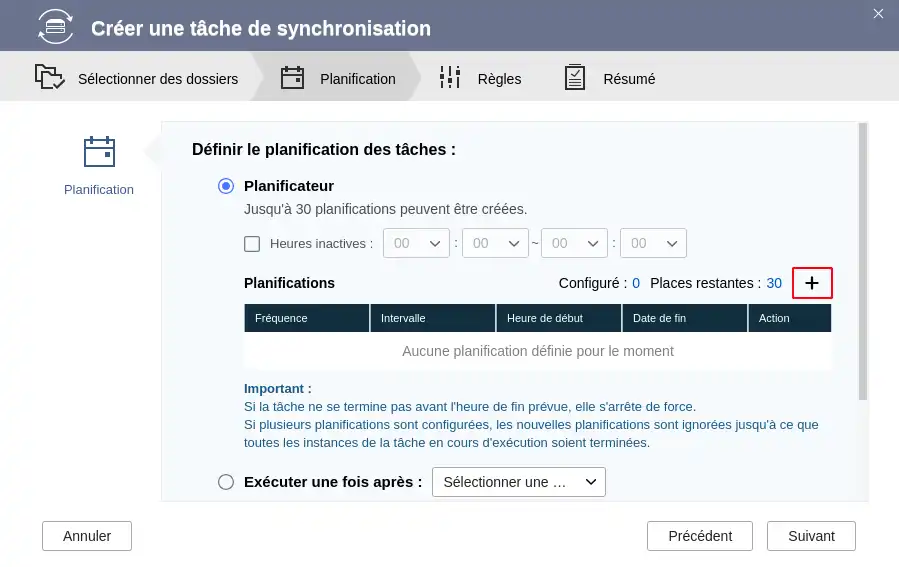
You can then schedule your task to run once at the desired date and time, or daily, weekly by selecting the desired day or days, or monthly.
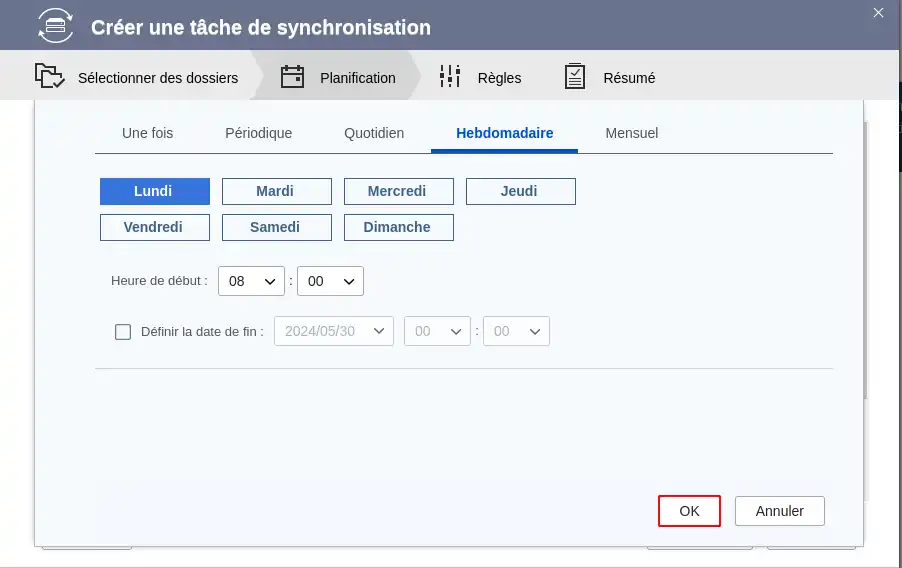
In the example above, we have configured the scheduler so that the task runs every Monday at 8am. Once your configuration is complete, click on"OK".
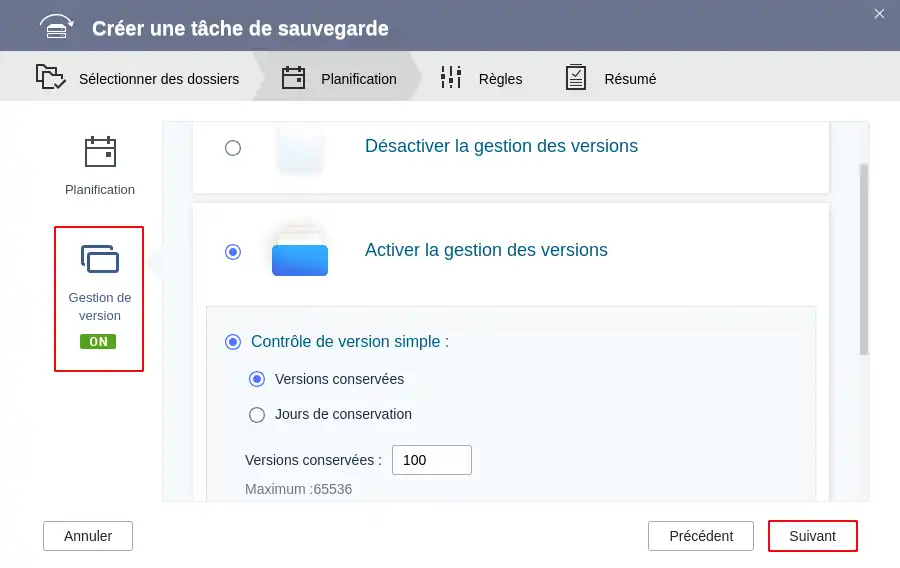
Once you're back on the previous page, you can choose whether or not you want to activate version management. This allows you, for example, to keep only recent versions by specifying the number of days you want to keep them, or simply to indicate the number of versions you want to keep. Once you have made your settings, click"Next".
Step 8: At this stage, you can choose whether you want to apply filters during backup.
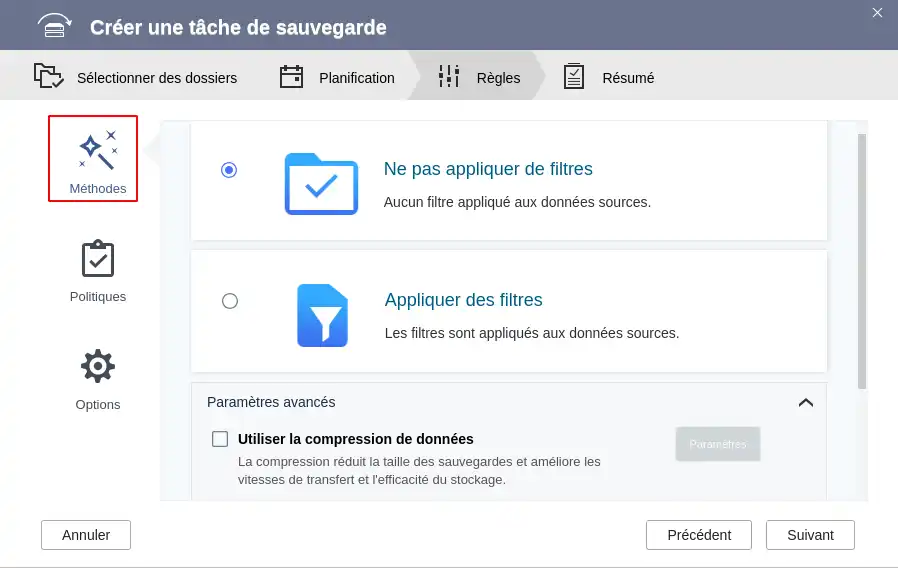
You can, for example, exclude certain file types or filter by creation date or size...
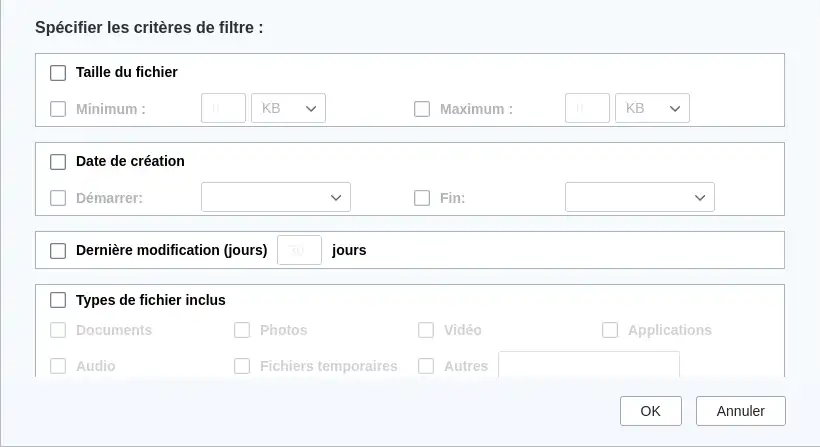
Once you have made your settings, click"Ok". Once you've returned to the previous window, click"Next" to go on to the next step.
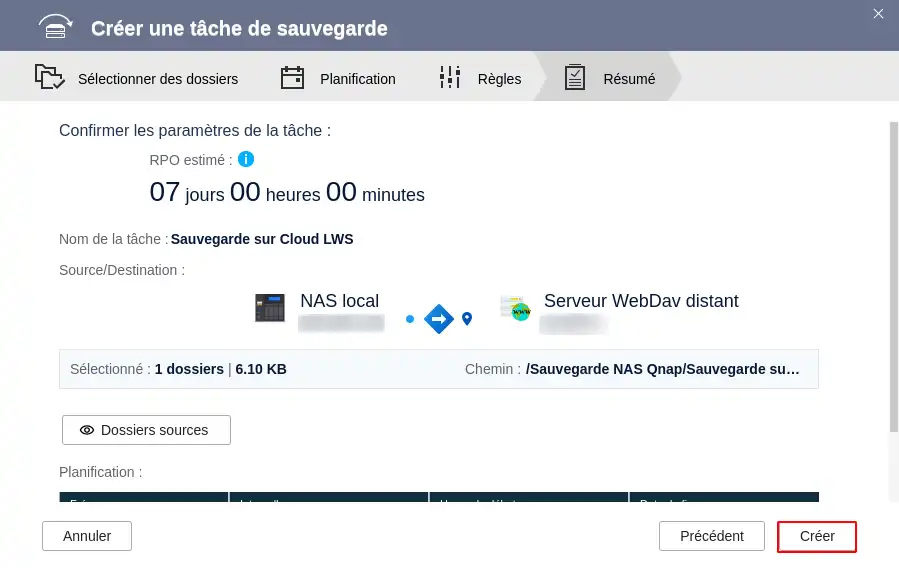
Step 9: You will then get a summary of the task's configuration, so all you have to do is click on "Create" to make its creation definitive.
Once the task has been created, you have the option of waiting for the next schedule to run the task or of making your first backup immediately (1).
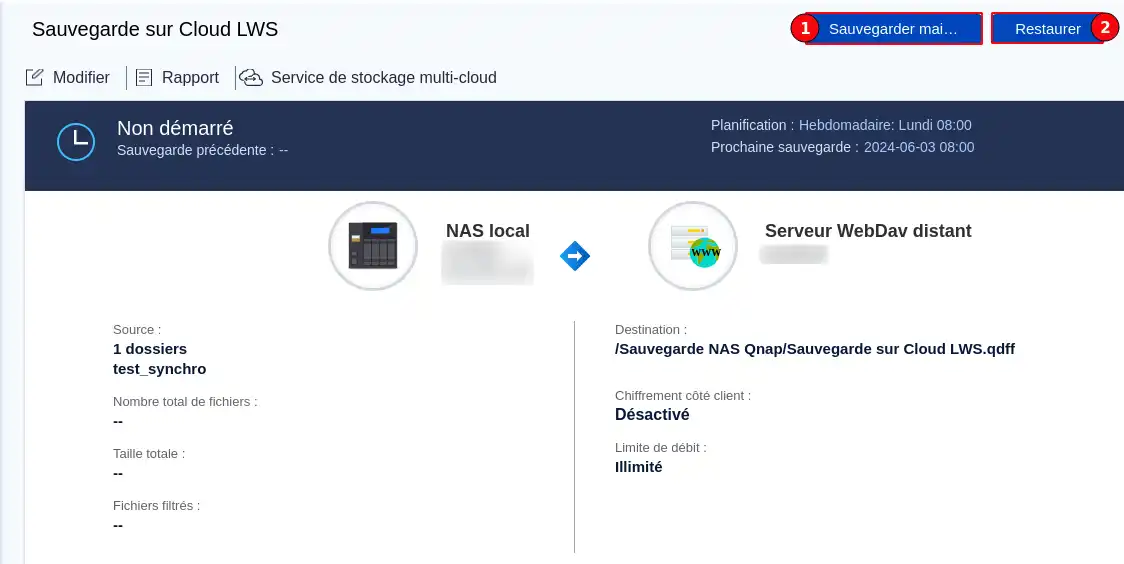
To restore a backup that has already been made, please follow the procedure below:
Step 1: In the left-hand menu, click on"Backup and Restore."

Step 2: Select the backup job containing the data you wish to restore
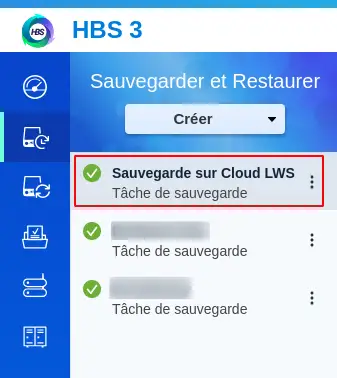
Step 3: Click on the "Restore" button (2) to create a restore job.

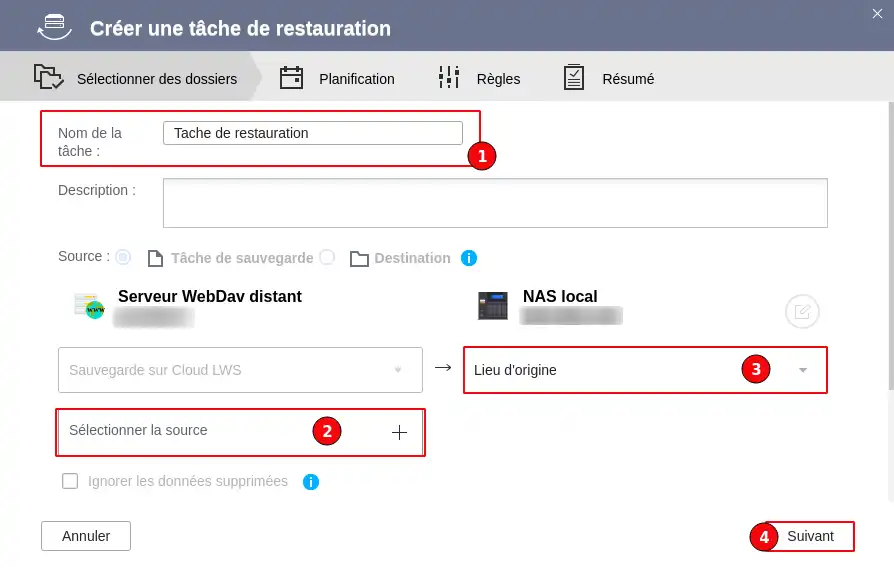
Step 4: Enter the name of the job so that you can find it later (1), Select the folder on the remote server containing the data to be restored (2) and the folder on the NAS (3). You can also select the "original location" if you want the data to be restored to the folder used for the backup. Then click"Next" (4) to go on to the next step.
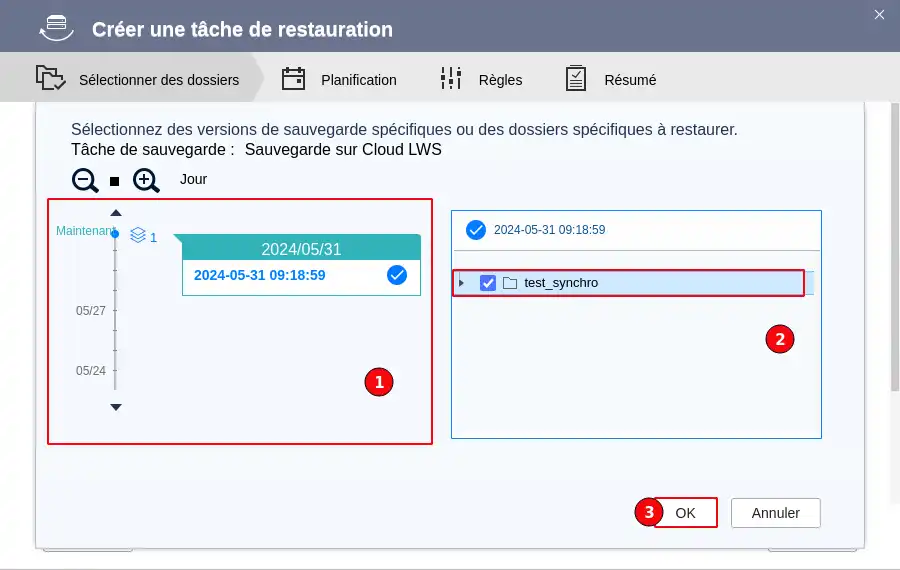
When selecting the data on the remote server, you will be able to choose the version to restore (1) and the folders for this version (2) before clicking on "ok" (3) to finalise your choice.
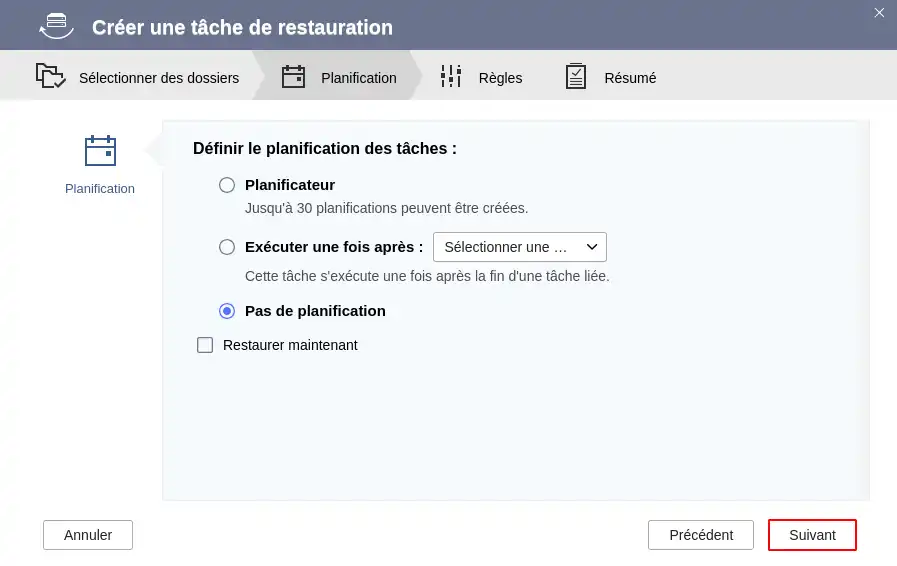
Step 5: As with the backup task, you have the option of applying a restoration schedule or not.
Step 6 : At this stage, you can choose to limit the data transmission speed if you wish to preserve your Internet connection for other uses during the restoration period.
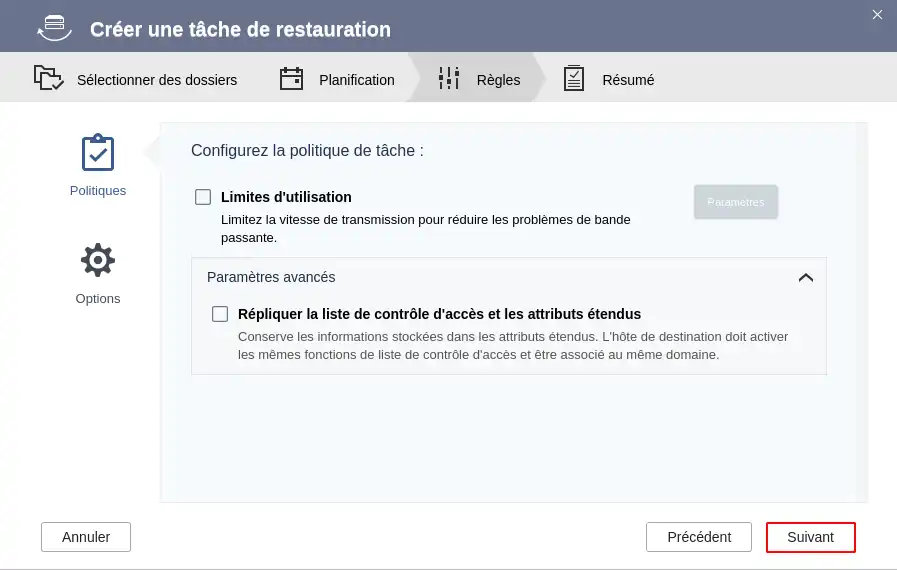
Step 7: This final step shows you a summary of the restoration task. You can click on "Restore" to finalise the creation of the task.
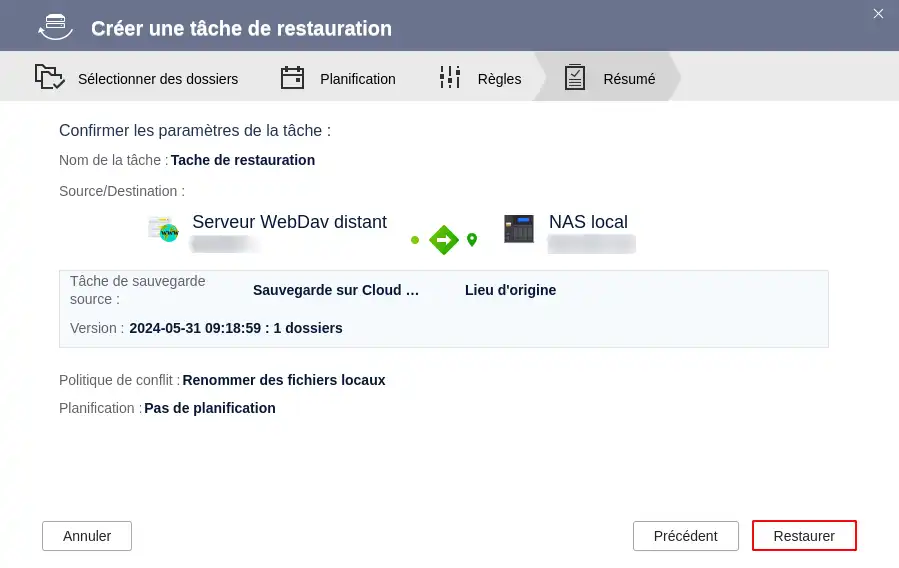
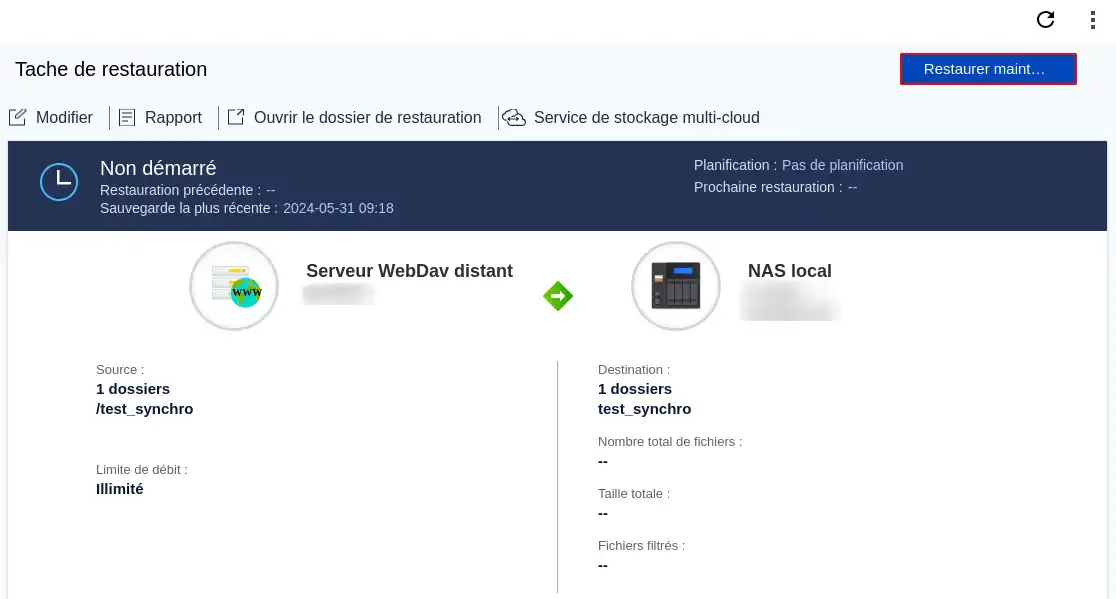
All that remains is to click on"Restore now" to launch the data restoration task.
You now know how to :
🔒 Thanks to these steps, the security and availability of your data is now reinforced, allowing you to work with peace of mind, with the assurance that your information is backed up securely and regularly. 💾
👍 We hope you've found this guide useful and have found it easy to implement an effective backup strategy. Thank you for reading! If you have any questions or would like to share your experience with the service, please don't hesitate to leave a comment. Your feedback is invaluable to us!
🔥 Nextcloud LWS online storage offers from £7.99/month! 🔥
Rate this article :
5/5 | 1 opinion
This article was useful to you ?
Yes
No
11mn reading
Synchronise NextCloud with my computer
9mn reading
Sharing my data with NextCloud
0mn reading
Synchronising folders to remote Cloud storage
2mn reading
How do I use NextCloud in WebDav mode on Cyberduck?