Rate this article :
5/5 | 1 opinion
This article was useful to you ?
Yes
No
Vous avez noté 0 étoile(s)
Procédure
Cyberduck is an FTP client with cloud capability. It can be installed on computers running Windows, but also on Mac OS. Cyberduck uses a graphical interface to provide users with access to files on remote servers.
To begin with, you can download Cyberduck and install the FTP client on your computer.
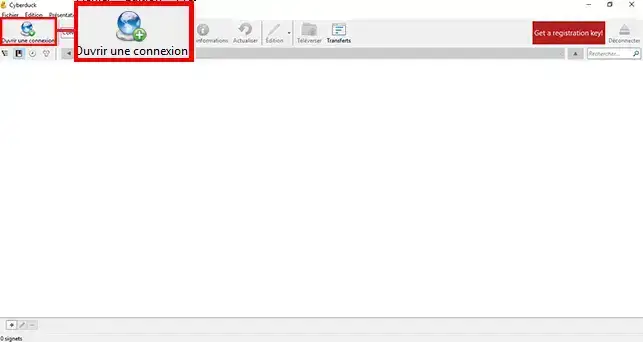
1. Once this has been done, open the software and click on the"Open a connection" button on the left-hand side of your screen.

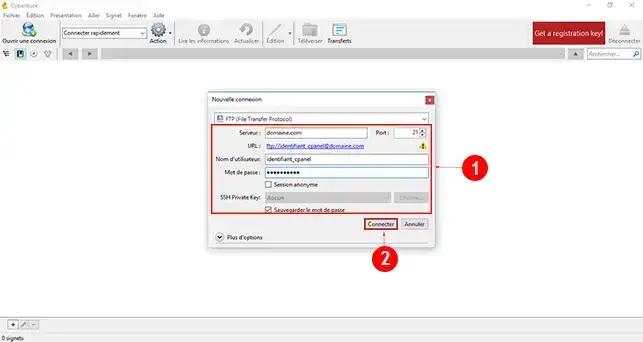
2. Enter the connection details for your cPanel FTP space as follows:
Then click on the "Connection" button to go to your FTP space.

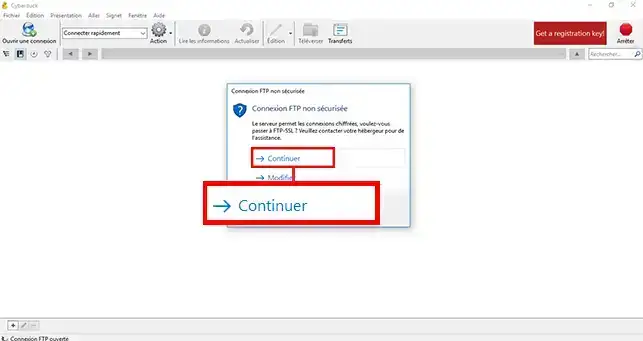
3. A new window will tell you that the connection is not secure. Click on the"Continue" tab.

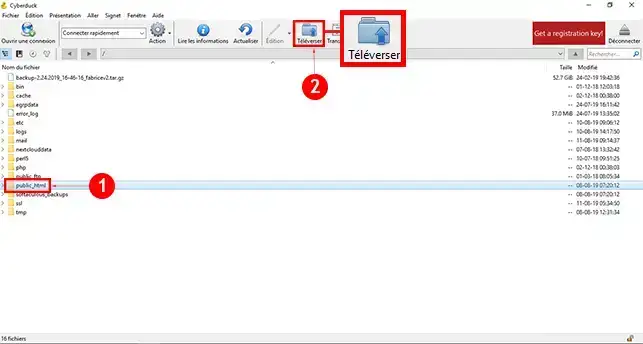
4. On cPanel, files must be placed in the"public_html" folder on the cPanel. The other folders are those used by your cPanel interface. Then click on the"Upload" button to select the file(s) and folder(s) you wish to import onto your cPanel FTP space. If you want to import several folders at the same time, simply select them all by simultaneously pressing the [CTRL] + C keys.

You can now install Cyberduck and configure it to add folders and files to your cPanel shared hosting FTP space. Note that you can also transfer files from the FTP space to a folder on your computer by clicking on the"Transfer" button.
Don't hesitate to share your comments and questions.
Rate this article :
5/5 | 1 opinion
This article was useful to you ?
Yes
No
1mn reading
How do I program a Cron task in cPanel?
0mn reading
How do I connect to cpanel via SSH using putty?
1mn reading
How do I resolve the ERR_CONNECTION_REFUSED error on cPanel?
1mn reading
How can I use WP-CLI to manage my WordPress instance on cPanel?