Rate this article :
4.5/5 | 4 opinion
This article was useful to you ?
Yes
No
Vous avez noté 0 étoile(s)
Sommaire
Procédure
Moodle is a CMS (online website editor) that makes it quick and easy to manage the content of a website. This CMS is suitable for both small and large companies.
Moodle also adds a number of tools for pedagogical and communicative interaction, creating an online learning environment: this application enables interaction between teachers, learners and teaching resources to be created via the network.
Moodle is included in all Linux hosting packages.
1. Log in to your web hosting administration area
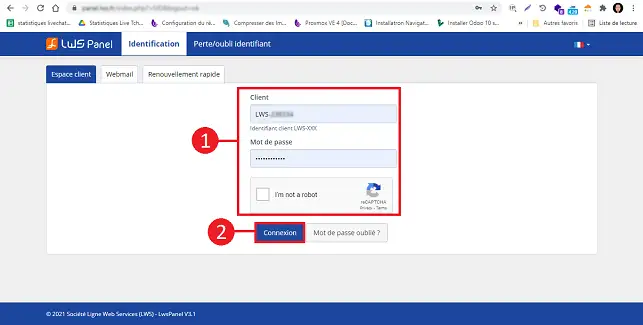
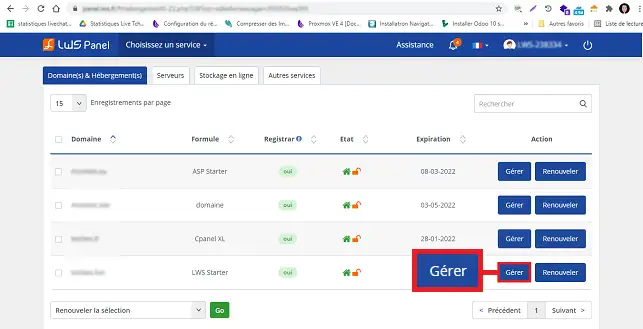
2. Click on the "Manage" button behind the package on which you wish to install the Moodle CMS.
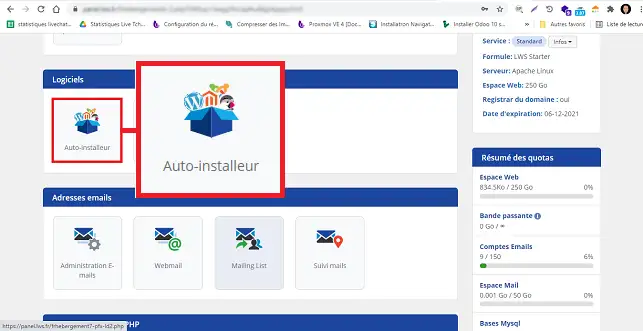
3. Click on the"Auto-installer" button in the"Software" section.
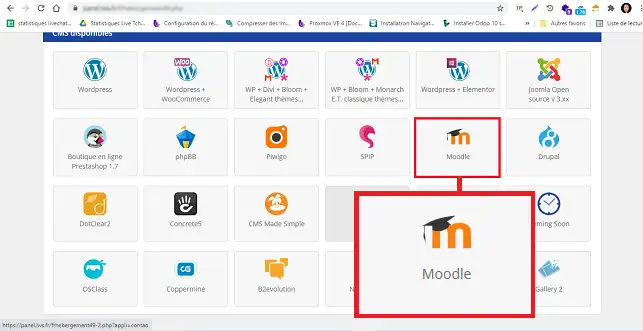
4. Choose Moodle by clicking on the relevant icon.
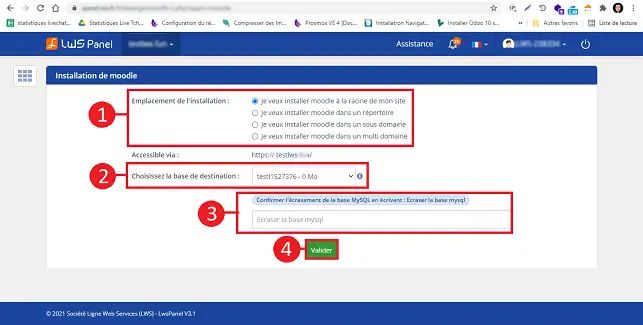
3. Indicate where you would like to install Moodle. You can choose between :
Then choose the database to be used for the installation and fill in the field to confirm that the database to be used can be overwritten.
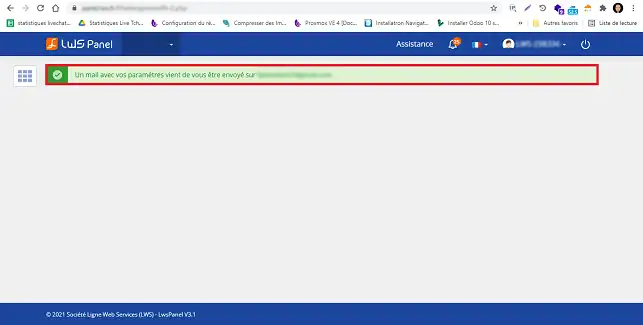
4. Once the installation is complete, the login details for your Moodle interface will be emailed to you.
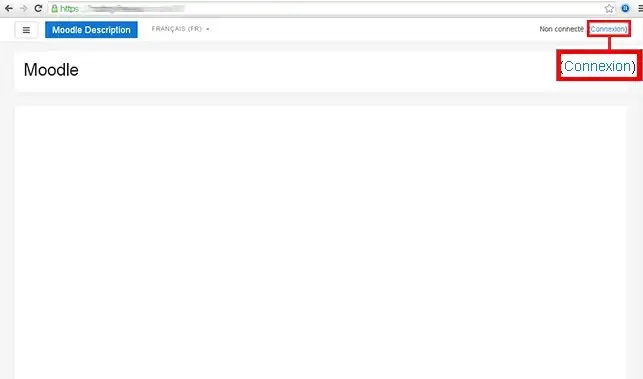
1. Click on Login (the address was sent to you by email during installation)
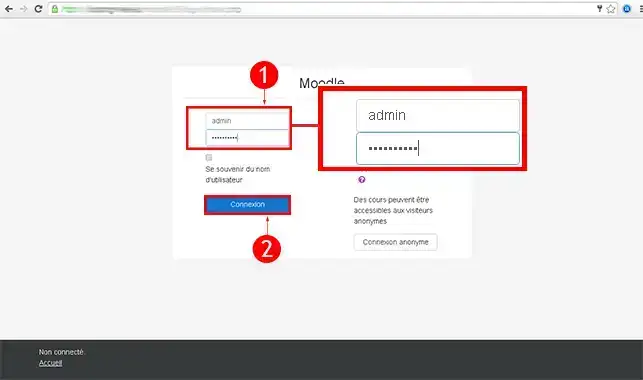
2. Enter the default login details you received in your email. Then click on Connection
3. Click on "System Administrator".
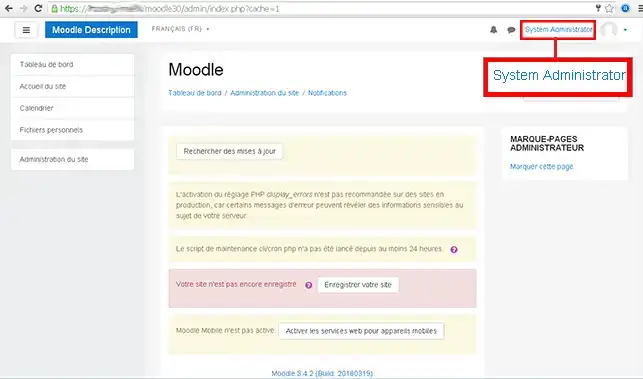
4. Click on the"Profile" tab.
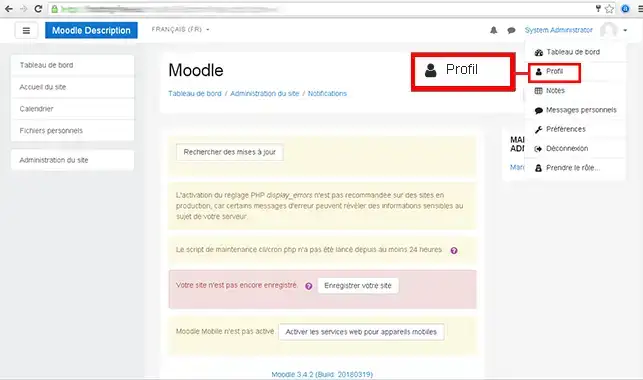
5. Click on Modify my profile
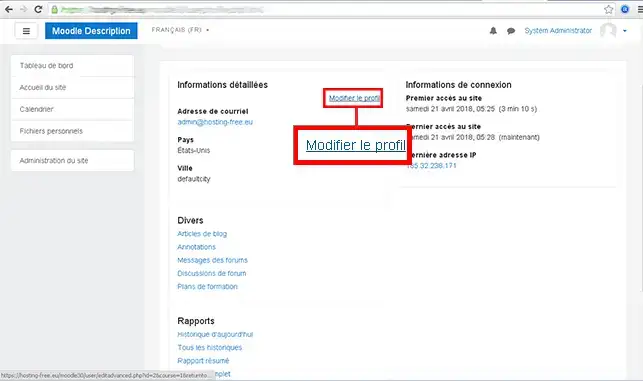
6. Enter your new password and click on Save profile.
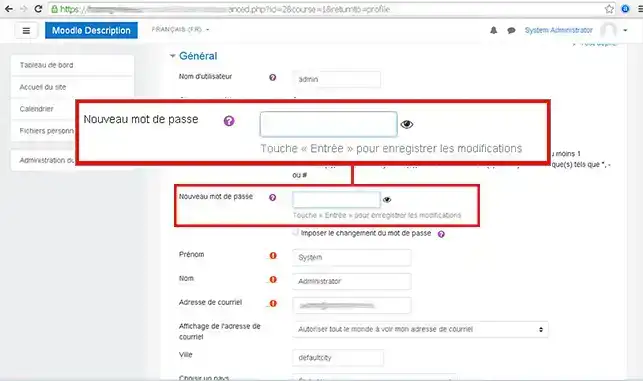
1. Click on Login (the address was sent to you by email when you set up your course)

2. Enter the default login details you received in your email. Then click on Connection

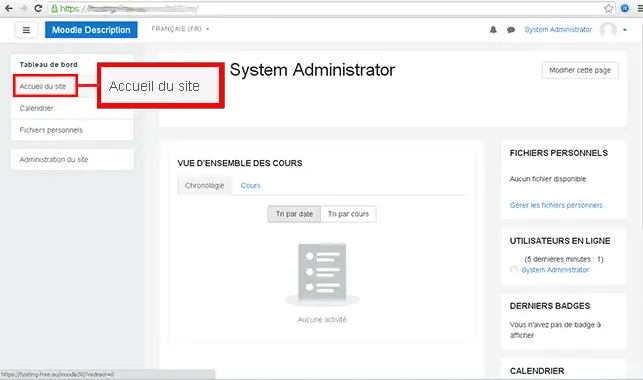
3. Click on the"Home page" button in the left-hand menu.
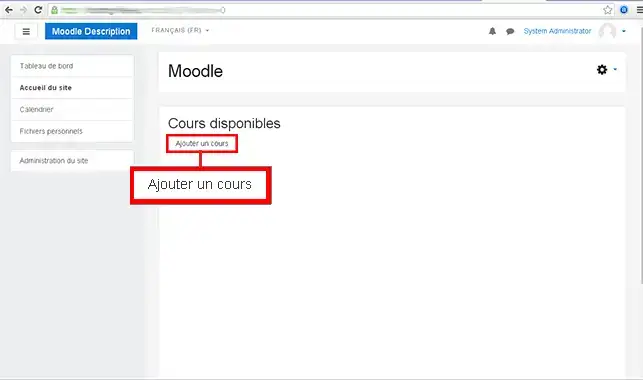
4. Then click on Add a course
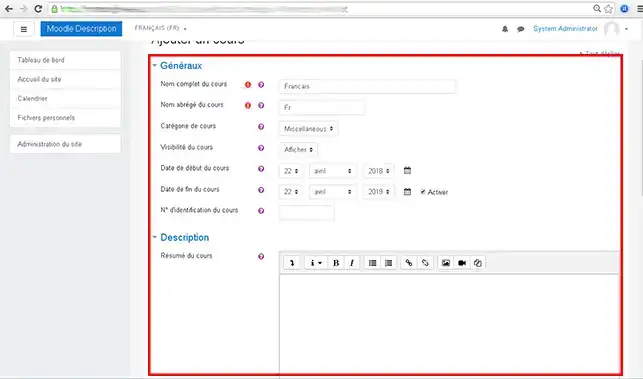
5. Fill in the details of your course then click on Save and display.
1. Click on Login (the address was sent to you by email when you set up your Moodle account)

2. Enter the default login details you received in your email. Then click on Connection

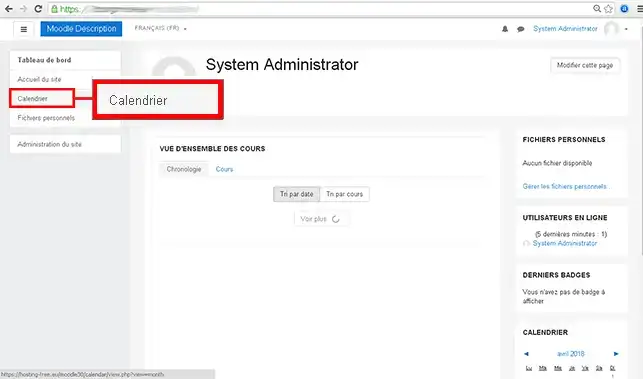
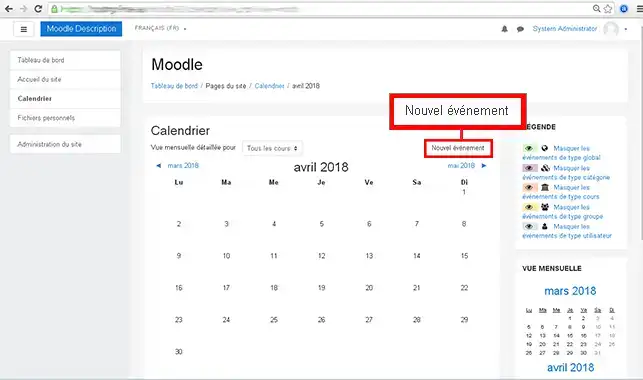
3. On the right-hand side click on Calendar.
4. Click on the"New Event" button.
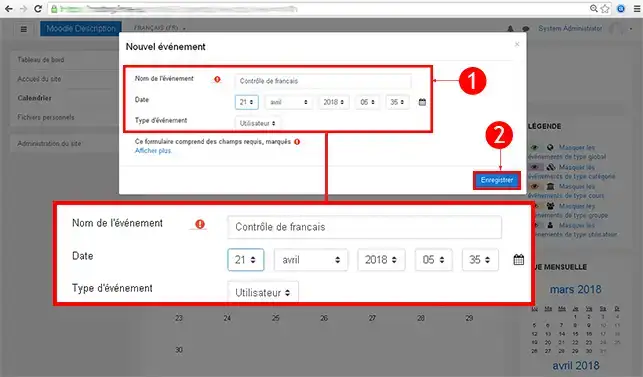
5. Enter the Event Name and the Event Type, then click Save.
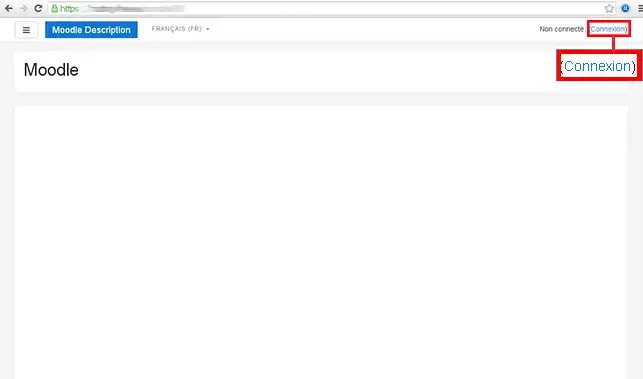
1. Click on Connect (the address was sent to you by email when you installed Moodle)
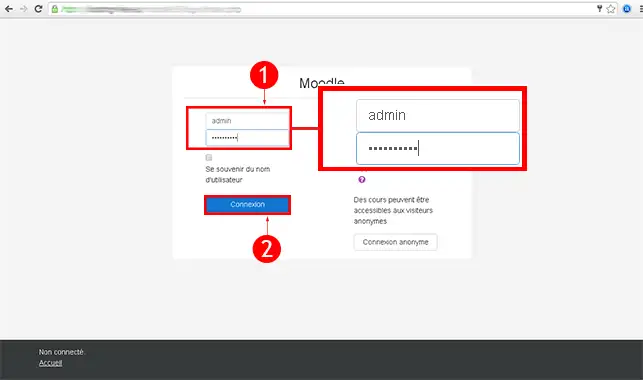
2. Enter the default login details you received in your email. Then click on Connection
3. Click on Modify this page.
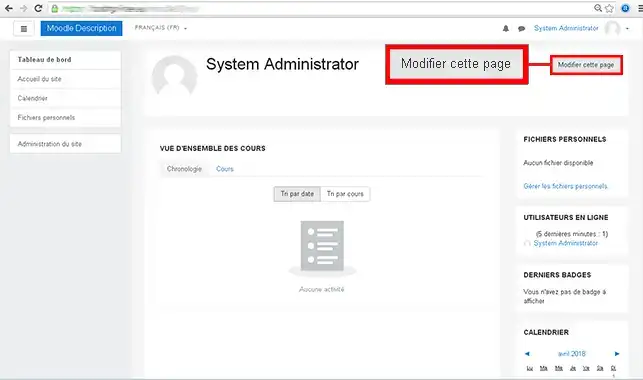
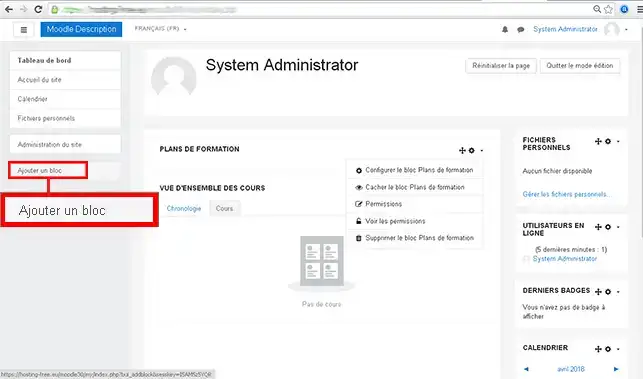
4. Click on Add a block in the left-hand menu .
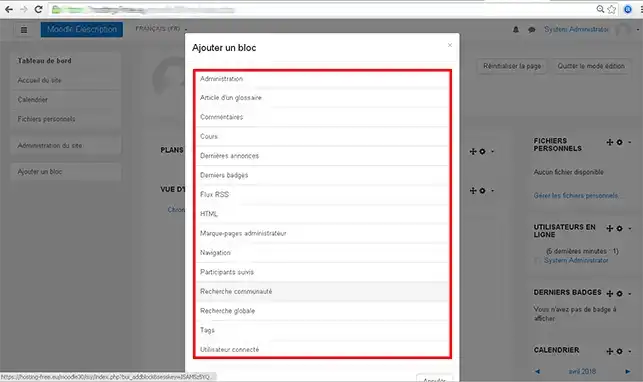
5. Click on the block you wish to add to your page.
1. Click on Login (the address was sent to you by email when you installed Moodle)

2. Enter the default login details you received in your email. Then click on Connection

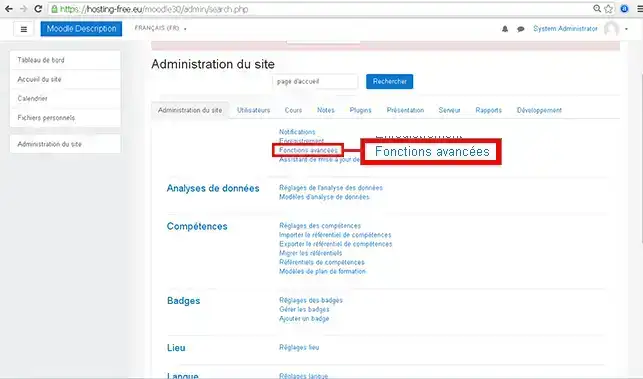
3. Click on the"Site administration" button in the left-hand menu.
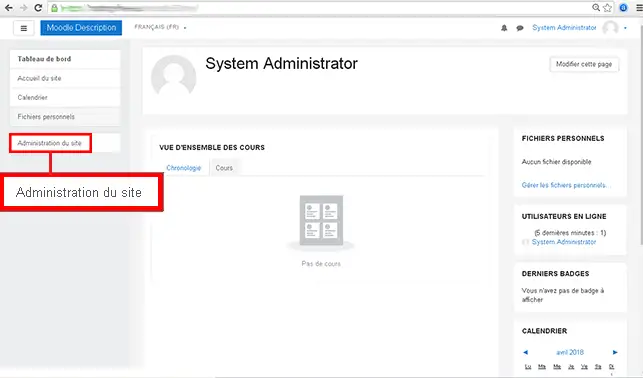
4. Click on the "Advanced functions" tab.
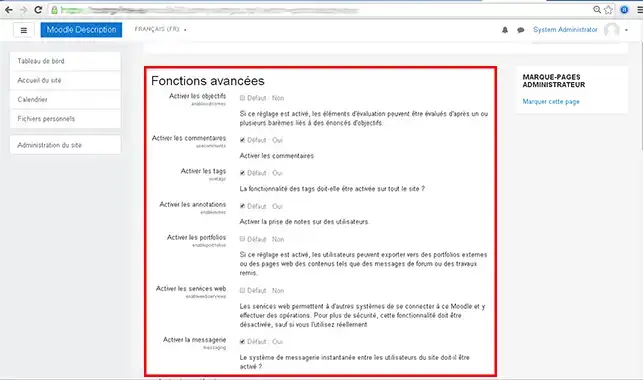
5. Choose the settings you want for your website and click the"Save" button to confirm your changes.
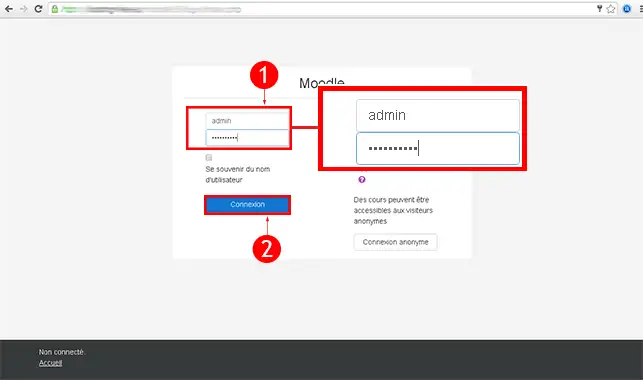
1. Click on Connection (the address was sent to you by email during installation)

2. Enter the default login details you received in your email. Then click on Connection
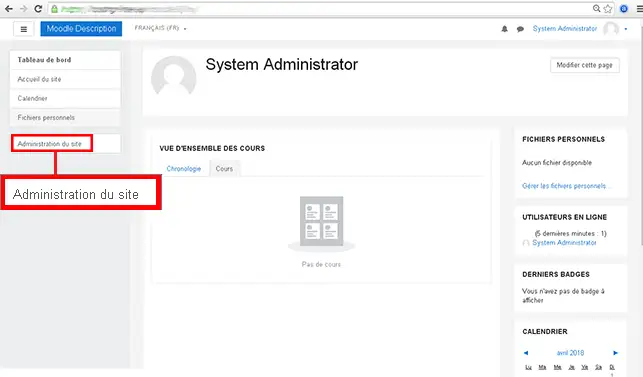
3. Click on the"Site administration" button in the left-hand menu.
4. Click on the"Plugins" tab.
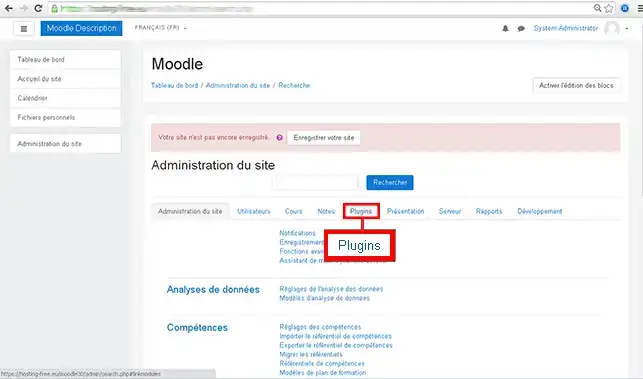
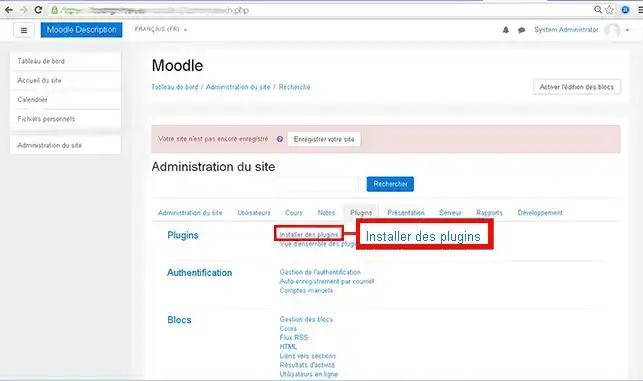
5. Click on the"Install plugins" tab in the"Plugins" section.
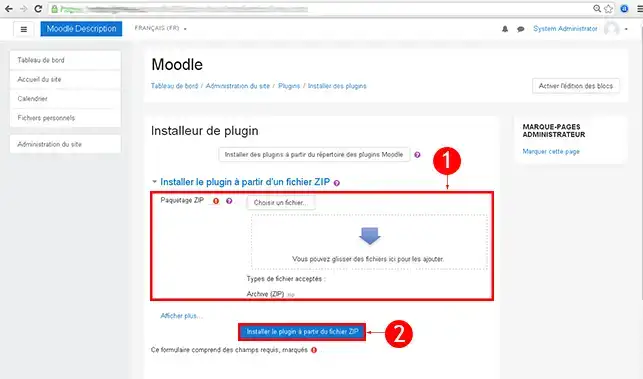
6. Choose whether you want to use the Moodle plugins directory or install the plugin from a ZIP file. If you are installing from a zip file, simply click on Install plugin from ZIP file to confirm.
To find out more about Moodle you can consult the official resources:
You can now create your Moodle site using the auto-installer available on your LWS shared hosting.
Moodle allows you to create a website quickly and without knowledge thanks to its intuitive interface.
Don't hesitate to share your comments and questions!
Rate this article :
4.5/5 | 4 opinion
This article was useful to you ?
Yes
No
3mn reading
How do I create a Spip website?
2mn reading
How do I create a Drupal website?
1mn reading
2mn reading
Bonjour,
Merci de votre retour.
L'auto-installeur LWS installe la version classique de Moodle, pour toute autre installation, je vous invite à vous reporter vers forums ou communauté de spéciale en Moodle afin qu'il vous aide à effectuer cela.
Je vous remercie de votre attention et reste à votre disposition pour toute autre question ou complément d'information.
Nous vous invitons à contacter notre service support à travers votre espace client, afin de vous apporter une aide si vous rencontrez des difficultés quelconque. (Contacter le support)
Cordialement, L'équipe LWS
Bonjour,
Merci pour votre message.
Vous avez la possibilité d’installer votre CMS directement via notre auto-installeur, disponible depuis votre espace client. La version actuellement proposée est la 4.5.
Nous attirons toutefois votre attention sur le fait que toute mise à jour au-delà de cette version nécessitera une intervention manuelle de votre part. De plus, nous ne pouvons garantir le bon fonctionnement des versions supérieures si celles-ci requièrent des fonctions PHP spécifiques non activées par défaut sur l’hébergement.
N’hésitez pas à revenir vers nous si vous avez besoin d’assistance pour l’installation initiale ou si vous avez des questions concernant la compatibilité.
Je vous remercie pour votre attention et reste à votre disposition pour toute autre question ou complément d'information.
Bien cordialement,