Rate this article :
5/5 | 1 opinion
This article was useful to you ?
Yes
No
Vous avez noté 0 étoile(s)
Procédure
Cloudflare is a company offering various services on the Internet in terms of security, data protection and, above all, CDN (Content Delivery Network), a system responsible for delivering content from its servers to users.
The way a CDN works is simple: when a site is requested for the first time, it is stored on the CDN server, in this case Cloudflare, and then shared with all the other CDN servers (Cloudflare) in the world.
From then on, any user wishing to access this site will receive a copy from the nearest server instead of making a request to the site directly, whose servers could be on the other side of the world.
In this way, it takes less time for the request to be processed, significantly improving performance. What's more, since it's no longer the site that manages the requests but the CDN, bandwidth usage is reduced.
These reasons alone are enough to explain why so many sites put their trust in Cloudflare, but it still has an ace up its sleeve: as all requests pass through Cloudflare first, it can block DDoS-type attacks or even malicious IPs trying to access your site. It therefore provides an initial layer of security against the various attacks that could affect your site.
If you're using Cloudflare and LWS Optimize on your site to improve performance, it's important to activate the Cloudflare integration option so that the two services are synchronised and compatible.
LWS Optimize offers a dynamic cache (LWS Cache) and CSS/JS minification options, which conflict with Cloudflare, which also offers minification and its own cache. To avoid these conflicts, the integration will deactivate certain options in the extension.
To activate this integration, go to the extension's settings, enter advanced mode by clicking on the dedicated button and then on the 'CDN' tab. Here, tick the "Cloudflare integration with LWS Optimize'" box. In the window that appears, enter your Cloudflare API Token. To create a token, you'll need to go to your Cloudflare account.
To create an API token, go to https://dash.cloudflare.com/ and log in to your Cloudflare account.
Then click on the icon at the top right and then on "My profile" to access your profile.

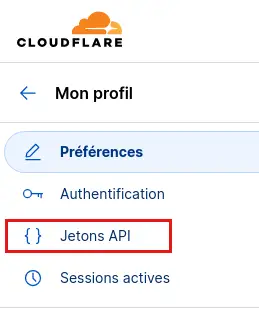
From here, click on "API Tokens" in the left-hand menu to open the Tokens page.
On the page, click on the "Create a token" button:

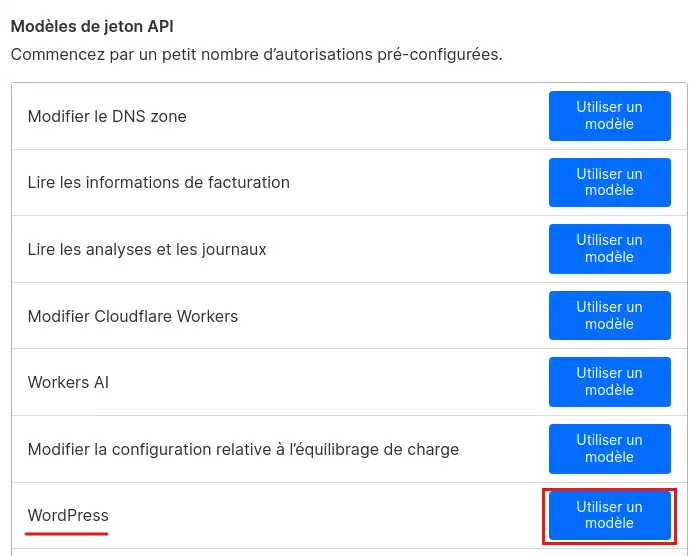
Finally, in the list of token templates, find "WordPress" and click on the "Use a template" button.
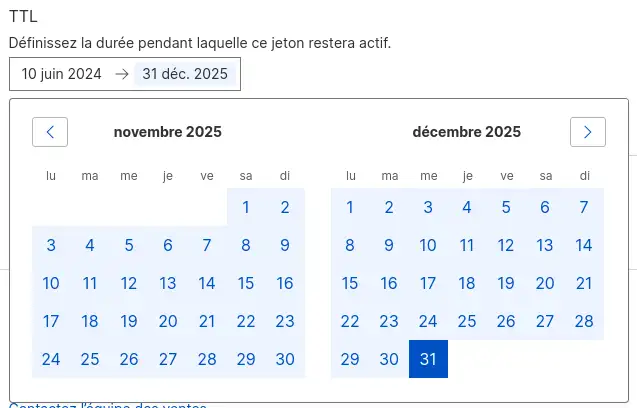
The configuration that is now displayed has been pre-filled for you, with the exception of the "TTL" field, which allows you to define the time for which the token will be valid. Start it at today's date and choose the token's expiry date. You can make it expire in several years if you don't want to repeat the operation frequently.
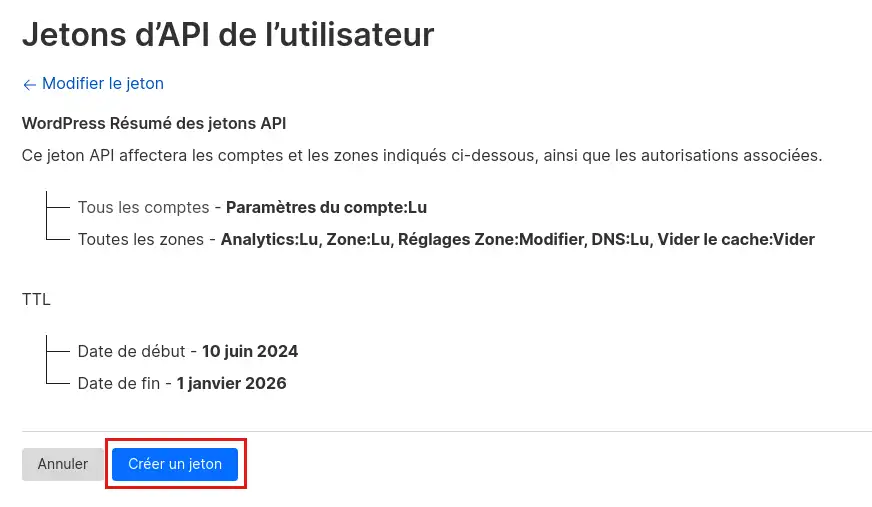
Click on the "Continue to summary" button to obtain a summary of the token's contents.

Finally, click on "Create a token" to complete the creation of the token.
Once the token has been created, copy it and keep it safe: if you lose it and need it later, you will have to recreate a new token.
If you know how to use a command terminal, you can copy the command displayed on the page to test your token. If it works, you should be able to read "This API Token is valid and active" in the command returns.
Back on the Cloudflare integration window, enter your newly created token in the field and proceed to the next step.
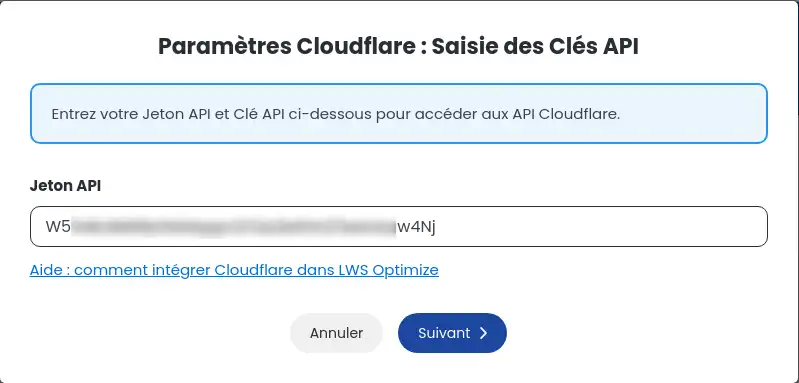
If your token is valid, you'll be redirected to a second screen, with a summary of your CloudFlare information. A reminder of the changes made is also displayed on the modal. If you're happy with this, click "Finish" to save the integration.
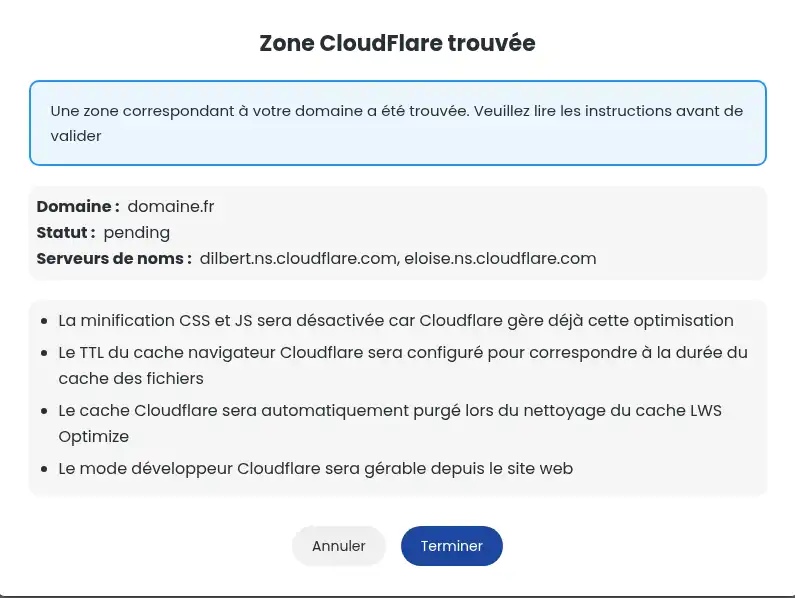
Now that the Cloudflare integration is activated, during an automatic cache purge (if enabled), the Cloudflare cache will also be deleted in order to display the most recent data to your visitors. If you change the lifetime of the file cache, this change will also be reflected in Cloudflare.
You now know how to :
🚀 With this knowledge, you're ready to boost your site's performance while providing an extra layer of protection against online threats. 🛡️ Don't forget that optimising your site is an ongoing process that requires regular attention to maintain fast load times and a smooth user experience. 😊
Thank you for reading this article! If you have any questions or would like to share your experience with Cloudflare and LWS Optimize, please feel free to leave a comment below. Your feedback is valuable to us and the community! 📬👥
Rate this article :
5/5 | 1 opinion
This article was useful to you ?
Yes
No
0mn reading
How can I minimize the files on my WordPress site with LWS Optimize?
0mn reading
How can I combine the files on my WordPress site with LWS Optimize?
0mn reading
How do I preload CSS files on my WordPress site with LWS Optimize?
0mn reading
How do I disable WordPress emojis with LWS Optimize?