Rate this article :
This article was useful to you ?
Yes
No
Vous avez noté 0 étoile(s)
Sommaire
Procédure
In this documentation, we will take a step-by-step look at how to create backups on a VPS using the ISPConfig 3 control panel. Regular backups are essential to protect your data and enable you to restore your website in the event of a problem.
To access ISP Config's backup functionality, you need to follow these steps:
Step 1: Log in to the ISP Config control panel on your VPS.
Step 2: select the site to be backed up.
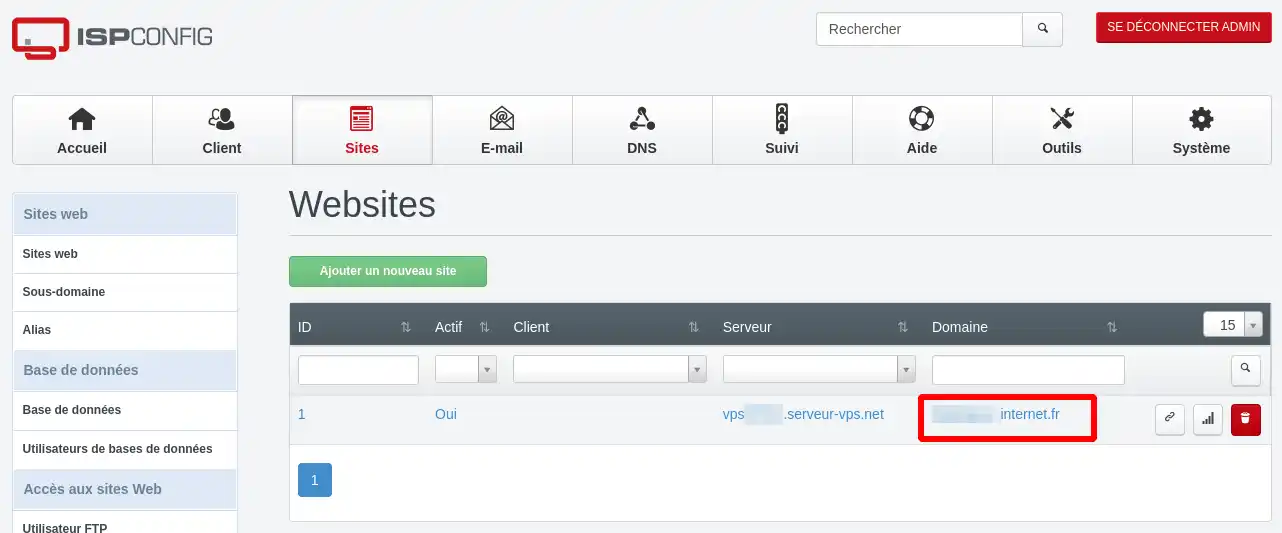
To do this, once you have logged into the control panel, click on the"Sites" button.

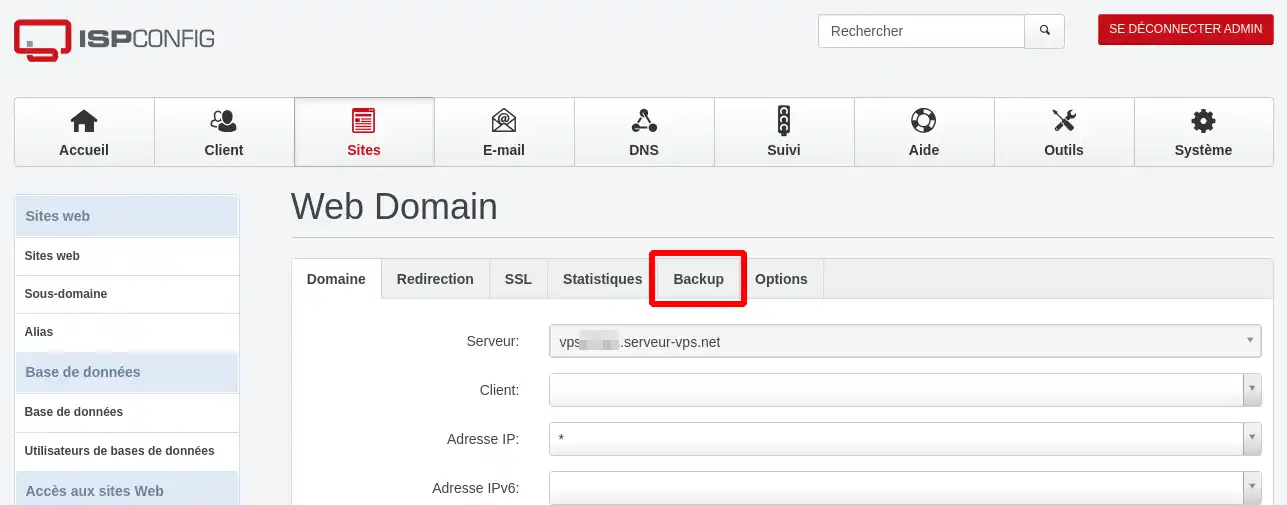
Then click on the domain name of the website whose back-up you wish to configure in the list of domains configured on the VPS server.

Finally, click on the "Backup" button in the website configuration menu.

In ISPConfig 3, you can configure a backup plan for each configured website. It is possible to configure the time of the backups as well as their frequency and the retention of the backups.
Step 1: Configure the backup plan
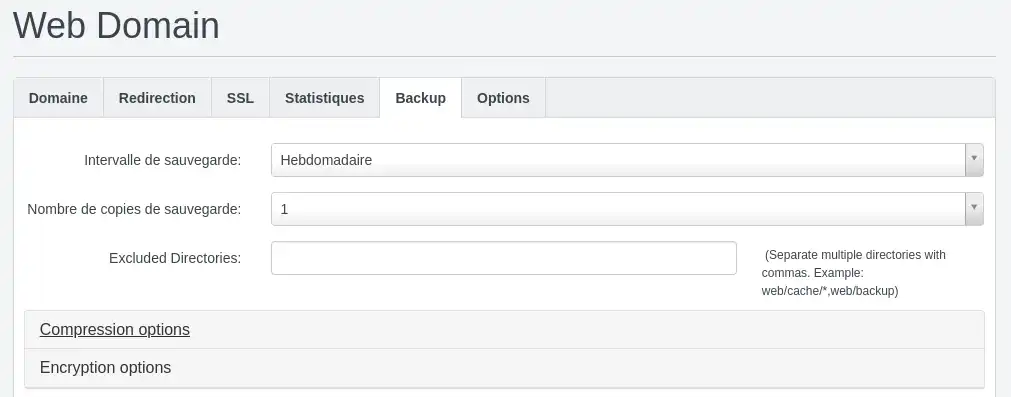
At this stage, your browser displays the backup management page for your website via ISP Config.
You can configure :

Step 2 (optional): advanced options
You can configure additional options such as backup compression and encryption.
By default, backup data is compressed into an archive in gzip format for web files and databases. You can change the compression format if you wish. You can manage the compression of web files and databases independently.

You can also encrypt your backup archives with a password.
To activate this feature, you need to click on the"Enable encryption" checkbox and set a password.

When configuring this feature, you will need to enter the password to allow the archive to be decompressed and the data decrypted.
Step 3: Finalising
Once you have configured your backup plan, click on the"Save" button at the bottom of the page to save the configuration permanently.
You can watch all these steps in the video below:
To perform a manual backup, go to the "Manual Backup" section.

In this section, you can make a backup of your web files by clicking on"Make Backup of web files" or a backup of your databases by clicking on"Make backup of databases".
If you have already made backups, whether manually or automatically, they will be listed in the"Existing backups" section.

This section allows you to perform the following actions on the backups you have made:
To modify the parameters for running ISP Config backups, please follow these steps:
Step 1: Access the server's system configuration
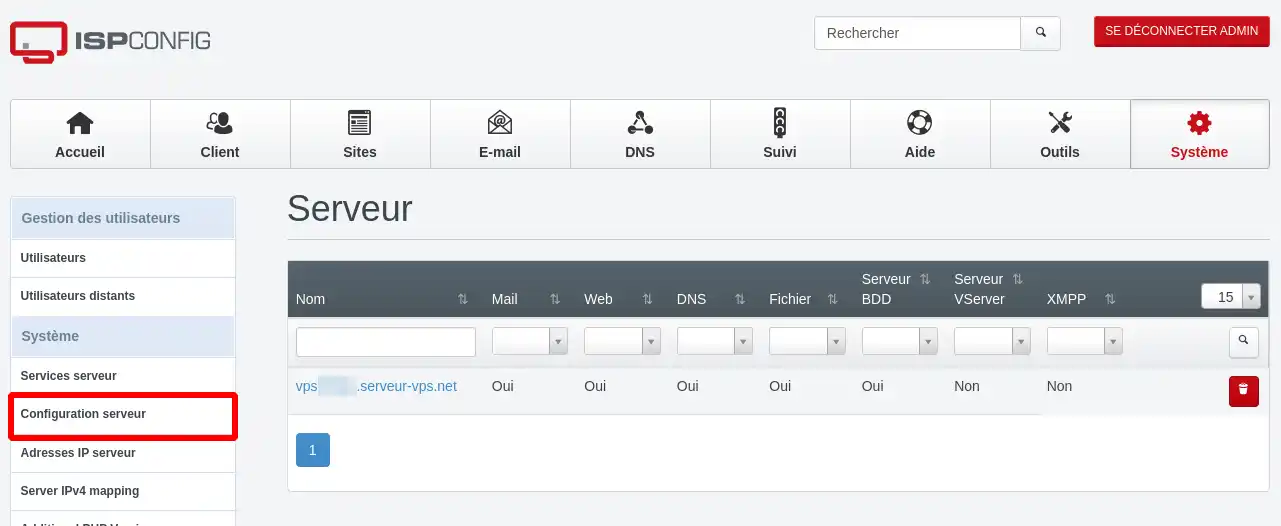
In the ISP config menu at the top of the control panel, click on the"System" button

Then, in the left-hand menu, click on"Server configuration".

Finally, in the list of configurable servers, click on the link for your server as shown below:

Then stay on the"Server" tab and scroll down the page to access the backup configurations, the guidelines for which are shown in the screenshot below:

The following parameters can then be modified:
Backup folder: This is the folder where ISPConfig stores the backups made. By default, the path of the folder that receives the backups is "/var/backup". This folder cannot be accessed by FTP connection, only by SSH. If you wish to place your backups in a folder accessible via FTP, you will need to change the path to something like "/var/www/domain.ext/backup" where domain.ext corresponds to the domain of the site that will receive the backups.
Backup directory is a mount : allows you to use a backup directory that is not on the vps but a mount point (a virtual directory that points to the SFTP of a CloudDrive storage package, for example).
Backup mode :
Backup tmp directory for zip: this is the folder where ISPConfig prepares the .zip backup
Backup time: time when the backup will be performed
Delete backups on domain/website delete: deletes the backups present in the folder configured as the "backup folder" if the site is deleted.
In conclusion, backups are essential to protect your data and ensure the continuity of your website. With ISPConfig 3, you have a user-friendly and powerful tool for configuring and managing your backups on a VPS. By following the simple steps described in this article, even beginners can create and monitor their backups effectively. Don't overlook the importance of regular backups, and make sure you take the time to set up your backups now to prevent data loss and prepare for potential problems.
Rate this article :
This article was useful to you ?
Yes
No
4mn reading
Force the creation of a backup on ISPConfig