Rate this article :
5/5 | 1 opinion
This article was useful to you ?
Yes
No
Vous avez noté 0 étoile(s)
Sommaire
Procédure
Caching web pages reduces the bandwidth used by your website and also the load on a web server. Caching allows your site to be displayed more quickly and to be better referenced by the main search engines.
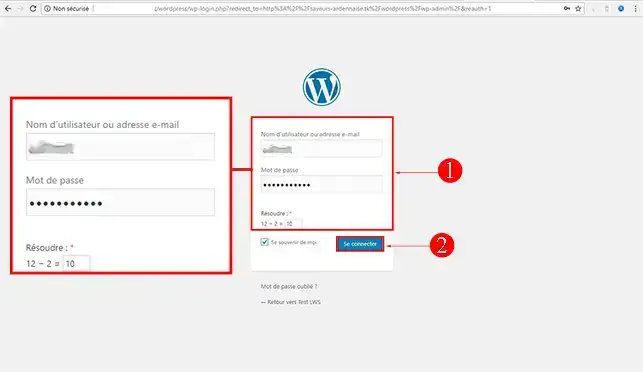
1. Connect to the dashboard of your website and identify yourself with the parameters received by email.
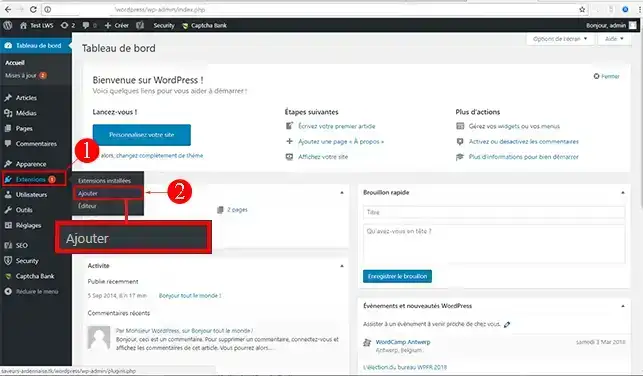
2. Go to the"Extensions" link in the left-hand column and click on"Add" to install the WP Super Cache module.
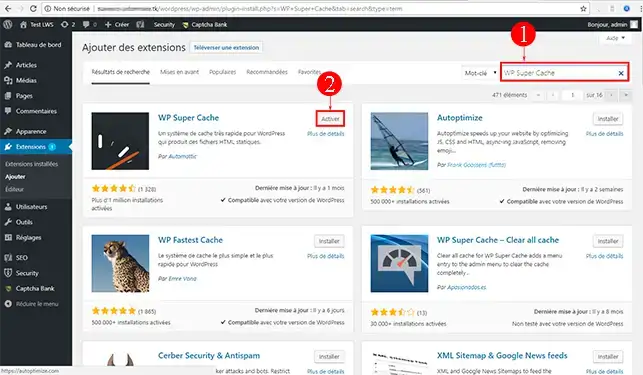
3. In the search bar at the top right, look for the"WP Super Cache" module. By default, it is already activated on LWS shared hosting packages. Click on the"Activate" button if the module is already installed. If not, the"Activate" button will be replaced by the"Install" button.
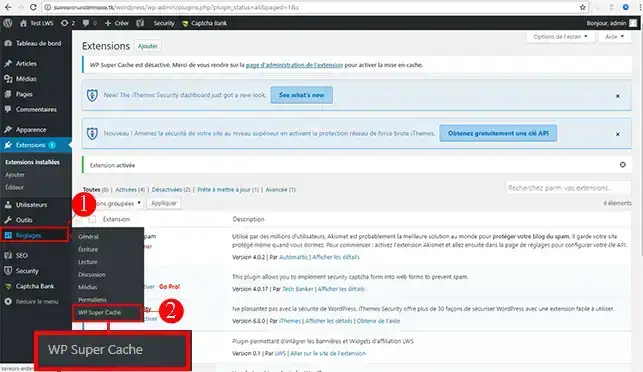
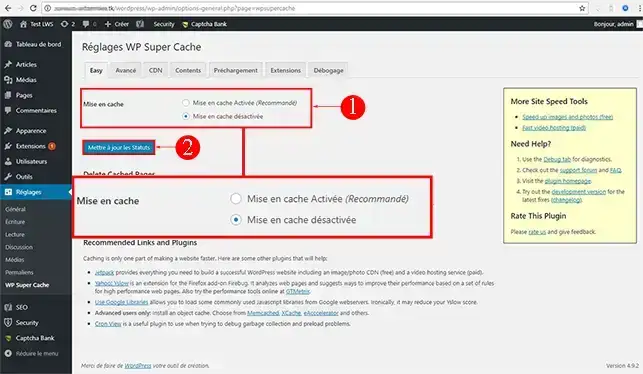
1. To set up and activate WP Super Cache, click on the"Settings" tab and then on"WP Super Cache".
2. Click on the Radio button"Caching Enabled (recommended)" and then on Update Status to start caching your Wordpress website.
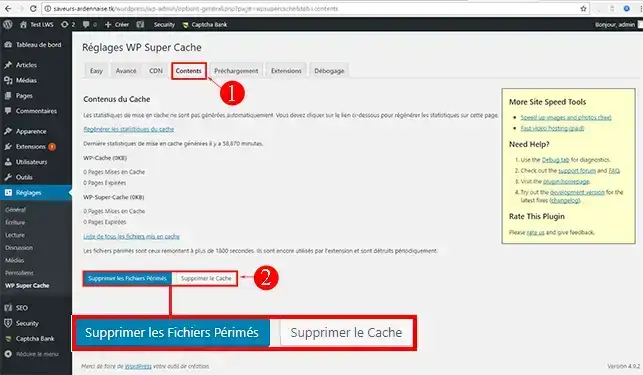
3. The"Contents" section of the WP Super Cache settings allows you to delete the cache you have or out-of-date files. If you make major changes to your website, it is essential to empty the cache files so that you can see the changes. If you forget to empty the cache, the changes will not be accessible until the cache is automatically updated.
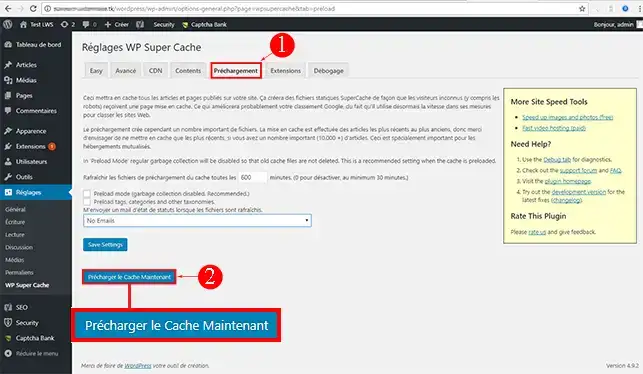
4. You can preload the cache files and request them to be updated every X minutes. In most cases, for sites where certain pages change regularly, the setting is 2 to 6 hours. These are the settings often recommended by Google Page Speed.
You can now install WP Super Cache on Wordpress to display your site faster with LWS.
Don't hesitate to share your comments and questions!
Rate this article :
5/5 | 1 opinion
This article was useful to you ?
Yes
No
2mn reading
2mn reading
How do I reset my Wordpress password?
0mn reading
Error connecting to the database on Wordpress
2mn reading
Our Wordpress packages