Rate this article :
2.2/5 | 41 opinion
This article was useful to you ?
Yes
No
Vous avez noté 0 étoile(s)
Procédure
The Roundcube webmail autoresponder feature lets you send an automatic reply to all or some of the emails you receive (acknowledgements of receipt, out-of-office messages, etc.).
Connect to the Webmail of the email address for which you want to set up the autoresponder.
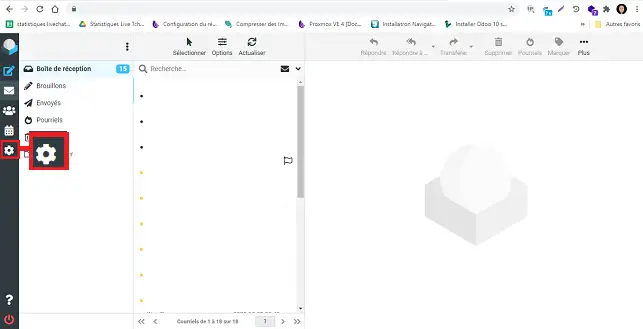
Click on the"Settings" button on the left-hand side of your screen.

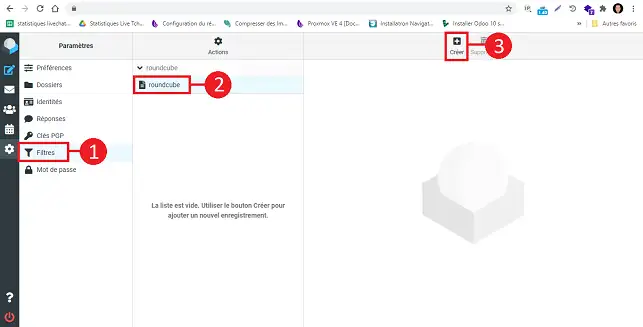
Click on"Filters" in the"Settings" section. Select the set of filters on which to add the auto-responder and click on the"Create" button.

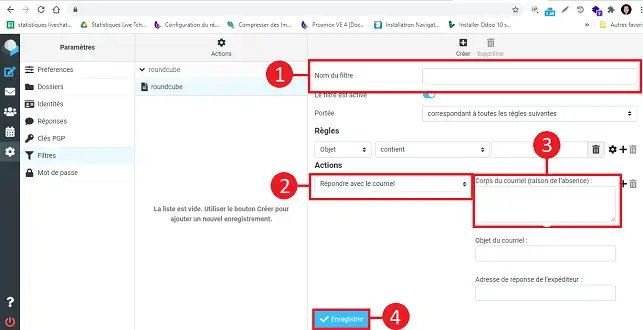
Fill in the fields as follows:
Click on the"Save" button to save your request.

You now know how to :
With these simple steps, you have the keys in hand to maintaining smooth, professional communication with your contacts, even when you're not behind your screen. Don't forget, a good autoresponder can make all the difference when it comes to customer relations and managing your online reputation. 👍
Thank you for reading this article! If you have any questions, suggestions or would like to share your experience with the Roundcube autoresponder, please feel free to leave a comment below. We value your opinion! 💬
Rate this article :
2.2/5 | 41 opinion
This article was useful to you ?
Yes
No
1mn reading
Use roundcube webmail to manage your email address easily
1mn reading
How do I get started with Rouncube webmail?
0mn reading
How do I insert a signature in my e-mails sent with Roundcube?
1mn reading