Rate this article :
3/5 | 1 opinion
This article was useful to you ?
Yes
No
Vous avez noté 0 étoile(s)
Sommaire
Procédure
The purpose of a cron job is to automatically run a script, a command or a programme at set times.
With"LWS cron job", you can schedule a script on your site to run at different times. For example, once a week, once a day, on the 8th of every month, etc.
Cron is a very useful tool for system administrators to automate various tasks, such as backing up data, updating software,sending emails, etc.
A timeout of 240s is applied to these tasks, which means that if your script takes more than 4 minutes to run, it will be automatically shut down after 4 minutes.
First, you need to log in to your LWS account and access the shared hosting for which you want to create a cron job.
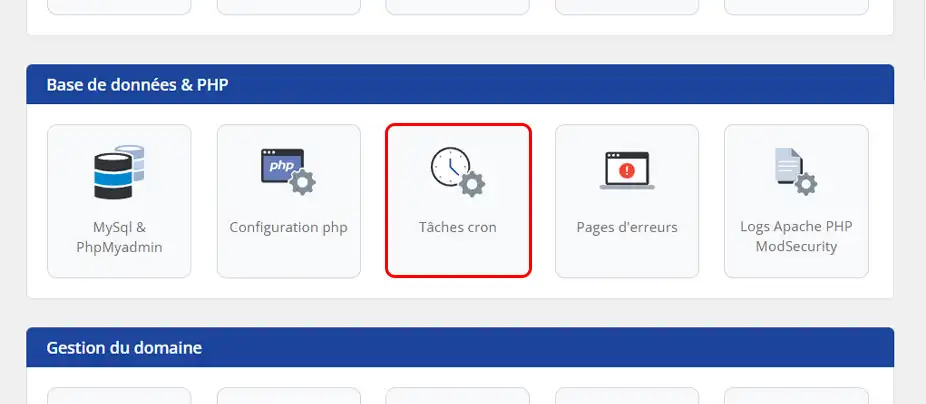
Once in the management of your service, look for the"Database & PHP" block and click on"Cron tasks".

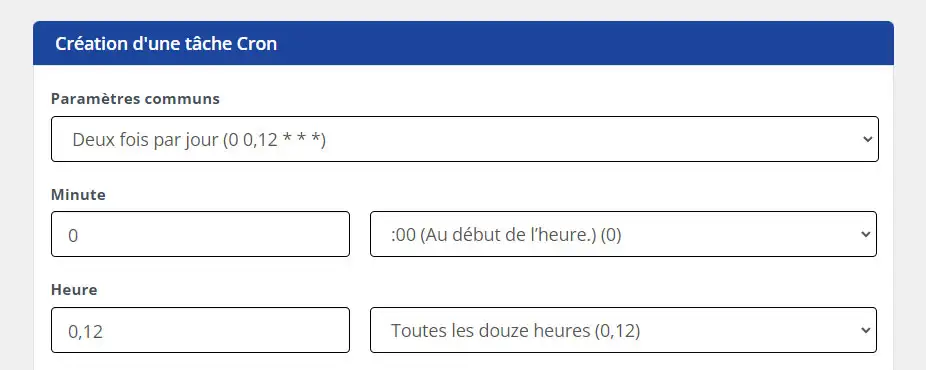
The first thing to configure for your cron job is its periodicity.
At this level, LWS offers pre-settings in its tool so that you can configure this in 1 click.
To do this, simply use the first list at the top of the form and select one of the proposed parameters. This will automatically fill in the fields to match the periodicity indicated in the list you have selected.

If the periodicity you want to set up is not proposed in this first list, don't worry, we can configure each element.
For each item (minutes, hours, days, etc.), you can either enter the values manually, or use the list field to the right of each field.
So if, for example, I want my task to start every day at 12:27, all I have to do is select the number 27 in the list attached to the minute field and select 12:00 pm (noon) in the list attached to the hour field.
There are three ways of calling your script via the Cron Task tool:
The difference between these three options lies mainly in the way they execute your script.
A Wget or Curl call uses the HTTP protocol, which means that it will be subject to Apache configurations and restrictions such as the timeout, which can be relatively short.
ThePHP call, on the other hand, will be free from the limitations that we discussed with the other two methods. Think of the PHP call as going through an SSH connection.
You might therefore wonder which method to choose for setting up your Cron task. Our answer is that there are no real differences for basic scripts that run quickly. However, if your CRON task is fairly large, with a lot of actions performed and therefore a slightly longer execution time, the most suitable method will be aPHP call. Unlike Curl or Wget, the timeout will be longer (4 min).
We're going to look at how to set up a cron job for each of the calls mentioned above. We'll take as an example a simple site calling a root script.
cURL call
When making a curl call using the HTTP protocol, we simply call the URL to our file as follows
curl -s -H "Cache-Control: no-cache" "https://www.mon-domaine.fr/cron.php" > /dev/null
We may also need to send parameters to our script. To do this, simply add them as follows:
curl -d "param1=value1¶m2=value2" -s -H "Cache-Control: no-cache" "https://www.mon-domaine.fr/cron.php" > /dev/null
This will allow us to retrieve these parameter values in the code of our POST script.
| Option | Role |
|---|---|
-s |
Silent mode (no progress bar). |
-H "Cache-Control: no-cache |
Force server-side no-cache. |
> /dev/null |
Redirects output to save nothing. |
Wget call
During a Wget call, which also uses the HTTP protocol, as with the cURL call, we will also call the URL of our script. This will give :
wget --no-cache --output-document=/dev/null --header="Cache-Control: no-cache" "https://www.mon-domaine.fr/cron.php"
If we need to pass parameters to the script, with Wget we will have no choice but to pass the parameters in GET. Here's how to write the command :
wget --no-cache --output-document=/dev/null --header="Cache-Control: no-cache" "https://www.mon-domaine.fr/cron.php?param1=value1¶m2=value2"
In the script, we can retrieve these two parameters in GET.
| Option | Role |
|---|---|
--no-cache |
Avoids the use of intermediate caches (useful with certain proxies). |
--output-document=/dev/null |
Stores nothing locally. |
--header="Cache-Control: no-cache" |
Sends an HTTP header to avoid server-side caching. |
PHP call
In the case of a simple site, let's imagine that the file containing my script is called cron.php
All you need to do is enter the following command in the Cron Task tool:
php /htdocs/cron.php
Here, the PHP version used to run your script will be 8.0 by default.
If you wish to use a specific version of PHP, simply modify the call slightly. For example, if you want to use version 7.2 to run the script, this is the command called :
php72 /htdocs/cron.php
We may also need to pass an argument that will then be used in our script.
For example, let's imagine that the aim of our script is to send an email based on a criterion we define, such as the birthday. We might therefore want to pass this criterion in the call. Here's how to do it via the command line :
php72 /htdocs/cron.php type=anniversary
Special cases
There are also special cases depending on what you use for your site.
For example, in the case of a site created with the Cakephp framework, the CRON task configuration will be a little different because it will be done via a SHELL command called by the framework system.
Let's imagine we have an e-commerce site created using the Cakephp framework and we want to set up a script that will send an email to the best customer offering them a promotional code.
We're going to create a Cake command that we'll call SendCP, which will contain the script that manages what we want to do. Here's how we'll configure the Cron task :
php72 /htdocs/Console/cake.php SendCP
It would take a long time to give an example of each case, but with what has been given here, you already have a good basis for using the Cron task tool.
Using the various examples, we now know how to write our command to :
We're now going to look at how to create a log file so that we can see what happened during the script called by Cron.
To do this, we'll use the example below for our CRON script.
Example of a PHP echo function for the log file
<?php /* So you don't have to worry about caching */ header("Cache-Control: no-store, no-cache, must-revalidate, max-age=0"); header("Cache-Control: post-check=0, pre-check=0", false); header("Pragma: no-cache"); /* Write the current date to the file, for example: 2023/01/19 12:24:01 */ /* PHP_EOL allows you to skip a line in the file */ echo date('Y/m/d h:i:s').PHP_EOL; /* Write the sentence below in the log file */ echo 'Recording my Cron'.PHP_EOL.PHP_EOL; ?>
Rendering of the log file after launching the script via Cron Job
2023/01/19 02:57:01 Recording my Cron 2023/01/19 03:57:01 Recording my Cron 2023/01/19 04:57:01 Recording my Cron 2023/01/19 05:57:01 Recording my Cron 2023/01/19 06:57:01 Recording my Cron 2023/01/19 07:57:01 Recording my Cron 2023/01/19 08:57:01 Recording my Cron
What you put in your log file will therefore depend on you and what you want to track in your script. For example, it could be a list of actions with the result for each one.
Example of a cURL call with return in a log file
For a cURL call, here is the command to enter in the "Command" field:
curl -s -H "Cache-Control: no-cache" "https://www.mon-domaine.fr/cron.php" > /htdocs/logs/cron_curl.log 2>&1
In this example, writebacks (echo PHP) will be made to the cron_curl.log file in the logs folder. If the file or folder does not exist, it will be created automatically.
| Option | Role |
|---|---|
-s |
Silent mode (no progress bar). |
-H "Cache-Control: no-cache" |
Force server-side no-cache. |
> /htdocs/logs/cron_curl.log |
redirects standard output (stdout) to cron_curl.log. |
| 2>&1 | also redirects errors (stderr) to the same file. |
Example wget call with return to a log file
For a Wget call, here is the command to use:
wget -O - -q --no-cache --header="Cache-Control: no-cache" "https://www.mon-domaine.fr/cron.php" > /htdocs/logs/cron_wget.log 2>&1
In this example, write feedback (echo PHP) will be sent to the cron_wget.log file in the logs folder. If the file or folder does not exist, it will be created automatically.
| Option | Role |
|---|---|
--no-cache |
Avoids the use of intermediate caches (useful with some proxies). |
--header="Cache-Control: no-cache" |
Sends an HTTP header to avoid server-side caching. |
| --post-data="..." | adds a custom HTTP header. |
> /htdocs/logs/cron_wget.log |
redirects standard output (stdout) to cron_wget.log. |
| 2>&1 | also redirects errors (stderr) to the same file. |
Example of a PHP call with return to a log file
For a PHO call, here is the command to use:
php72 /htdocs/cron.php >> /htdocs/logs/cron_php.log
In this example, write feedback (echo PHP) will be sent to the cron_php.log file in the logs folder. If the file or folder does not exist, it will be created automatically.
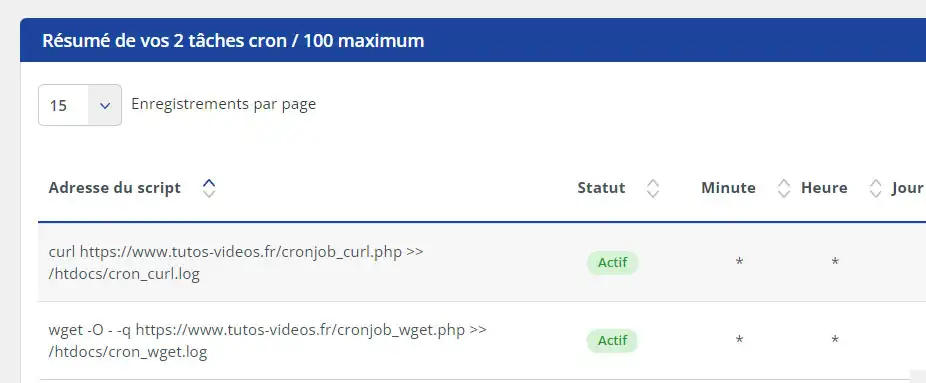
Once you have created your cron tasks, you can find them directly in the listing that appears below the add form.

Here you'll find a list with the command recorded, the periodicity and the option to delete a cron job or pause it.

If you have an LWS Starter package or higher, you can modify the cron job for your package via the Web Terminal accessible from your package administration.
To do this, connect to your hosting and access the shared hosting for which you want to modify a cron job.
Click on"Terminal" in the "Software" section.

Access the cron file using the following command:
crontab -e

Once in the cron file, browse the file for the task you wish to modify. Each line in the file represents a separate task. Then modify the cron job, making sure that the syntax remains correct. Then save it using the keyboard shortcut [CTRL] +X then"Y". Then press [Enter].
You can then check whether the cron job has been correctly modified by using the following command:
crontab -l

You have linked your domain to CloudFlare using the latter's DNS and you want to configure a cron job from your customer area in the associated section, but the job only executes once without repeating itself at the time interval you wanted. This problem is known, CloudFlare blocks the execution of crons sent from our services. To overcome this problem, here's a workaround.
The cron tasks configured from the customer area don't work if you use CloudFlare DNS. To overcome this problem, please follow this procedure:
In the "DNS" section, add a CNAME record as shown in the following example:

Replace"cron" with the name of your sub-domain and"domain.ext" with your domain name.
Make sure that the cloud is grey and not orange. This tells CloudFlare that you don't want to use its services for this sub-domain.
You can then click on the"Add Record" button.
You now know how to : - Understand the purpose and operation of a cron job 🤖
We hope this article has provided you with all the keys to mastering cron tasks and automating your system tasks efficiently.
If you have any questions, feedback or tips to share, don't hesitate to leave them as a comment. Thanks for reading and see you soon for more practical advice! 🙏💬
Rate this article :
3/5 | 1 opinion
This article was useful to you ?
Yes
No
0mn reading
Multi-domain - Putting several domains on the same web hosting service
1mn reading
Is it possible to remove the RSpamD anti-spam function on shared hosting?
0mn reading
How can I view emails sent using the PHP mail function and blocked by SPAMASSASSIN?