Rate this article :
This article was useful to you ?
Yes
No
Vous avez noté 0 étoile(s)
Sommaire
Procédure
WordPress themes are essential elements that define the look and feel of your website. A good theme can make your site attractive and easy to navigate, increasing user engagement and the length of their visit.
However, managing themes can seem like a daunting task if you don't know where to start. Fortunately, WP Manager makes this task incredibly easy and intuitive. This tool has been designed to help you install, activate, configure and manage your WordPress themes hassle-free and efficiently.
This guide, designed for both beginners and more advanced users, will take you step-by-step in a simple, clear and precise way, allowing you to customise the look and feel of your site to your heart's content.
First of all, you need to access the WP Manager function on the hosting where you want to manage the installed WordPress instances.
In the list of Wordpress instances on your hosting, click on the 3 dots to the right of the instance you want (1). In the menu that appears, click on"Manage WordPress installation":

Once in the WordPress installation management, click on the"Themes" tab to view the list of themes installed on your WordPress instance:
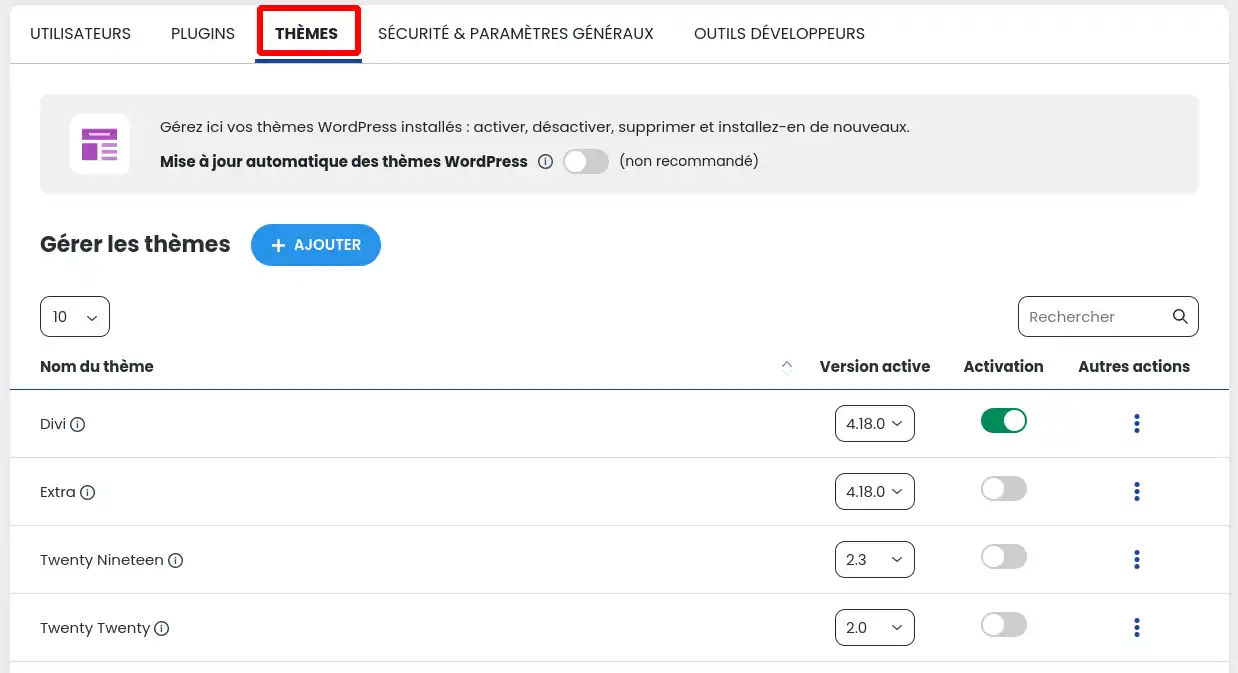
Once you have accessed the list of themes, click on the slider on the line of the theme you wish to activate.
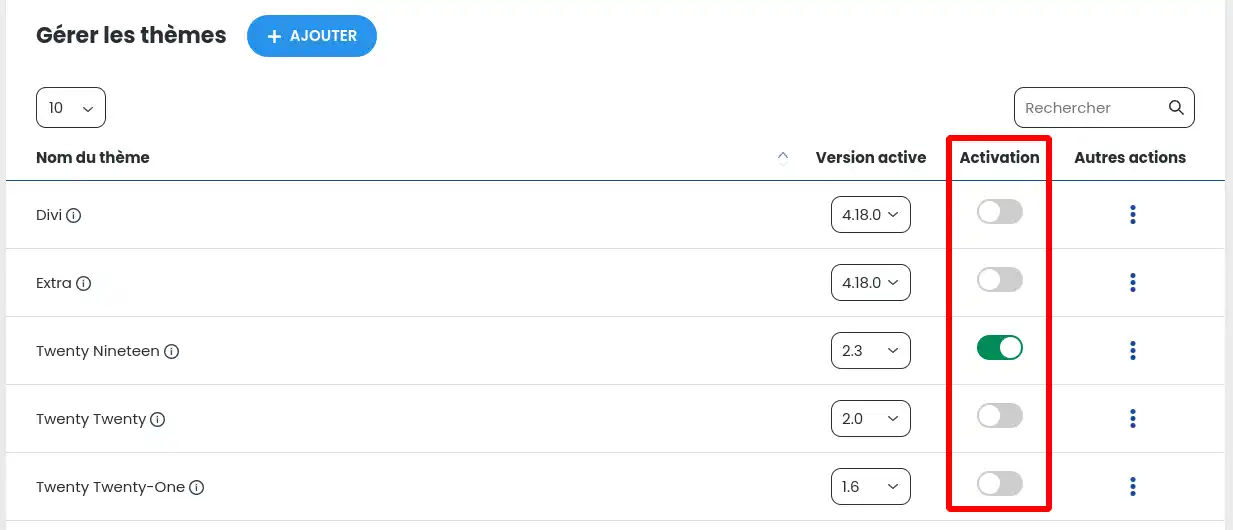
If the slider is grey, then the theme is inactive. Conversely, if the cursor is green, then the theme is currently active.
To add a theme to your Wordpress site, click on the "+ Add " button located above the list of themes.
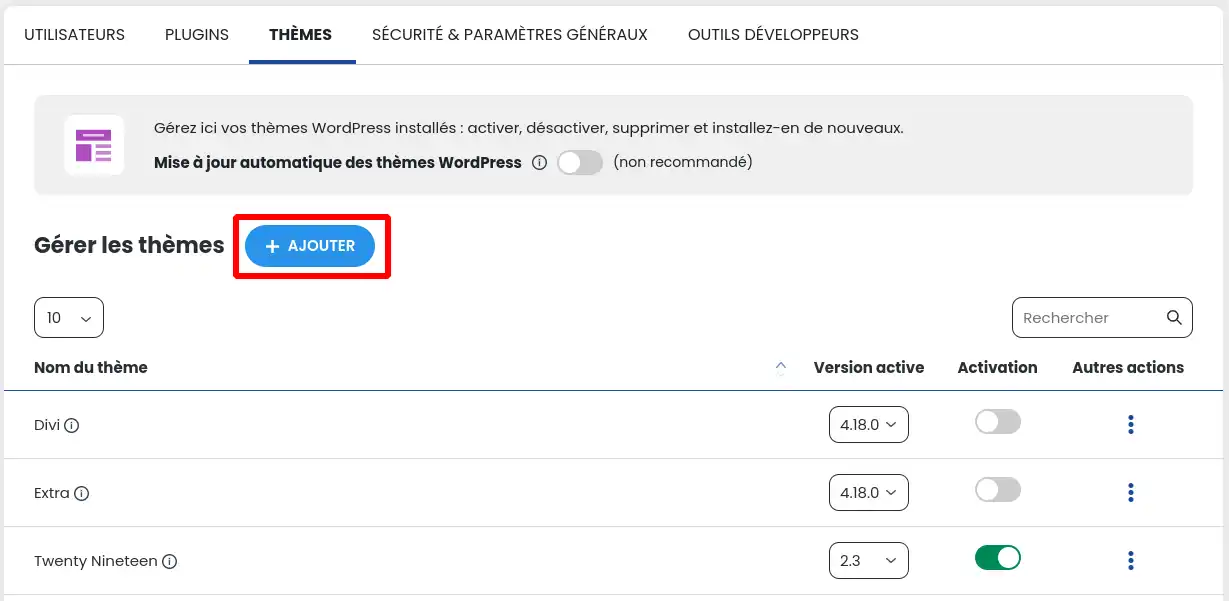
You will then be redirected to the add theme form at the bottom of the same page.

You can search for a theme in the WordPress catalogue by entering a term in the field indicated by a red frame in the screenshot above. The term can be part of the name of a theme that you are looking for in particular, or a generic term such as "salon", for example, in order to search for all themes related to this term.
For the example, we're going to search for themes around the term "Salon".
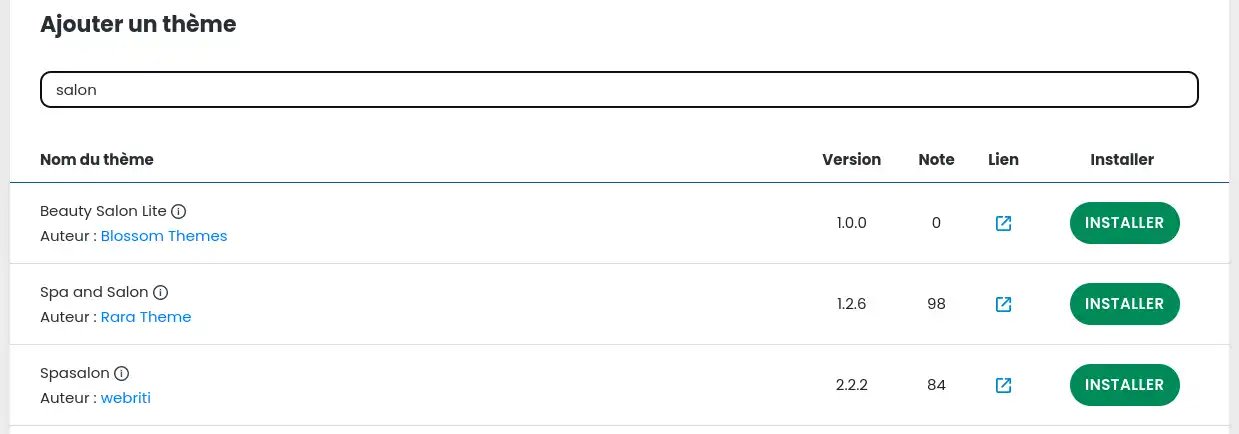
The image above shows the result of the search. Once you've made your choice, click on the "Install" button.
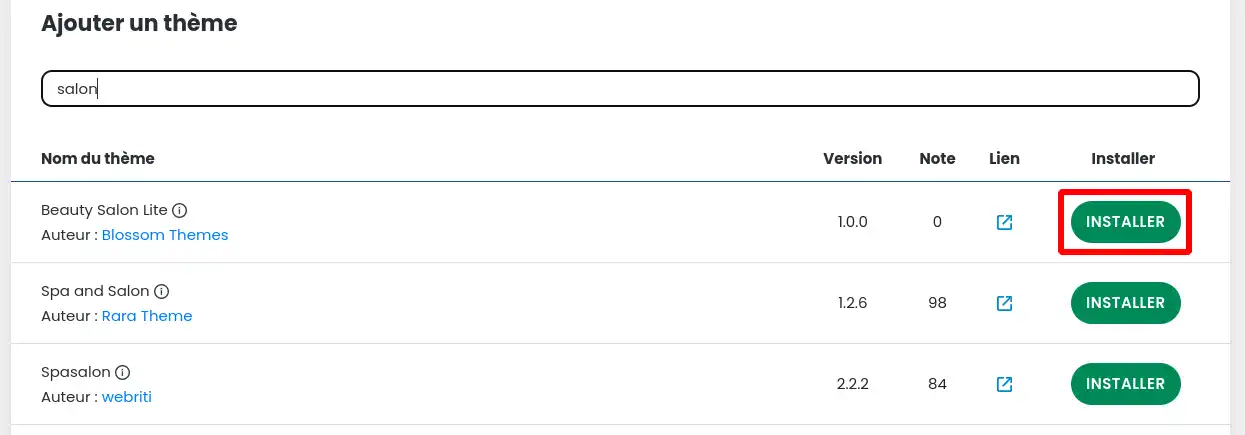
Once the theme has been correctly installed on your site, you need to activate it. This can be done by following point II of this same documentation or by clicking on the "Activate" button in the search listing.
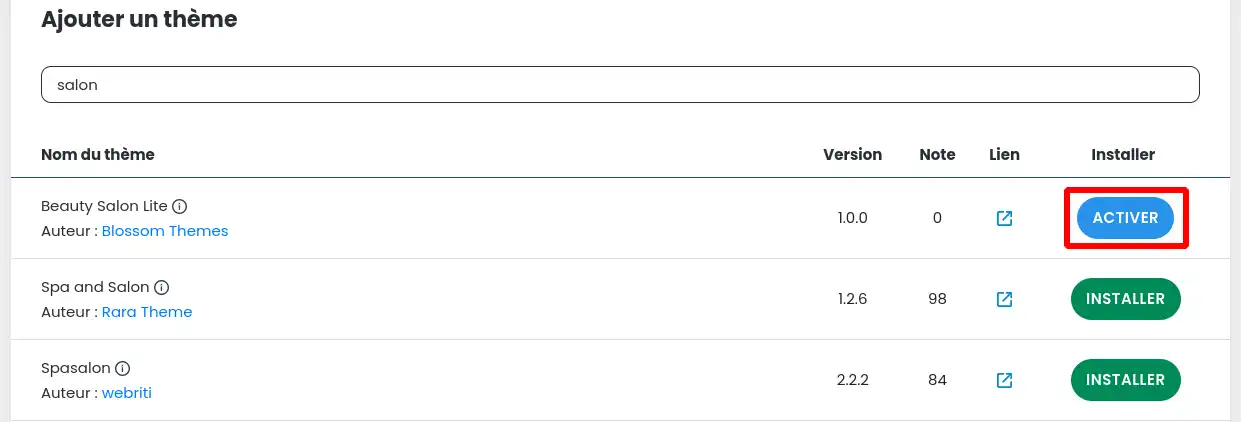
Once activated, the theme goes into active status as shown in the screenshot below and you can immediately configure it on your WordPress site.
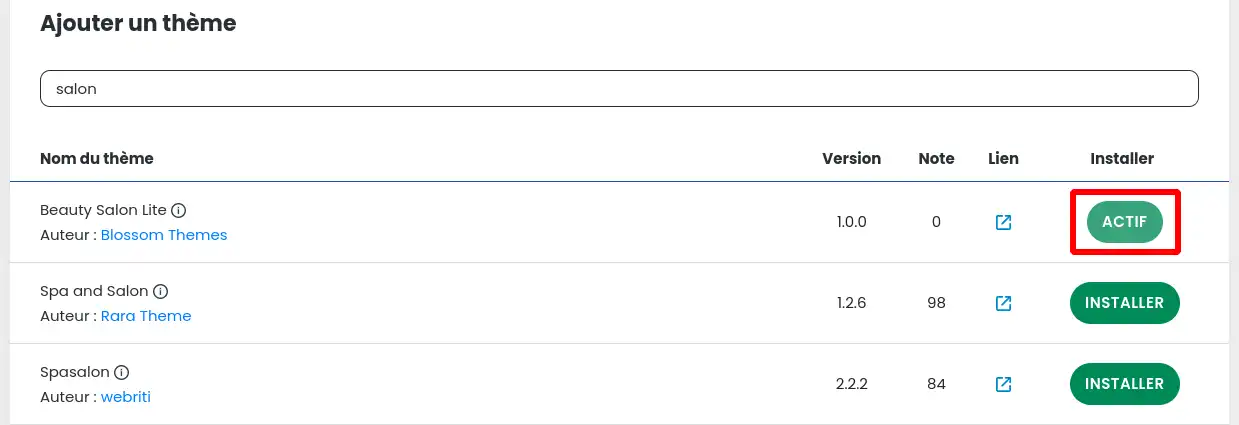
Themes cannot be configured using the WP Manager tool. You will therefore need to connect to the WordPress Dashboard.
To update a theme, go to the list of themes on your Wordpress site and click on the 3 dots to the right of the theme you want (1). In the menu that appears, click on"Update":
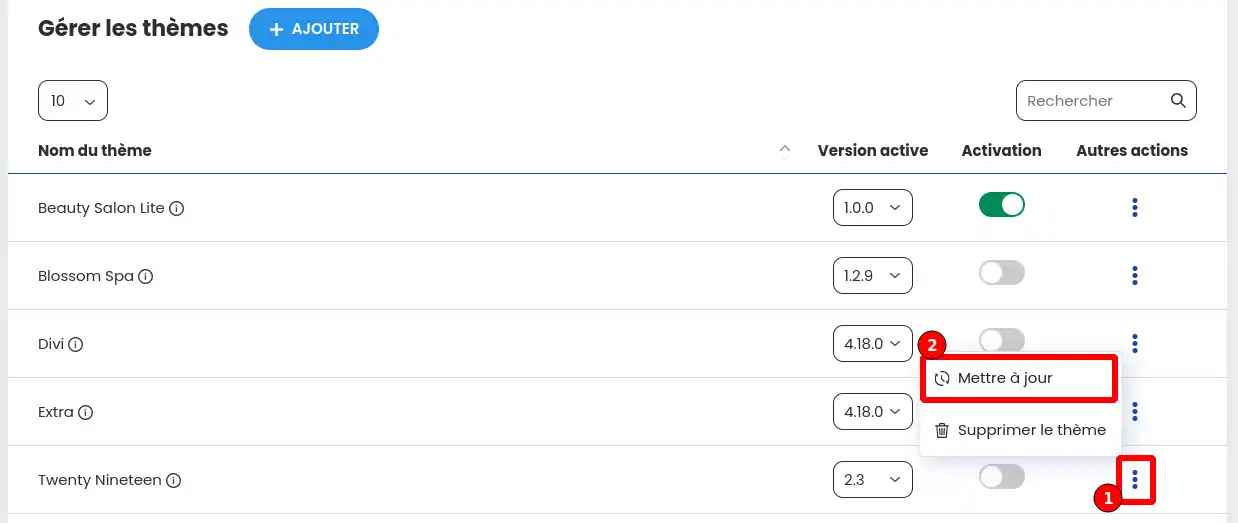
The update may take from a few seconds to a few minutes, so wait until the end of the process to check that everything is working properly.
Activating automatic theme updates is a very practical way of keeping your site up to date without having to check regularly, but it should be used with caution. Indeed, an update can lead to incompatibility with an extension or the version of WordPress and render your site partially or totally non-functional. That's why we don't recommend using this feature, although it can be activated by informed users.
To activate the automatic update of themes, simply activate the slider at the top of the "Automatic update of WordPress themes" theme management page.

If the slider is grey, then the functionality is inactive. Conversely, if the slider is green, then the feature is currently active.
It is possible that the latest version of a recently updated theme is not compatible with all the modules of your WordPress site or with the PHP parameters of your hosting.
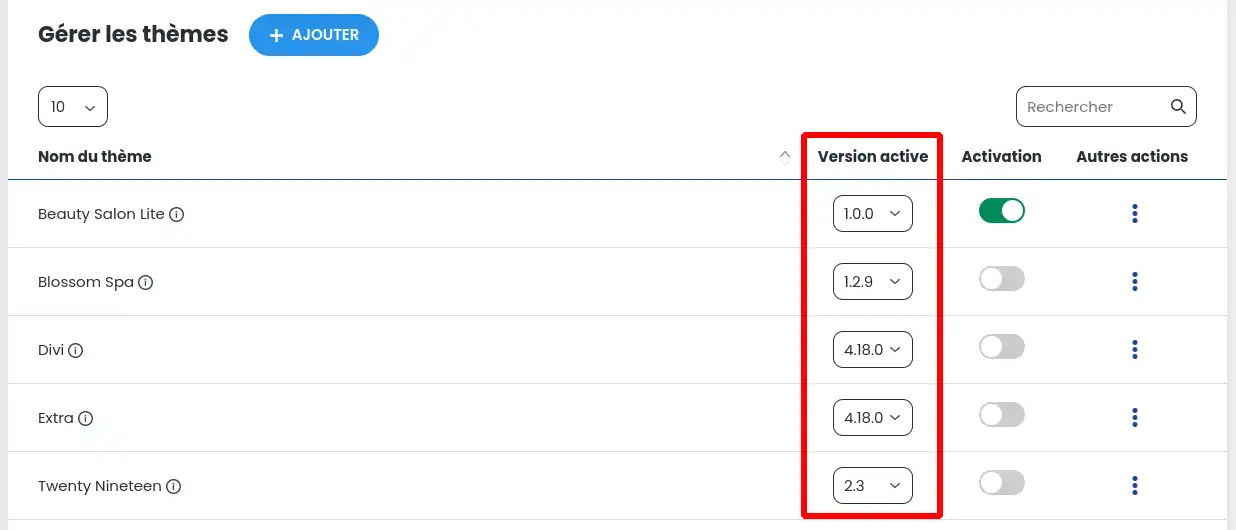
In this case, you can revert to a previous version of a theme.
To do this, you can select the version of each theme you wish to use from the list of themes and reinstall a previous version of the one causing the problem:
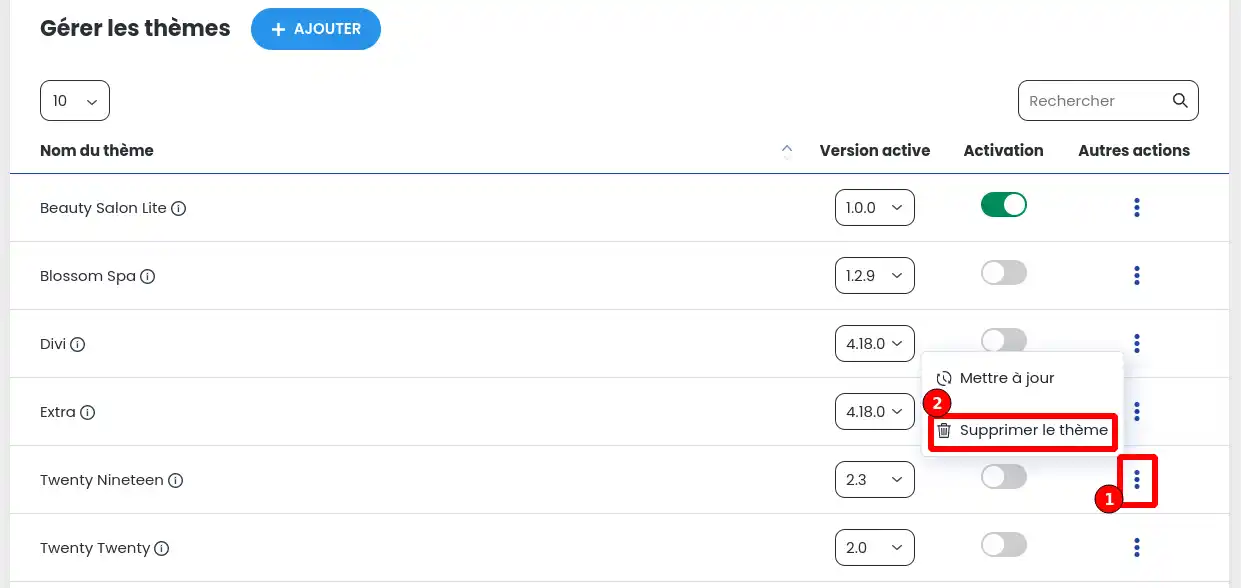
To delete a theme, go to the list of themes on your Wordpress site and click on the 3 dots to the right of the desired theme (1). In the menu that appears, click on"Delete theme":
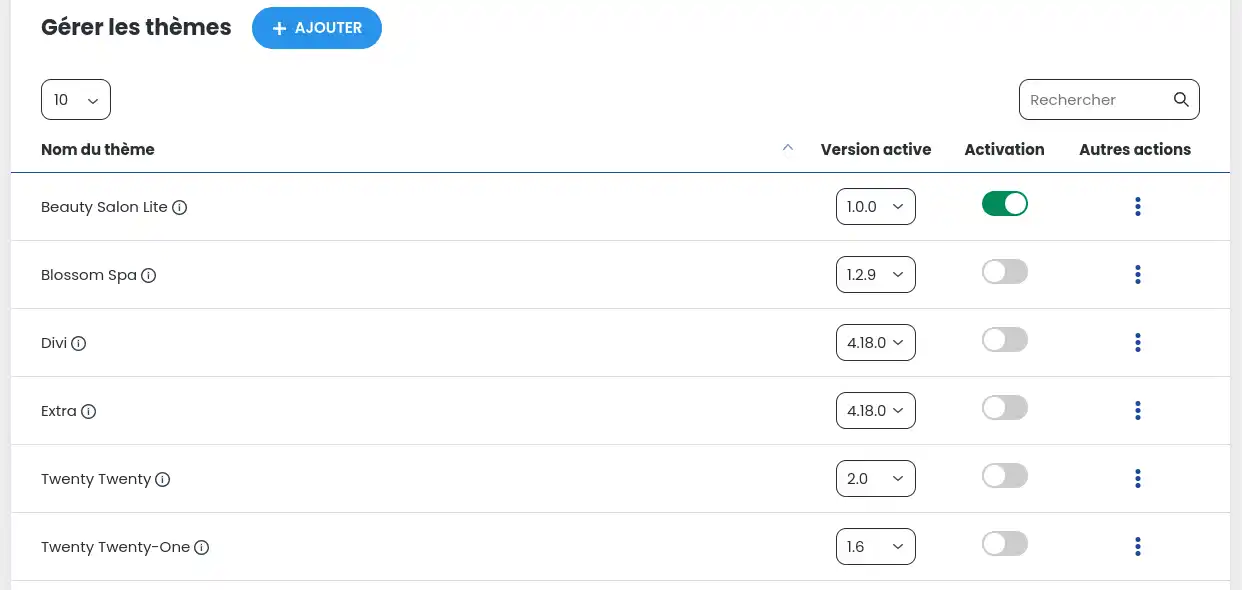
The listing is then updated without the theme that has just been deleted.
You now know how to :
🚀 Thanks to these key steps, you are now able to master the world of WordPress themes and offer your visitors an improved user experience and a website that reflects your image. 🌐
We hope you've found this guide useful and thank you for your trust. If you have any questions or feedback to share, please don't hesitate to leave us a comment. Your opinion matters to us! 🤝
[tips_related_readings]Managing updates to my Wordpress site with WP Manager[/tips]
Rate this article :
This article was useful to you ?
Yes
No
1mn reading
How do I search for Wordpress installations on my hosting?
1mn reading
How do I manage Wordpress users with WP Manager?
1mn reading
How do I manage updates to my Wordpress site using WP Manager?
1mn reading
How do I manage extensions and plugins with WP Manager?