Rate this article :
This article was useful to you ?
Yes
No
Vous avez noté 0 étoile(s)
Sommaire
Procédure
Synchronising your contacts and calendar between Nextcloud and Outlook allows you to manage your information centrally and seamlessly, from multiple devices and interfaces. This documentation will guide you step-by-step through configuring this synchronisation using the CalDav Synchronizer extension.
To synchronise your Nextcloud calendar and contacts with Outlook, you will need to install the CalDav Synchronizer extension. Click here to download it.
Click on the Download button
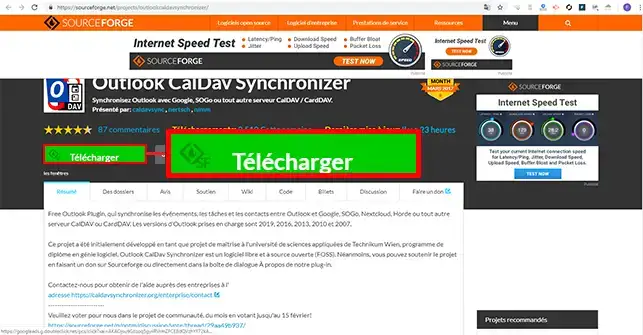
Once the download is complete, you should obtain an archive in ZIP format with this name: OutlookCalDavSynchronizer-4.4.1.zip. Simply extract it using your favourite software (7Zip, Winrar, etc.) or the tool deployed by default on your operating system, generally this involves right-clicking on the file and then Extract here. Then run the setup.exe file inside the extracted folder.
A new window should appear; simply press Next to complete the installation, then press Close to confirm. We recommend using the default installation directory for this type of extension.
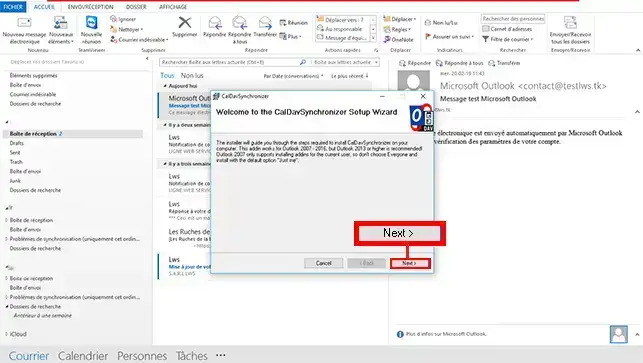
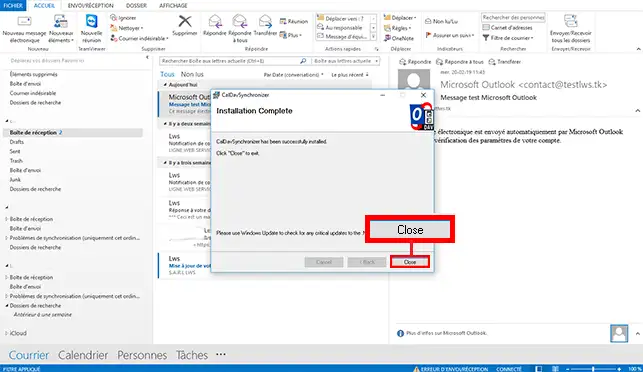
Once the installation is complete, you will need to restart Outlook. The extension will then be visible in the upper part of Outlook.
Open Outlook and click the CalDav Synchronizer tab at the top of your screen. If Outlook was already open, close it and then open it so that the new module installed previously is active.
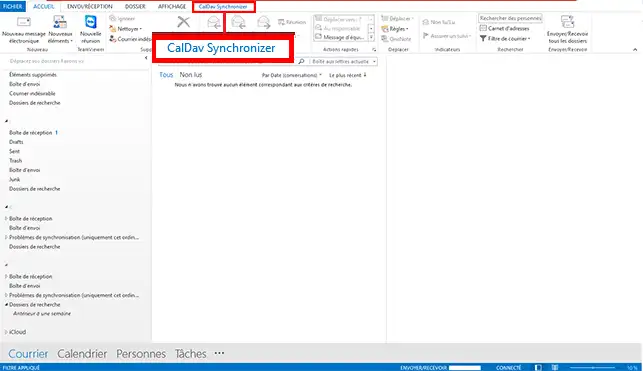
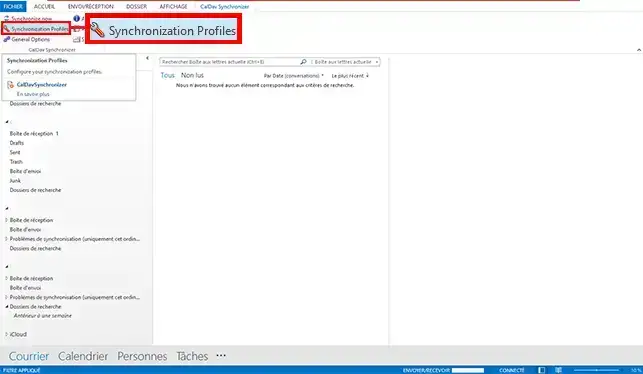
Next, click on Synchronizations Profiles to create the profiles required for it to work properly.
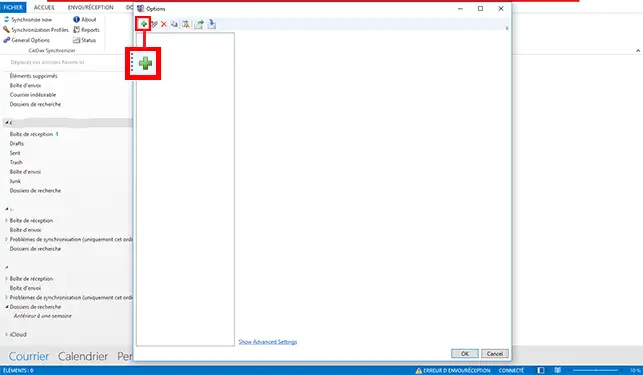
Now click on the green (+) icon in the top left-hand corner of the new window.
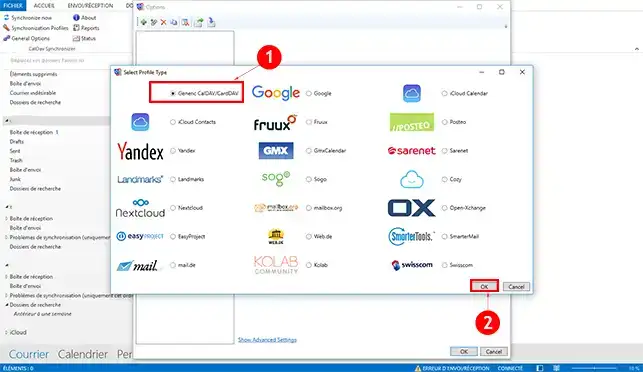
Select Generic CalDAV/CardDAV as the profile type, then click OK.
A new window should appear and you will need to fill in the fields, starting by entering a name for your profile. Ideally, the names "Calendar" and "Contacts" should be used. Next, you need to select the directory in which the calendar or contacts will be saved on your computer.
To do this, start by clicking on the "..." just to the right of the input field for the Outlook Folder.
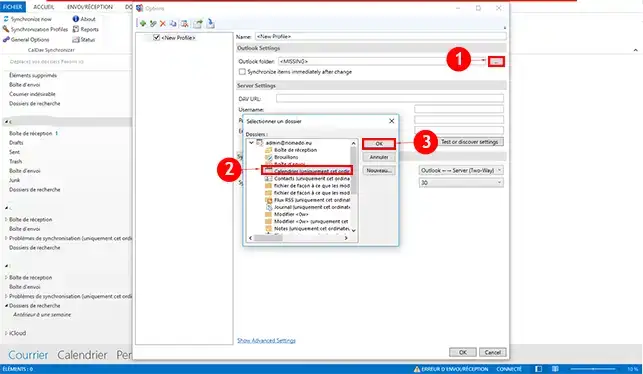
Then save by clicking OK
The last fields consist of entering the information linked to your Nextcloud account in order to complete the configuration of the CalDav Synchronizer extension.
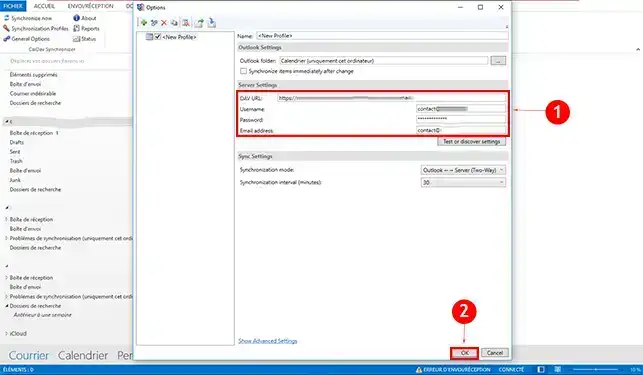
Here is the information to enter in these fields:
For information, here are a few explanations about the information to be modified in the DAV URL field:
Click OK to save your settings
Of course, this procedure will be repeated twice in order to add the sync profile for Contacts, but also for Calendar, starting from step 2.
By following the steps described in this guide, you have now successfully configured the synchronisation of your contacts and calendars between Nextcloud and Outlook. Thanks to the CalDav Synchronizer extension, your information is always up to date, whether you consult it from your Outlook client or from Nextcloud. This bi-directional synchronisation allows you to work more fluidly, avoiding duplication or loss of data.
Rate this article :
This article was useful to you ?
Yes
No
11mn reading
Synchronise NextCloud with my computer
9mn reading
Sharing my data with NextCloud
0mn reading
Synchronising folders to remote Cloud storage
2mn reading
How do I use NextCloud in WebDav mode on Cyberduck?