Sommaire
Procédure
1. Connect to your web space using software such as FileZilla.
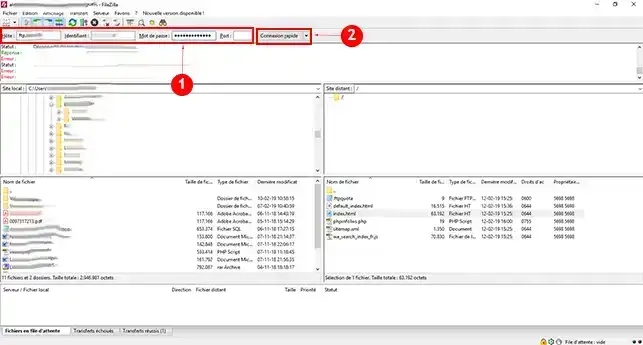
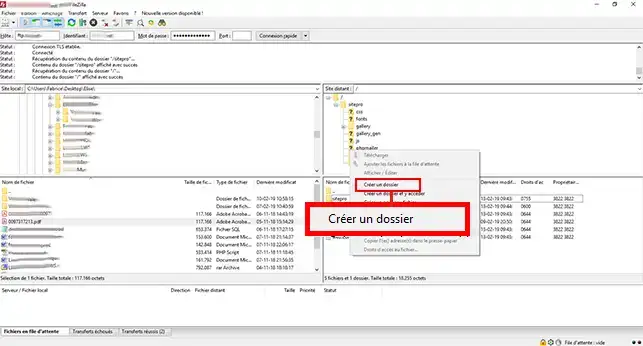
2. Create a new folder. To do this, right-click on the mouse and then on"Create a folder". It is preferable not to put the files to be uploaded in the "sitepro" directory, because each time you publish the website, the files in this directory will be overwritten and you will need to upload all the downloadable files again.
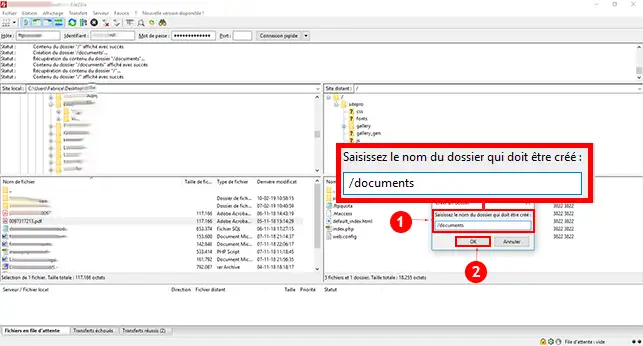
3. Enter the name of the folder to be created and click on the"Ok" button to save it.
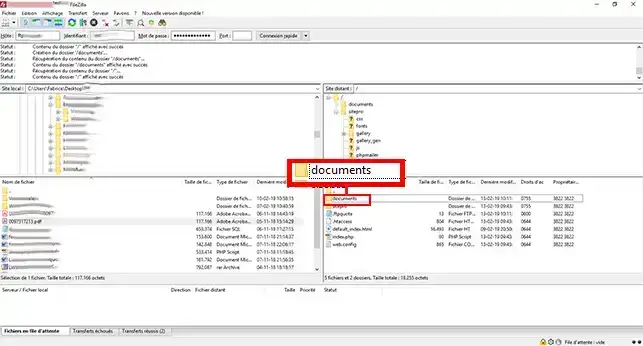
4. Double-click on the folder you have just created to go to it.
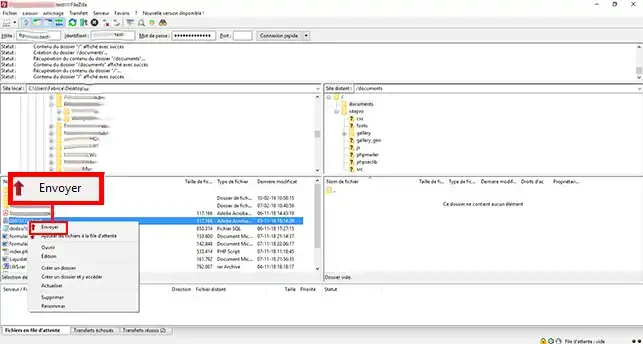
5. Choose the file to upload. Right-click on it and click on"Send" to transfer your file to your FTP space.
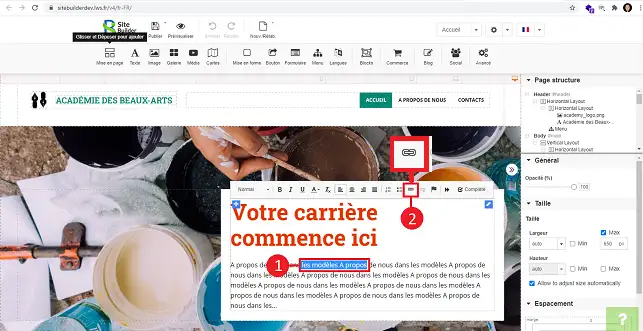
6. Connect to your SiteBuilder Pro software and select the text you want to upload. Then click on the"Chain" button (hypertext link).
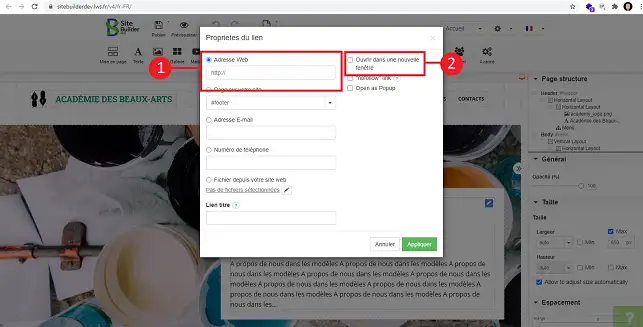
7. A new window will open, allowing you to enter the download link. You can tick the"Open in a new window" box. Once the configuration has been made, click on"Apply" to save your choice.
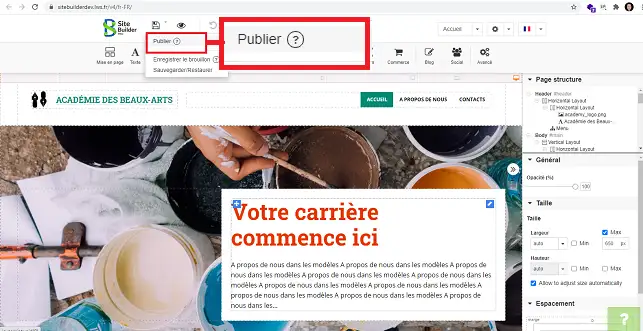
8. Don't forget that you need to republish your website after each modification you make.
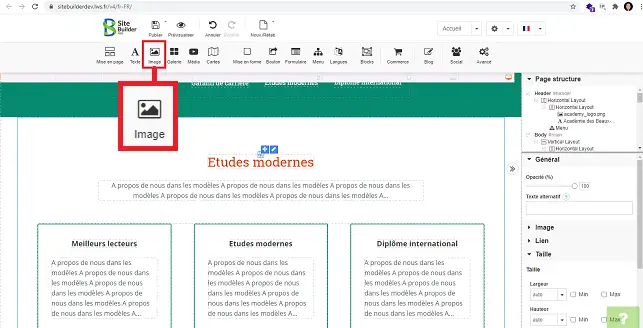
1. Once you have logged on to your SiteBuilder interface, click on the"Image" icon in the tools.
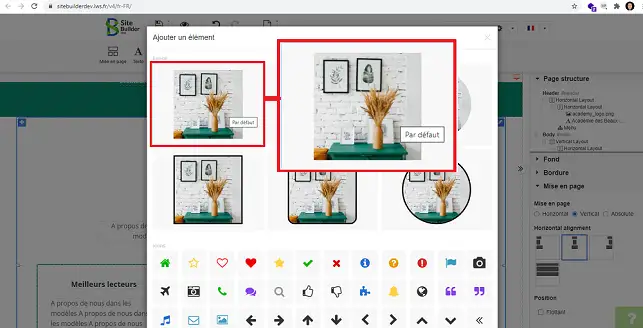
2. Click on one of the images to access the media library.
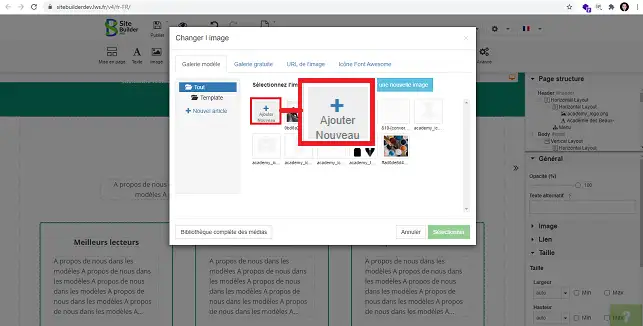
3. Click on"Add New" in the new window to upload your .PDF file.
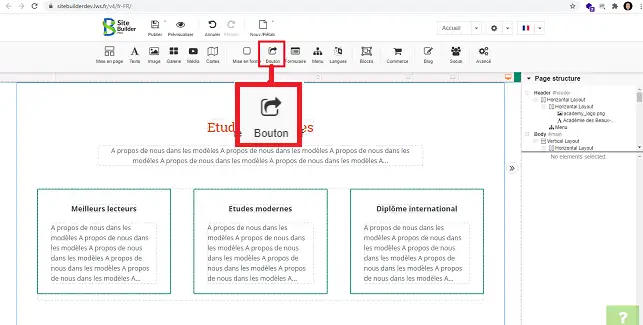
4. You can add a button to download your .PDF file. To do this, click on the"Button" tool in the menu at the top of the page.
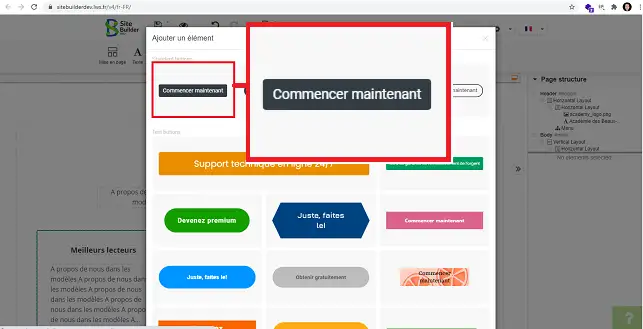
5. Choose the type of button you want by clicking on it.
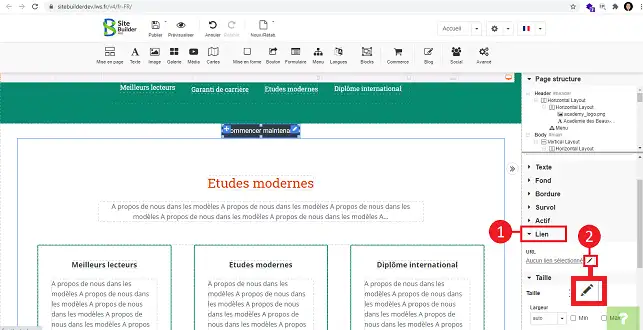
6. Select the button, go to the right-hand column and click on"Link" to open the title. Finally, click on the stylus behind the"No link selected" tab.
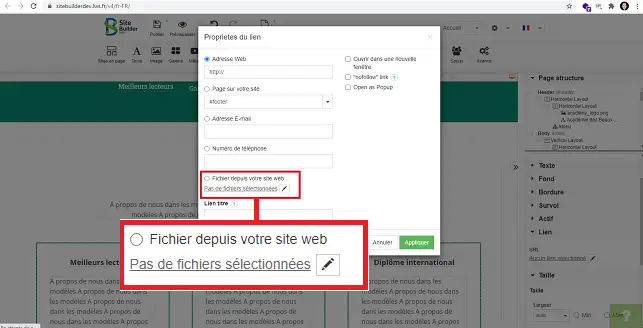
7. Select"File from your website" and click on the stylus behind the"No files selected" tab.
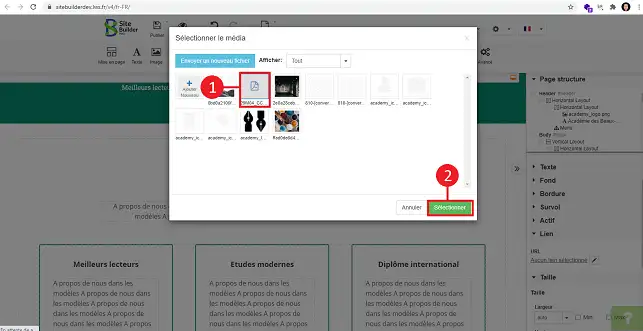
8. Select your .PDF file and click on the"Select" button.
9. Click on"Apply".
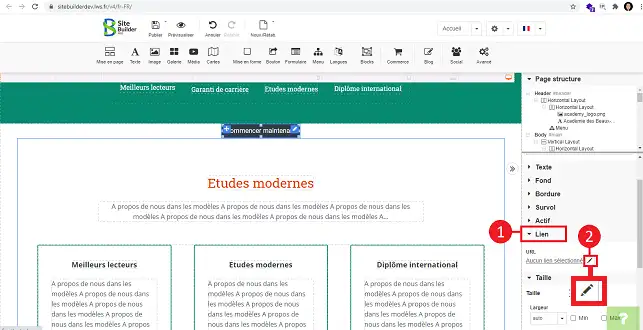
1. Once the button has been placed in the desired location on SiteBuilder Pro, click on"Link" in the right-hand menu to open the heading and then on the stylus behind"No link selected".
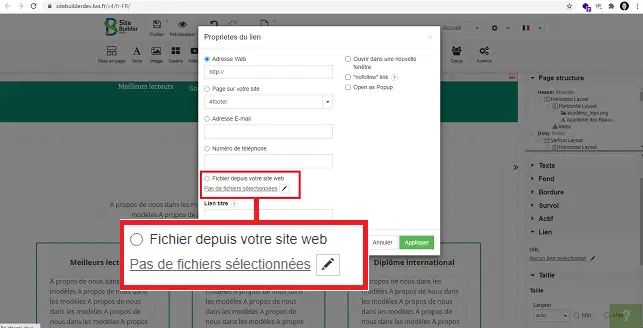
2. Select"File from your website" and click on the stylus to add the file.
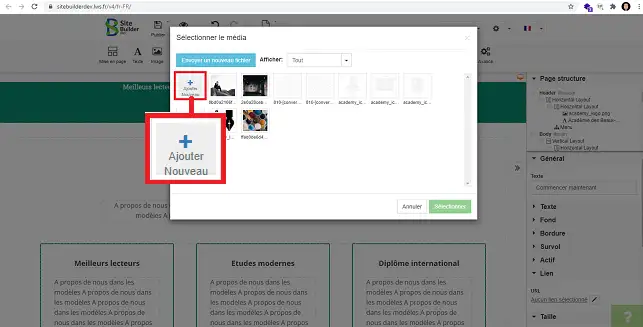
3. Click on"Add New" and upload your zipped file to your SiteBuilder interface.
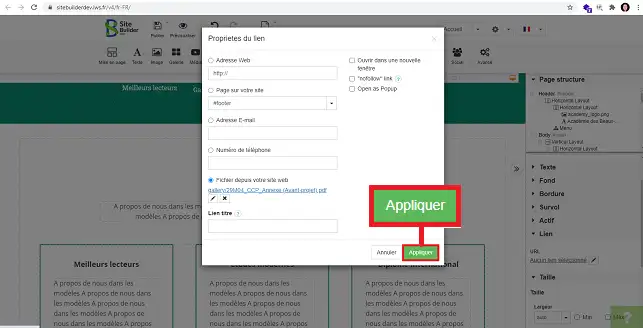
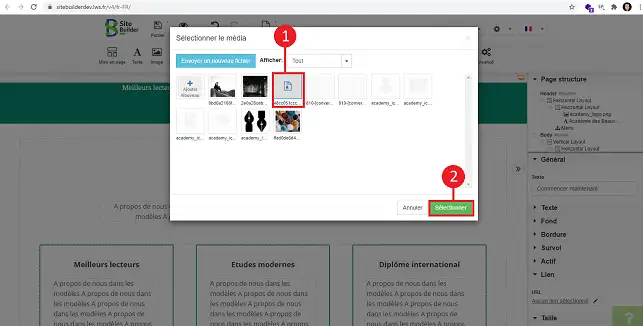
4. Select the zipped file you have just uploaded and click on"Select".
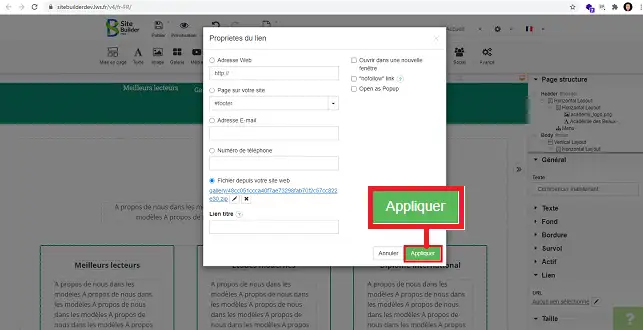
5. Click on the "Apply" button.
You can now add downloadable documents to your SiteBuilder site. It is important to note that it is preferable to insert the documents in a directory other than the "sitepro" directory so that you don't have to upload them again each time you publish your website.
Don't hesitate to share your comments.