Rate this article :
5/5 | 3 opinion
This article was useful to you ?
Yes
No
Vous avez noté 0 étoile(s)
Sommaire
Procédure
Welcome to this practical guide designed to help you configure SPF (Sender Policy Framework) and DKIM (DomainKeys Identified Mail) records to use the LWS (Ligne Web Services) mail service efficiently with your domain name. Whether you use Cloudflare or another DNS provider, this document will provide you with the essential steps and best practices for securing and optimising the sending and receiving of your emails.
The aim of this guide is twofold. Firstly, you will learn how to set up an SPF record, a mechanism for verifying the sender's IP address, which is essential for limiting the risks of spam and phishing. Secondly, you will discover how to set up a DKIM record, a method of validating the sender's identity via a digital signature, thereby reinforcing the confidence of receiving servers in the legitimacy of your emails.
Whether you're an experienced system administrator or new to managing domains and email services, this guide will provide you with clear, step-by-step instructions. Get ready to improve the security and efficiency of your email service by following this comprehensive guide to setting up SPF and DKIM records for your domain name.
To find out the values you need to enter with your DNS manager (Cloudflare or other), you first need to log into your LWS customer area and access the management of your hosting or mail service concerned.
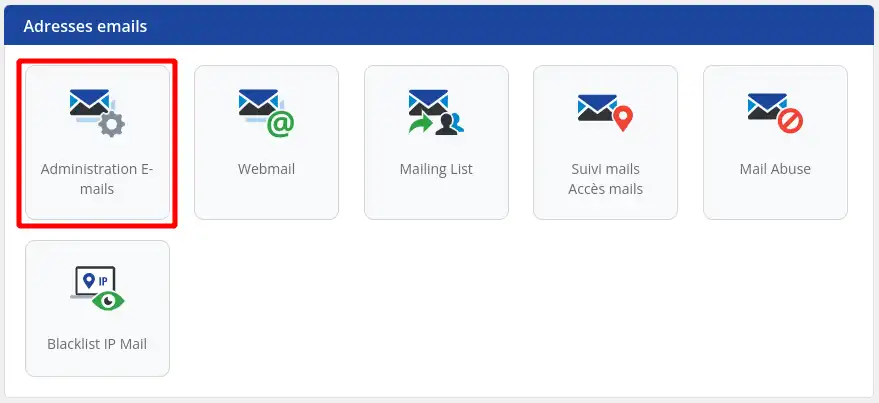
Once you are in your hosting management, click on the"Email administration" icon in the"Email addresses" section.
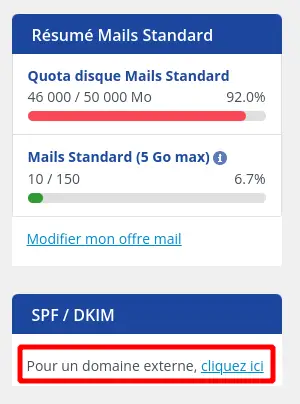
On the email administration page, click on the link in the left-hand column to view the SPF and DKIM record values to be configured on your DNS provider's interface.
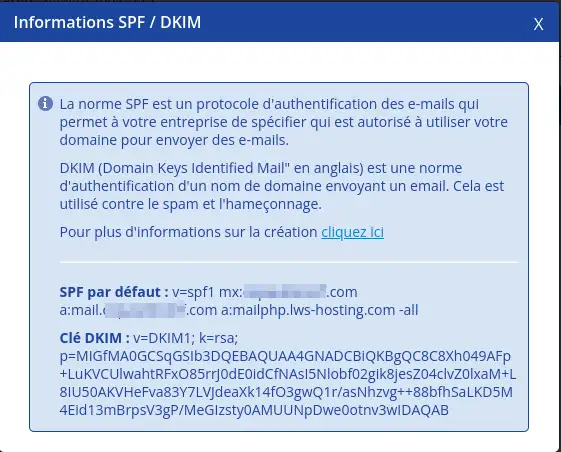
A window will appear showing the values of the SPF and DKIM records to be configured.
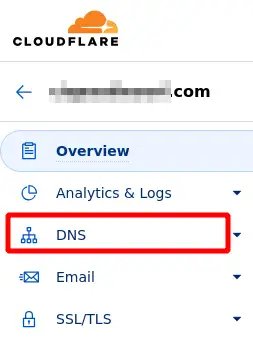
To do this, log in to your Cloudflare account and select the domain concerned.

Then click on"DNS" in the left-hand menu.
On this new page, which displays the entire DNS Zone for your domain, click on the"Add record" button.

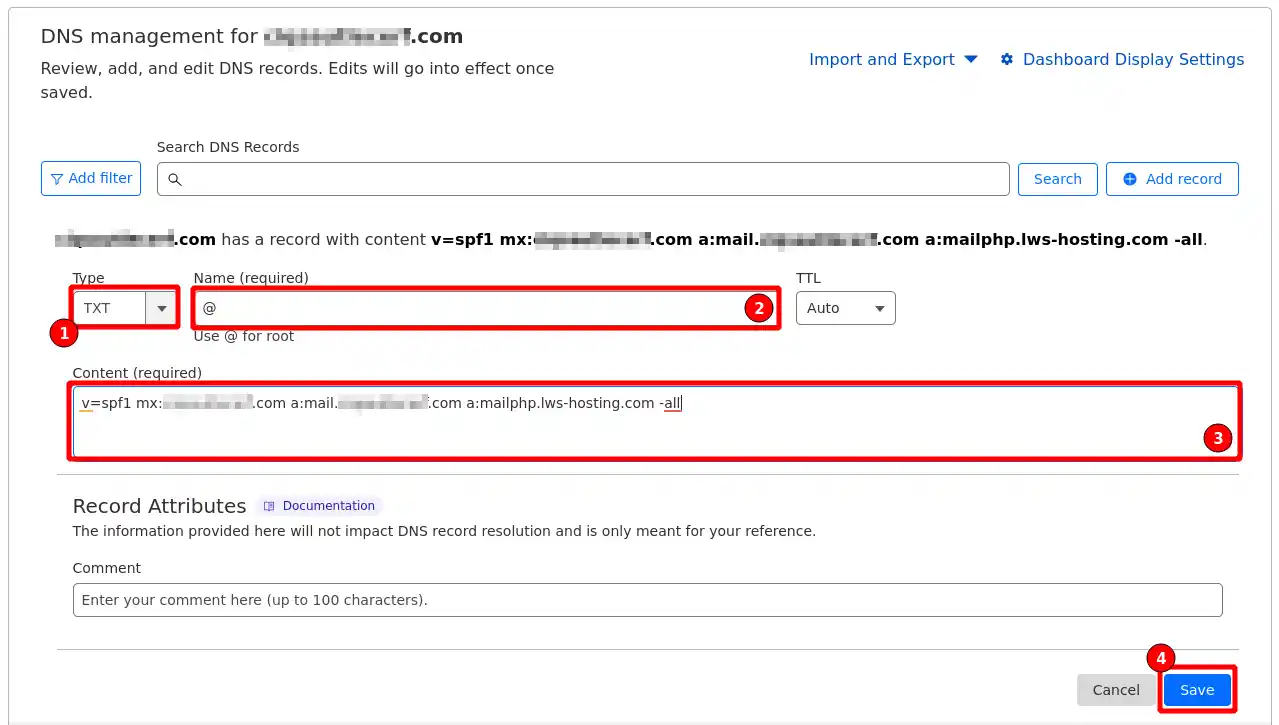
In the form that appears, to add the SPF record, select the TXT record type (even if an SPF type is proposed). Indicate"@" in the name and then the value of the record that you were able to find by following part I of this documentation. Then click on the"Save" button to add the record to your domain's DNS Zone.
The entry must correspond to the following capture:
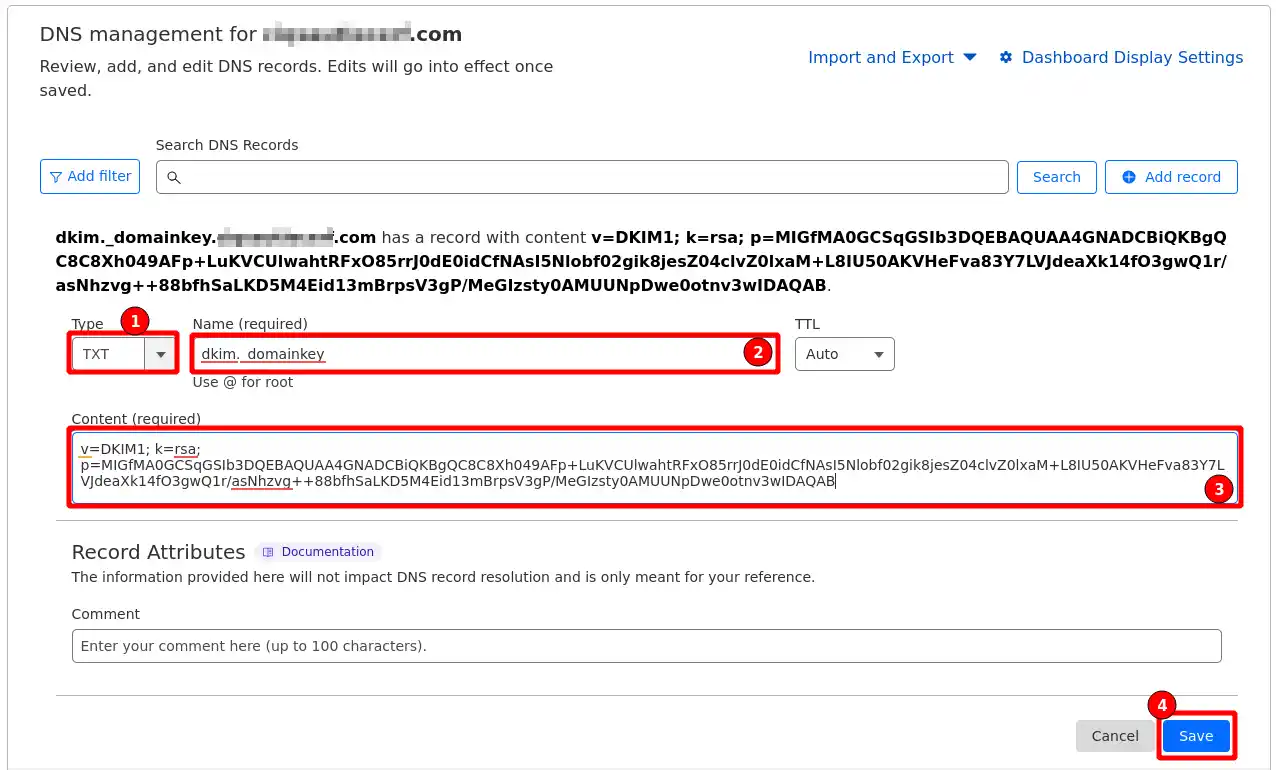
For the DKIM record, you need to repeat the same operation, selecting the "TXT" record type. In the name, you will need to enter"dkim._domainkey" and then the value of the record that you were able to find by following part I of this documentation. Click on the"Save" button to add the record to your domain's DNS Zone.
The entry should correspond to the following screenshot:
Setting up an SPF and DKIM record with a DNS provider other than LWS or Cloudflare is similar to the procedure described in part II of this documentation. The interface may be slightly different and if in doubt, contact your DNS provider's support service with the values found in part I of this documentation so that they can help you with the configuration.
Rate this article :
5/5 | 3 opinion
This article was useful to you ?
Yes
No
1mn reading
How do I create a mailbox with the LWS Panel?
1mn reading
How can I redirect my emails to another email address?
1mn reading
How can you manage your mailing lists effectively with LWS Panel?
1mn reading
How do I change the password for an email address on the LWS Panel?
Bonjour,
Actuellement, nous ne proposons pas de système supportant les clés SMTP sur nos hébergements. Cela signifie qu'il n'est pas possible d'utiliser une clé SMTP au lieu du mot de passe de votre compte.
Si vous souhaitez renforcer la sécurité de vos connexions SMTP, nous vous recommandons d'utiliser des mots de passe robustes et d'activer la vérification en deux étapes sur votre compte si cette option est disponible.
N'hésitez pas à revenir vers nous si vous avez des questions supplémentaires ou si vous avez besoin d'aide.
Cordialement, L'équipe LWS