Rate this article :
5/5 | 2 opinion
This article was useful to you ?
Yes
No
Vous avez noté 0 étoile(s)
Sommaire
Procédure
WP-Cron is the internal WordPress mechanism that imitates the Linux cron service to run scheduled tasks in the background on WordPress. Among other things, this enables automatic updates, cache warm-ups and WooCommerce maintenance tasks to be carried out. Since plugins have access to this mechanism, they can add tasks to be executed in order to schedule additional actions. You can find out more in our dedicated blog post: What is WordPress CRON?
WP-Cron was originally designed to replace cronjob on web hosting packages that don't allow you to add a script to the Linux cron service. As a result, WP-Cron triggers the execution of tasks thanks to requests made to the wp-cron.php file, during AJAX requests made to wp-admin/admin-ajax.php, and/or when the page is loaded. So the trigger for these HTTP requests is inevitably the visit to the website. As a result, page loading will be encumbered by the execution of WP-Cron tasks and performance may be reduced. Worse still, some plugins add tasks that are far too long on Wp-Cron, to the point of exceeding the possible HTTP waiting times. And most disturbingly, the execution of tasks could be delayed because there are no visitors on the site at the time when the task should have been executed. Some tasks could therefore accumulate, and when a visitor opens the page, dozens or even hundreds of scheduled tasks could be dropped, greatly penalising loading time for this unfortunate visitor.
Triggering WP-Cron with a cron job therefore ensures that tasks scheduled with WP-Cron are executed without affecting visitors: wp-cron.php will then be executed at regular intervals, whether or not there are visitors, and visitors can immediately open the site without waiting for pending tasks to be executed.
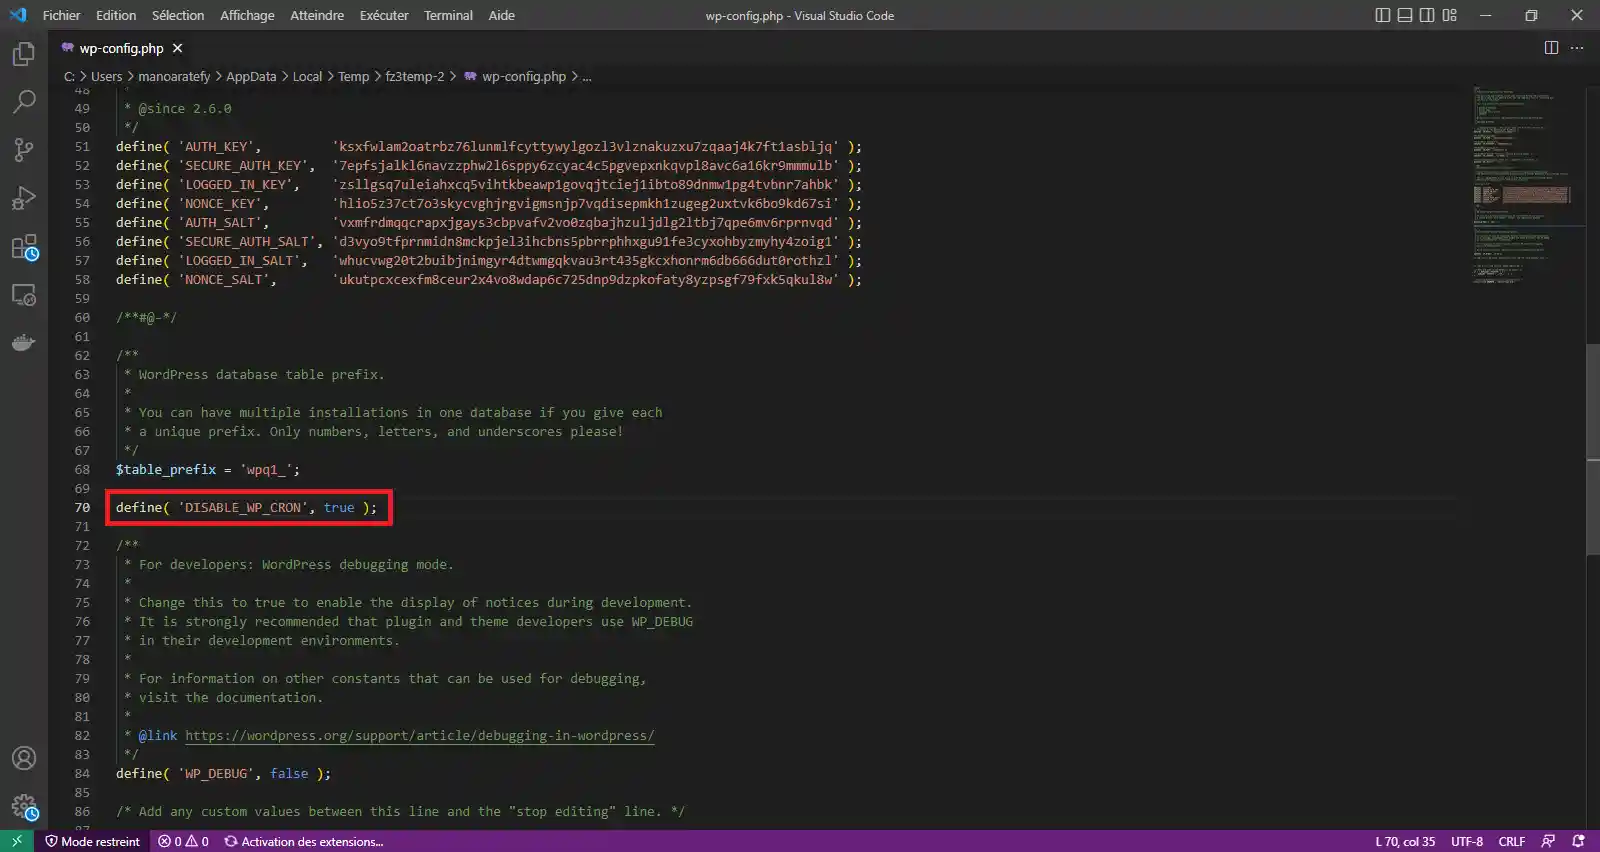
First of all, you need to disable WP-Cron from running when a page is loaded. This is done by adding the following line to your wp-config.php file:
define( 'DISABLE_WP_CRON', true );
To do this, go to your FTP client, connect to your FTP account and edit the wp-config.php file:
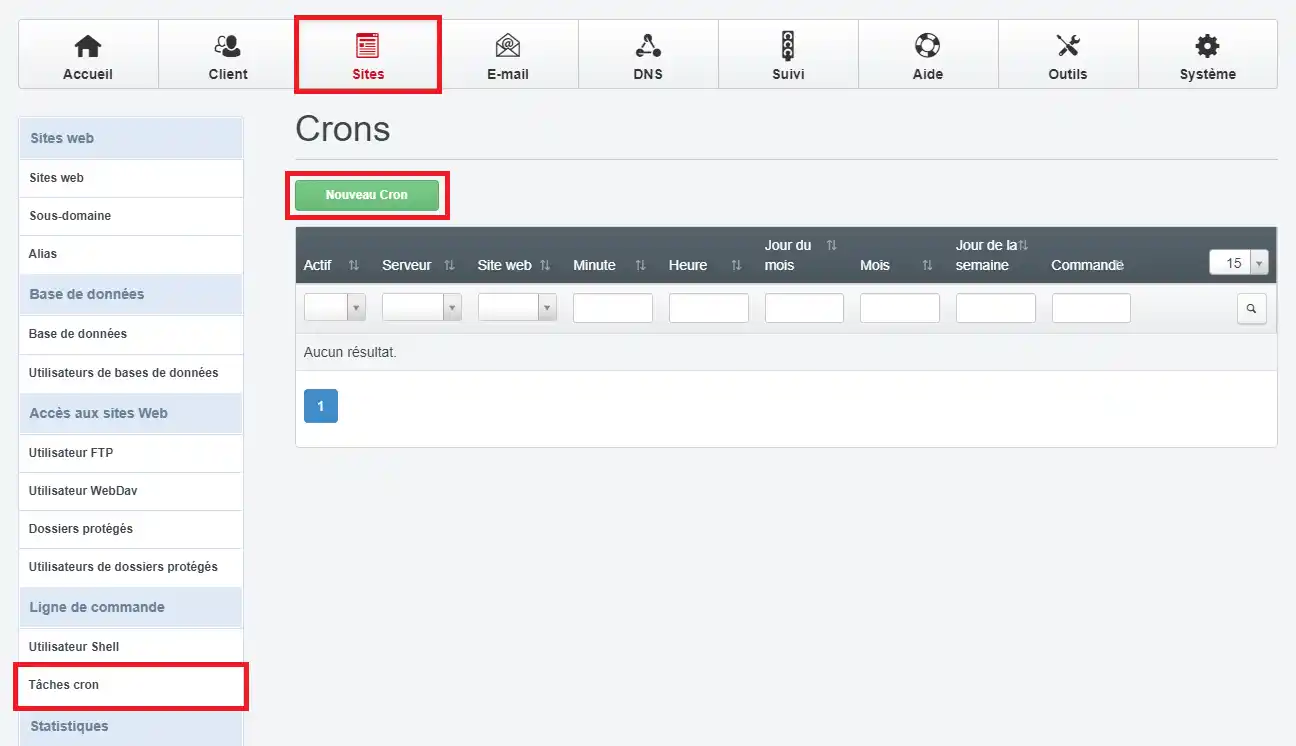
In your ISPConfig control panel, go to Sites > Cron jobs and click on"New cron":
Then enter a cronjob that runs every minute and executes the wp-cron.php file:
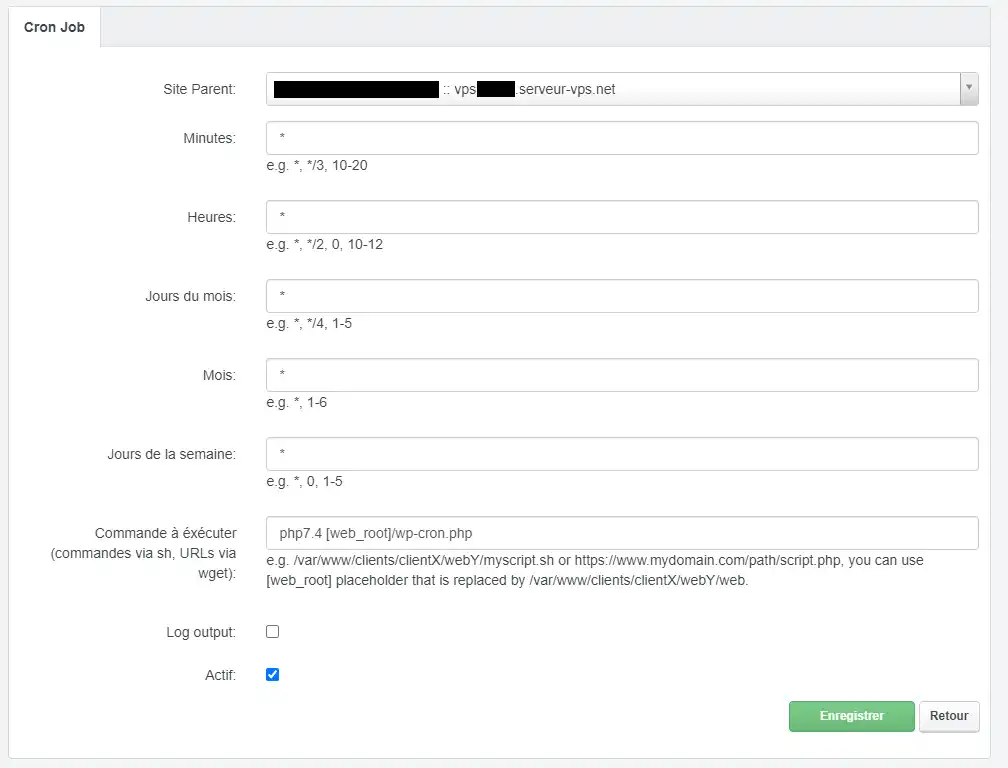
The command to be executed,"php7.4 [web_root]/wp-cron.php" can be adjusted:
The "Log output" checkbox allows you to log the output of wp-cron in the "private" folder of your FTP account. You can check it if you want to have the stdout and stderr output of wp-cron.php, useful for debugging, for example.
You can find out more aboutscheduled cron job tasks on your VPS in the dedicated article.
By default, sites created on ISPConfig are not associated with any customer account:
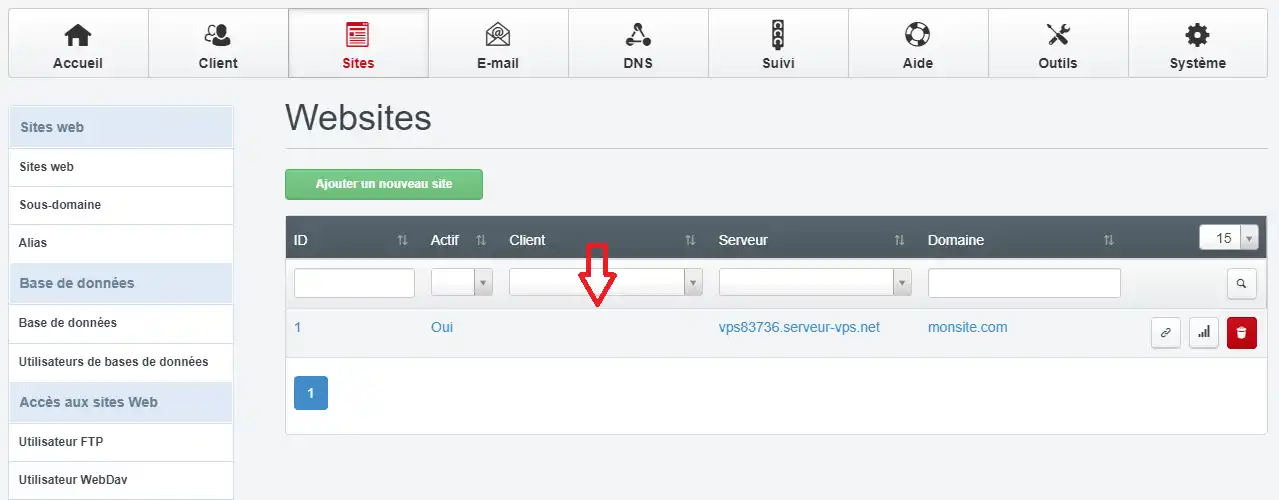
However, if you have voluntarily associated your website with a customer or reseller account created on ISPConfig, then this account may have certain cron limits that could prevent the cron job from working properly. To check these limits, go to the Limits tab of the customer/reseller account:
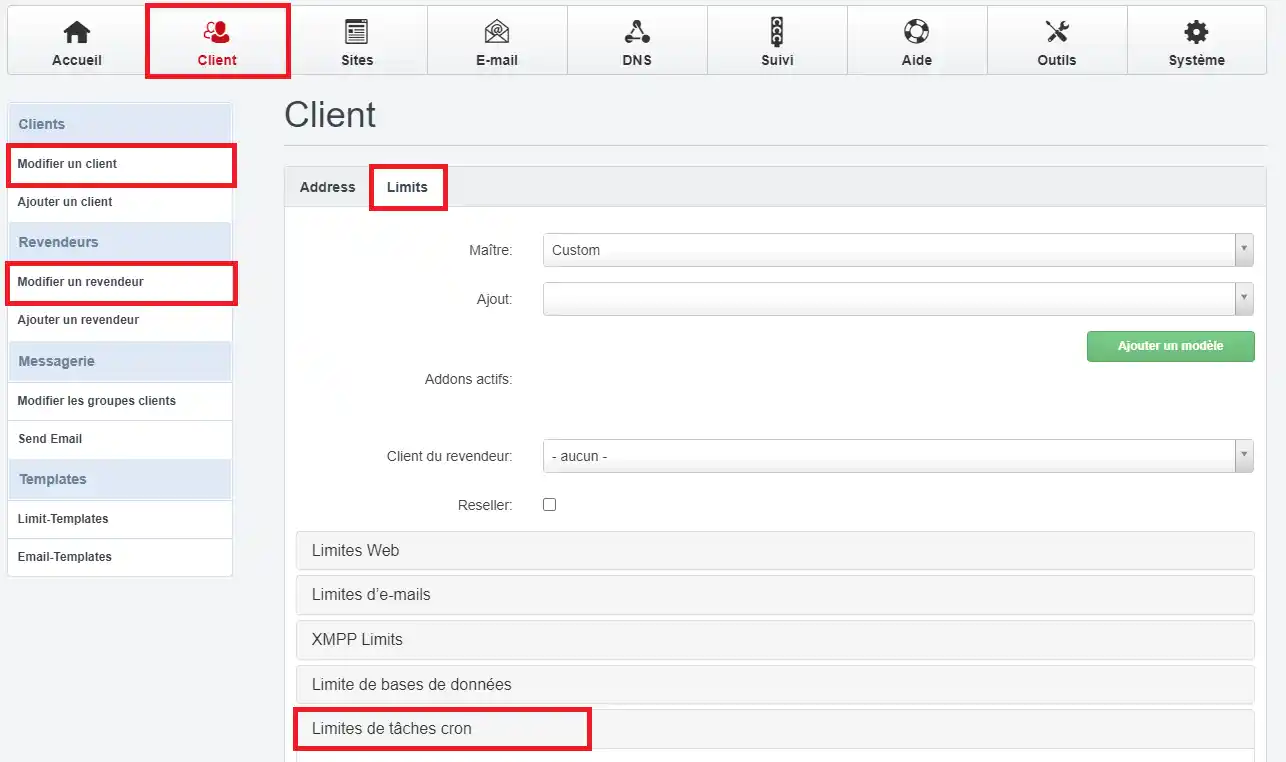
Make sure you have chosen Full cron so that the cronjob doesn't run in a limited jail chroot that doesn't have all the functions needed for the cronjob to work properly:
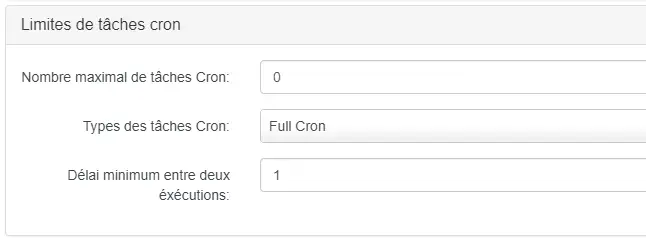
Also make sure you set the minimum time between runs to "1" so that the cronjob can run every minute.
If you have already created cronjobs and/or shell users for the site, it will be necessary to delete all the existing cronjobs and shell users, and then recreate them, so that ISPConfig can switch them from a chroot environment to a full cron environment.
Rate this article :
5/5 | 2 opinion
This article was useful to you ?
Yes
No
0mn reading
How do you disable mod_security on a website on your VPS using the ISPConfig panel?
1mn reading
Bandwidth limits on VPS servers
2mn reading
How to configure two-factor authentication on ISPConfig